13
Troubleshooting
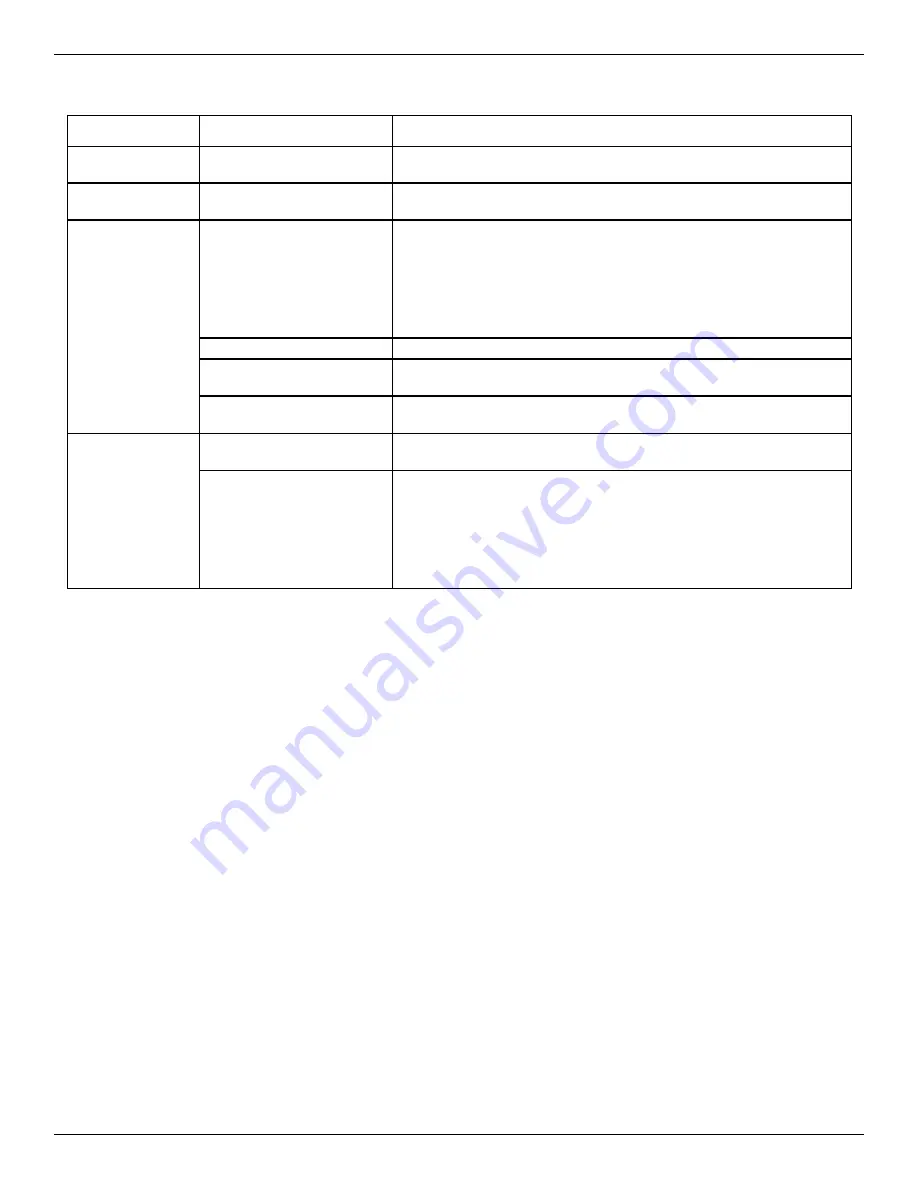
PROBLEM
CAUSE
CORRECTION
Sediment flush
does not initiate
1. Battery is dead.
Replace battery (See “Battery Replacement” on Page 11).
Low or no water
flow through filter
1. Filter is plugged.
Manually clean filter screen (See Page 12). May be necessary to reduce
number of days be tween automatic sediment flushes (See Page 11).
Sediment does
not leave sump
during sediment
flush cycle
1. Valve is plugged.
Manually clean filter screen (See Page 12). After water has been turned
back on, initiate another clean cycle (hold CLEAN NOW button for 2
sec.). Repeat if necessary. If caused by too great a volume of sediment,
may be necessary to reduce number of days be tween automatic sedi-
ment flushes (See Page 11). If this does not clear plugged valve, it may
be necessary to disassemble valve and clean manually (See
“Disassembly of Valve,” below).
2. Drain hose is plugged.
Disconnect drain hose, remove obstruction and reconnect.
3. Insufficient water pressure. Make sure water pressure requirement (30 psi minimum) is met. Shorten
drain line.
4. Misapplication of product.
See application information (“How the Automatic Sediment Filter Works”)
on Page 5.
Continuous leak
to drain
1. Solenoid seat is dirty.
Initiate several clean cycles. If leak continues, then remove valve sole-
noid and clean seat area (See “Disassembly of Solenoid”, below).
2. Valve is plugged or valve
seat is dirty.
Manually clean filter screen (See Page 12). After water has been turned
back on, initiate another clean cycle (hold CLEAN NOW button for 2
sec.). Repeat if necessary. If caused by too great a volume of sediment,
may be necessary to reduce number of days be tween automatic sedi-
ment flushes (See Page 11). If this does not clear plugged valve, it may
be necessary to disassemble valve and clean manually (See “Dis -
assembly of Valve,” below).
DISASSEMBLY OF SOLENOID
(See Exploded View on Page 14)
If the troubleshooting table, above, indicates that the sole-
noid seat requires cleaning, use the following procedure:
1
. Before shutting off the water supply (as directed in Step
2), run a bucketful or sinkful of water to use for cleaning.
2
. Shut off the main house water supply valve upstream from
the Automatic Sediment Filter.
3
. Open a cold water faucet in the house (downstream from
the ASF) to depressurize the system. Close faucet again.
4
. Remove the solenoid (Key No. 6 on Page 14) by unscrew-
ing it from the top of the valve.
5
. Using the water you saved in Step 1, clean the solenoid
seat, plunger and hole.
6
. Make sure the o-ring (Key No. 7) is in place and reinstall
the solenoid, being careful not to cross-thread.
7
. Open a cold water faucet downstream from the ASF.
8
. Turn the main house water supply back on.
9
. Close the faucet that you opened in Step 7 after air has
been expelled from the system.
10
. Check that there is no water leaking from the solenoid
thread area. Tighten solenoid if necessary.
DISASSEMBLY OF VALVE
(See Exploded View on Page 14)
If the troubleshooting table, above, indicates that the valve
requires cleaning, use the following procedure:
1
. Before shutting off the water supply (as directed in Step
2), run a bucketful or sinkful of water to use for cleaning.
2
. Shut off the main house water supply valve upstream from
the Automatic Sediment Filter.
3
. Open a cold water faucet in the house (downstream from
the ASF) to depressurize the system. Close faucet again.
4
. Remove the six screws (Key No. 8 on Page 14) from the
top of the valve and lift off the valve cover (Key No. 9).
5
. Using the water you saved in Step 1, clean the diaphragm
Key No. 12) and seat area of valve body (Key No. 13).
6
. Make sure the two small holes in the valve body under the
diaphragm are not plugged.
7
. Reassemble the valve, making sure the diaphragm is right
side up (small knob at center points up) and the other
components are properly placed, as shown on Page 14.
8
. Open a cold water faucet downstream from the ASF.
9
. Turn the main house water supply back on.
10
. Close the faucet that you opened in Step 8 after air has
been expelled from the system.
11
. Check that there is no water leaking from the valve seal-
ing area. Tighten screws if necessary.
Need help troubleshooting? Call Toll Free 1-800-693-1138
, Monday - Friday, 7 am - 6 pm CST.


