background image

 Description and Operation

www.echostar-int.com

Page 2 - 9

©

 20

04

 Ech

o

S

tar

 In

te

rn

ati

o

nal

 C

o

rp

or

at

io

n

Al

l ri

g

h

ts

 r

e

s

e

rv

e

d

8.

A

DD

/E

DIT


DATA

ADD

/

EDIT


A


TRANSPONDER


OR


CHANNEL

NOTE

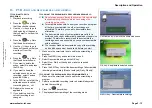
You only need to add a transponder and/or channel if it is not available from the internal 
database. 

I

F


YOU


WANT


TO


ADD


A


TRANSPONDER

:

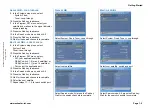
1. Press the MENU key.
2. Select main menu 2.
3. Select Add/Edit data.

4. Press the OK key.
5. Press the 

 key.

6. Press the Green key.

7. Add the new transponder:

a. Enter the Frequency.

b. Enter the Symbol rate.

c. Enter the Polarity.

d. Enter the FEC (If known).

8. Press the MENU key twice.
9. Select main menu 1.
10. Select Program SAT.

11. Make sure, the signal 

indicator shows a reading.

12. Press the Red key.
13. Select the required Search 

mode (TP).

14. Press the OK key.
15. Press the Red key.
16. Wait for the Search channels 

to complete.

I

F


YOU


WANT


TO


EDIT


A


TRANSPONDER

:

1. Press the MENU key.
2. Select main menu 2.
3. Select Add/Edit data.

4. Press the OK key.
5. Press the 

 key.

6. Press the Red key.

7. Select the required 

transponder:
a. Enter the Frequency.

b. Enter the Symbol rate.

c. Enter the Polarity.

d. Enter the FEC (If known).

8. Press the MENU key twice.
9. Select main menu 1.
10. Select Program SAT.

11. Make sure, the signal 

indicator shows a reading.

12. Press the Red key.
13. Select the required Search 

mode (TP).

14. Press the OK key.
15. Press the Red key.
16. Wait for the Search channels 

to complete.

I

F


YOU


WANT


TO


ADD

/

EDIT


A


CHANNEL

:

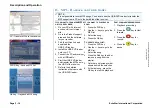
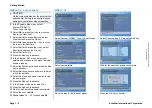
1. Press the MENU key.
2. Select main menu 1.
3. Select Advanced.

4. Press the OK key.
5. Select the required 

transponder:

6. Set the new PIDs 

(Enter also the leading 0):

a. Set the Video PID.

b. Set the Audio PID.

c. Set the PCR PID (If 

known).

7. Press the Red key.
8. Note that the Channel added 

popup shows momentarily.

9. Press the MENU key twice.
10. Select main menu 2.
11. Select Edit channel.

12. Press the Blue key.
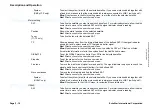
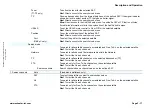
13. Rename the channel.

; select 

character;

-  OK; enter character;
- Red; cancel rename;
- Green; backspace.

14. Press the MENU key.

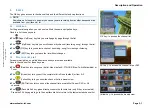
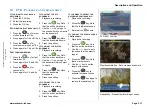
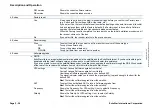
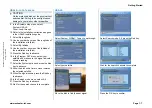
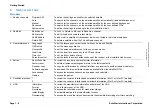
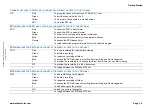
Red - Edit TP; Green - Add TP.

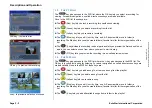
Set the Audio PID and Video PID.

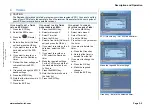
Rename the channel.

Содержание PVR-5020

Страница 1: ...User Guide EchoStar Personal Video Recorder with User Interface ...

Страница 2: ... If your receiver has conditional access capabilities For pay services please only use Common Interface CI modules and the related Smartcard which are approved by the service provider of the encrypted program you want to receive Only this will enable the receiver to work properly Anomalies can occur when an unapproved CI module and or Smartcard is used EchoStar can not and will not accept any resp...

Страница 3: ...ment Disconnect the receiver from the mains before you start any maintenance or installation procedures Do not use alcohol or ammonia based liquids to clean the receiver If required clean with a soft lint free cloth slightly made damp with a mild soap solution Consult an authorized service technician if the receiver does not operate normally when the instructions in this user guide are strictly fo...

Страница 4: ...s of Council Directive 73 23 EEC and 93 68 EEC on the approximation of the laws of the Member States relating to low voltage and electrical safety The receiver is electrically safe within the normal use of the receiver as stated in the safety chapter Warning You have to read the manual for detailed instructions on handling the receiver Dual Tuner for Watching and Recording 4x Record 2x Watch Pictu...

Страница 5: ...CTURE 1 8 DESCRIPTION AND OPERATION 1 LISTS 2 1 2 EPG MENU PROGRAM INFORMATION 2 3 3 TELETEXT 2 4 4 TIMERS 2 5 5 ORGANIZE THE LISTS 2 6 6 CREATE A FAVORITE LIST OR A FOLDER PVR MP3 2 7 7 ADD EDIT DATA ADD A SATELLITE 2 8 8 ADD EDIT DATA ADD EDIT A TRANSPONDER OR CHANNEL 2 9 9 SOFTWARE UPGRADE FACTORY RESET 2 10 10 PVR PLAYBACK AND TRICK MODES 2 11 11 PVR RECORDING TIME SHIFT AND INSTANTREPLAY 2 12...

Страница 6: ...LNB Control DiSEqC 1 0 1 1 Hi Speed USB2 0 Link For USB compliant PC Software Update via Satellite Internet OTA RS 232 MPEG 2 DVB Compliant MP ML PIP Compact size 370 x 290 x 65 mm WxDxH CONDITIONAL ACCESS Common Interface 2 Housing PCMCIA Type 1 and 2 TUNER DEMODULATOR FOR EACH TUNER Receiving Frequency 950 2 150MHz Input Signal Level between 65dB and 25dB Input Impedance 75 Ohm LNB Control 13 18...

Страница 7: ...H to go one channel up CH to go one channel down to move the cursor up or down EPG to view the EPG i to view the InfoBanner to access extended EPG information to access the mosaic view recording Red to go to an option as indicated in the active on screen menu REWIND to go back fast Green to go to an option as indicated in the active on screen menu PLAY to playback a recorded event Yellow to go to ...

Страница 8: ...received Access door to access the different slots for the CI modules and smartcards 3 REAR PANEL CONNECTIONS For the location and availability of the connectors please refer to the rear panel as shown on the packaging If available the connectors on the rear panel are For each tuner LNB1 LNB2 LNB IN F type to connect a dish installation IF OUT F type for a loop through connection to another receiv...

Страница 9: ... down RECORD to start or stop a recording PLAY to continue the playback of a recording STOP to stop the recording or playback of an event REWIND to go back quickly Fast Forward to go forward quickly PAUSE to pause the playback Slow motion to playback a recording in reversed slow motion Slow motion to playback a recording in forward slow motion Continuous to playback a scene or recording continuous...

Страница 10: ...INFOBANNER PVR The InfoBanner has The information bar to show the name of the recording The satellite information bar to show the name of the selected satellite The digital clock to show the time at the moment of recording The progress bar to show the duration The service information bar to show that additional services are available These icons show only if the service is available the icon and s...

Страница 11: ...o replace your dish installation or LNB In this case follow the instructions on how to install a Loop through configuration You can connect the receiver in different ways each with its own advantages and disadvantages You can use the Loop through configuration where you connect a single dish to the first tuner and the output of tuner 1 to the input of tuner 2 Now each tuner has access to the same ...

Страница 12: ...channels and watch another NOTE The amount of channels presented in the channel list can vary depending on the current recording s and installation type PART OF A CHANNEL LIST 1 2 TWIN CONFIGURATION 4 Single dish Twin LNB EXAMPLE Normally you have access to all the channels that you have searched for In our example we make use of channel list as shown Record a program from ARD 11837 H This means t...

Страница 13: ...at one tuner is used for Astra and only the channels that belong to this frequency 11837 H are shown Note that the complete channel list for Hotbird is still present Record another program from Hotbird ZDF 11604 H This means that the other tuner is used for Hotbird and only the channels that belong to this frequency 11604 H are shown Within these frequencies 11837 H 11604 H you can record two more...

Страница 14: ... PLASTIC PACKAGING MAY CLING TO NOSE AND MOUTH AND PREVENT BREATHING 3 INSTALL YOUR RECEIVER 3 1 GUIDED INSTALLATION 1 Switch the receiver to ON and wait for the Languages menu to appear 2 Make the required Language selections 3 Make sure the pre programmed language settings are convenient for you 4 Press the Red key to advance 5 Make the required Local time selections Note that GMT time is transm...

Страница 15: ...op through 10 Press the Red key to advance 11 In the Program SAT menu select SAT your applicable satellite DiSEqC switch 1 0 max 4 satellites or DiSEqC switch 1 1 max 16 satellites Port select the applicable port 12 Press the Red key to advance 13 In the Search mode menu select All 14 Press the Red key to advance 15 Wait for the search channels to complete 16 Select the next satellite 17 Repeat st...

Страница 16: ...e the signal indicator shows a reading 17 Select the System option and press the blue key to advance 18 Select Move continuous and move the dish to find the satellite 19 Select Fine tune and move the dish to find the best signal 20 Press the Red key to advance 21 In the Search mode menu select All 22 Press the Red key to advance 23 Wait for the Search channels to complete 24 Select the next satell...

Страница 17: ...ect your satellite and make sure the signal indicator shows a reading 17 Select the System option and press the blue key to advance 18 Allow the dish some time to move towards the selected satellite 19 When the signal shows press the Red key to advance 20 In the Search mode menu select All 21 Press the Red key to advance 22 Wait for the search channels to complete CAUTION On the motorized dish set...

Страница 18: ...e personal preferences for the on screen menus Local time To set the local time as used by the EPG and timers Timer list To set modify or delete a timer Parental control To set the locks to avoid unauthorized use of the receiver or the installation edit menus 4 Extras About EchoStar To review the receiver and manufacturer information Factory reset To delete all personal settings and return to the ...

Страница 19: ...rieve detailed program information for the selected program PVR MENU USE THE PVR AND COLOR KEYS FOR DIRECT ACCESS TO THE OPTIONS PVR Red To lock a recording for unauthorized viewing Green To delete a recording Yellow To rename a recording or folder Blue To access the PVR edit menu for sorting descrambling and file management i To preview the recording in 16 scenes pictures from where you can start...

Страница 20: ...Getting Started Page 1 10 EchoStar International Corporation 2004 EchoStar International Corporation All rights reserved ...

Страница 21: ... For easier navigation so called direct access keys are made available Once in the channel list these keys are The Red key lets you group the list None default FTA CAS Free To Air Scrambled or Tuner The Green key lets you sort the complete list in None default or from A Z The Yellow key lets you show the channel list in a mosaic view The SAT list key lets you show the channel list per satellite Cu...

Страница 22: ...ite lists for further organization of the list The i key divides the recording in equal parts and lets you preview the first scene of such a part You can select a scene from where you want to start viewing The PIP key lets you preview the recording in a so called preview screen 1 4 THE MP3 LIST The key gives access to the PVR list where the key gives access to the MP3 list The OK key lets you sele...

Страница 23: ...service provider access to the detailed program information of the current selected program The keys once in the Daily EPG menu lets you toggle between the Now and Next program information NOTE Most digital channels broadcast program data as an EPG Digital channels that broadcast EPG offer you program information in advance for a certain period of time The EPG information is not always available S...

Страница 24: ...YOU WANT TO EXIT TELETEXT 1 At any page press the EXIT key SELECT A TELETEXT PAGE 1 Press the numerical keys to choose a page number or 2 Press the key to go to the next previous page or 3 Press one of color keys to go to the indicated page 4 Sub pages 1 2 2 2 are automatically advanced USE THE TELETEXT SUPPORTED SUBTITLES FOR THE HEARING IMPAIRED 1 If the subtitles are transmitted select the appl...

Страница 25: ... in the timer list 11 Press the EXIT key IF YOU WANT TO SET A TIMER WHEN THERE IS NO EPG 1 Press the MENU key 2 Select main menu 3 3 Select Timer list 4 Press the OK key 5 Select a free timer No timer set and press the OK key 6 If you want to record on the hard disk select the PVR timer 7 If you want to record on a VCR select the Reminder timer 8 Make the required settings For the PVR timer note t...

Страница 26: ...he OK key 5 Make the required selection 6 Press the Red key 7 Enter your PIN code 8 Press the OK key 9 Note that the Lock symbol shows IF YOU WANT TO DELETE A CHANNEL 1 Press the MENU key 2 Select main menu 2 3 Select Edit channel 4 Press the OK key 5 Make the required selection 6 Press the Green key 7 Note that the Delete symbol shows behind the selection IF YOU WANT TO MOVE A SELECTION 1 Press t...

Страница 27: ...te list 6 Use the and OK key to make the next selection 7 Press the MENU key 8 Press the EXIT key IF YOU WANT TO RENAME A FAVORITE LIST 1 Select the favorite list 2 Press the Blue key Note that the keyboard shows 3 Rename the selection select character OK enter character Red cancel rename Green backspace 4 Press the EXIT key IF YOU WANT TO CREATE A FOLDER PVR MP3 ONLY 1 Press the PVR key 2 If you ...

Страница 28: ...ess the OK key 5 Press the Green key Note that the keyboard shows 6 Enter the SAT name select character OK enter character Red cancel rename Green backspace 7 Press the MENU key 8 Enter the data of a TP that belongs to the SAT 9 Press the MENU key 2x 10 Select main menu 1 11 Select Program SAT 12 Select System DiSEqC1 2 13 Press the Blue key 14 Move the dish to find the satellite 15 Press the Red ...

Страница 29: ... 3 Select Add Edit data 4 Press the OK key 5 Press the key 6 Press the Red key 7 Select the required transponder a Enter the Frequency b Enter the Symbol rate c Enter the Polarity d Enter the FEC If known 8 Press the MENU key twice 9 Select main menu 1 10 Select Program SAT 11 Make sure the signal indicator shows a reading 12 Press the Red key 13 Select the required Search mode TP 14 Press the OK ...

Страница 30: ...s live video IF YOU WANT TO DO A SOFTWARE UPGRADE BY PC 1 Press the MENU key 2 Select main menu 4 3 Select About EchoStar 4 Press the OK key 5 Look up the current a S W version b Internet site 6 On your PC with Internet access visit our Internet site 7 Go to the Product support area and find the software for your receiver 8 Download the latest software as applicable for your receiver 9 Find the ut...

Страница 31: ...bookmark shows 5 Press the exit key IF YOU WANT TO DELETE A BOOKMARK 1 Playback a recording 2 Press the key Note that the action bar shows 3 Use the keys to go to the bookmark that you want to delete 4 Press the key Note that the bookmark disappears 5 Press the exit key IF YOU WANT TO GO TO A BOOKMARK 1 Playback a recording 2 Press the key Note that the action bar shows 3 Press the exit key IF YOU...

Страница 32: ...standard duration is set to 2 hours 4 Press the exit key IF YOU WANT TO STOP A MANUAL RECORDING 1 When in live video press the stop key note that the record menu shows 2 Select the recording that you want to stop 3 Press the stop key note that the stop indicator appears behind the selection 4 Press the exit key IF YOU WANT TO MAKE A TIMED RECORDING 1 Press the MENU key 2 Select main menu 3 3 Selec...

Страница 33: ...ct Descramble and press the OK key 4 Select Now Daily or Weekly and make the required selections 5 Press the EXIT key to start the descrambling of all scrambled recordings immediately Now or delayed Daily Weekly IF YOU WANT TO DESCRAMBLE A RECORDING IMMEDIATELY 1 Make sure the smartcard is not used for descrambling a program 2 Select a scrambled recording note red scrambled symbol behind the recor...

Страница 34: ...and download the USB PVR loader 4 Install the USB PVR loader onto your PC 5 Connect the PC and receiver with a USB cable 6 Start the USB PVR loader and transfer the MP3s onto the HDD of the receiver 7 Refer to the detailed instructions that came with the USB PVR loader IF YOU WANT TO PLAYBACK A SONG 1 Press the PVR key 2 Use the keys to go to the MP3 list 3 Select the song 4 Press the OK key TO CR...

Страница 35: ... data menu to add edit a SAT or TP that is not listed for detailed information refer to the explanation of the Add Edit data menu LNB Power To switch the LNB power to On for dishes or Off for distribution networks Red Direct access to the search mode menu LNB To define the LNB that you use in your system Red Direct access to the search mode menu Blue Direct access to the Edit LNB menu to add a LNB...

Страница 36: ...ccess to the search mode menu Blue Direct access to the Add Edit data menu to add edit a SAT or TP that is not listed for detailed information refer to the explanation of the Add Edit data menu DiSEqC1 2 To set the DiSEqC motor control to On or Off for the selected satellite Red Direct access to the search mode menu Step size To set the step size for the fine tune commands Red Direct access to the...

Страница 37: ...t DiSEqC only To select the port for the selected satellite Red Direct access to the search mode menu Search mode All To search for all available channels scrambled and Free To Air on the selected satellite Red To start the Search channels Network To search for all channels that are available within the Network Red To start the Search channels TP To search for all available channels on the selecte...

Страница 38: ...dd Edit data menu to add edit a SAT or TP that is not listed for detailed information refer to the explanation of the Add Edit data menu Symbol rate To define the Symbol rate of the transponder Red To start the Search channels Polarity To define the Polarity of the transponder Horizontal Vertical Red To start the Search channels FEC To define the FEC of the transponder if this is not known select ...

Страница 39: ...io PID of the selected channel Red To save the data as entered in the database PCR PID To define the PCR PID of the selected channel if this is not known select Auto Red To save the data as entered in the database 1 Search channels System setup Fixed System To select the system dish that you have installed Tuner Tuner 1 Tuner 2 Loop through Twin To select the tuner configuration that you want to u...

Страница 40: ...dish set the physical East and West limit switches first Failing to do so might cause damage to your motorized dish installation or other properties My longitude Set the longitude for the installation site of the dish you can obtain your longitude from Stab at www usals info My latitude Set the longitude for the installation site of the dish you can obtain your latitude from Stab at www usals info...

Страница 41: ... When the keyboard shows Red To cancel the operation and return to the original name Green To delete the last entered character backspace When in the TP list Red Edit TP Frequency Symbol rate Polarity FEC To edit a transponder To edit the Frequency of the transponder To edit the Symbol rate of the transponder To edit the Polarity of the transponder Horizontal Vertical To edit the FEC of the transp...

Страница 42: ...enu 3 User preferences User profile TV Signal To select the video output for the TV and VCR output SCART Aspect ratio To set the image size for the TV If you have a TV with a 4 3 screen size and the transmission is in 16 9 format you can select either 4 3 4 3 Letterbox or 16 9 4 3 shows the full screen completely where some of the image sides is cut off 16 9 will show the full image with black top...

Страница 43: ... timer Duration To set the length for the timer 3 User preferences Parental control Installation lock To lock the Installation related menus for unauthorized users Note that the Installation lock comes on automatically after you have set a channel lock Edit lock To lock the Edit related menus for unauthorized users Note that the Edit lock comes on automatically after you have set a channel lock Re...

Страница 44: ...al data only To copy all data from one receiver to another 4 Extras Software upgrade NOTE EchoStar offers on a regular basis software updates via the satellite and the EchoStar Internet If you have trouble to get a download with the latest software version please ask your retail seller or dealer for assistance If you are not able to receive the satellite transponder you always can upgrade the soft...

Страница 45: ... receiver starts to download the new S W version in temporary memory When the download is complete the new S W version is written to the receiver memory where it deletes the previous version This process can take up to approximately 30 minutes The Software upgrade is completed when the TV shows live video 4 Extras Accessories Calendar Shows the built in Calendar Red To select the previous month Gr...

Страница 46: ...HDD Used Shows the amount of space capacity that you have already used Free Shows the amount of space capacity that you can use Total Shows the total capacity of the HDD 6 HDD Format Yes If you select Yes the receiver deletes all content that is present on the HDD and restores the condition as came out of the box No If you select No the receiver returns to the previous menu 6 HDD Recording Recordi...

Страница 47: ...option to Off 6 HDD Descrambling NOTE This receiver lets you record either descrambled or scrambled recordings Once the smartcard is used for descrambling one program the other programs will be recorded scrambled Before you start to descramble the recordings you have to make sure that the smartcard is not used for descrambling another recording or live video Descrambling Manual Now Daily Weekly To...

Страница 48: ...Description and Operation Page 2 28 EchoStar International Corporation 2004 EchoStar International Corporation All rights reserved ...
Страница 49: ... not aim sufficiently at the receiver Aim at the receiver display Install a RCU extender Batteries are almost empty Insert new batteries 3 LIST RELATED Problem Possible cause What to do 1 The list is empty You have selected an empty list Press the OK key Press the FAV key You are recording a program When recording the channel list is limited Stop the recording or wait for the recording to complete...

Страница 50: ...ings are not correct Read the solutions in to solve an EPG related problem 2 I cannot find the programmed timers Press the EPG key Press the record key Select applicable timer 6 TV AND RADIO RELATED 3 My VCR did not record the program You did not set the VCR itself Set your VCR itself also The Reminder timer does not start your VCR it only switches on the receiver so that you can record the progra...

Страница 51: ...Digital amplifier Press the MENU key Select main menu 3 Select User profile Set the Dolby Digital option to Off Problem Possible cause What to do 7 INSTALLATION RELATED Problem Possible cause What to do 1 During initial setup of the receiver no channels are found You did not select the correct LNB F Universal LNB 05150 C band 09750 FSS 10000 FSS 10050 10060 DBS 10750 DBS 11200 AUSAT 11475 Telecom ...

Страница 52: ...scrambling keys are regularly updated by the service provider Problem Possible cause What to do 9 MOTORIZED INSTALLATION RELATED Problem Possible cause What to do 1 I cannot select a specific satellite The required satellite is located outside the selected East or West limit If physically possible mind dish damage revise the limit setting Select another satellite 2 The motor reacts unpredictable w...

Страница 53: ... a recording Smartcard related problems Read the solutions in to solve a smartcard related problem 4 My recording stops after two hours You did not specify the stop time The factory default is set to two hours During manual recording press the record key Set the stop time 5 How can I get the recordings onto my PC Visit the EchoStar internet site and download the USB PVR Loader 11 MP3 RELATED 12 SP...

Страница 54: ...Troubleshooting Page 3 6 EchoStar International Corporation 2004 EchoStar International Corporation All rights reserved ...
Страница 55: ...are used for these modules These modules are PCMCIA cards with a slot in which you can insert a smartcard Common Interface A DVB standard which defines the software and hardware requirements for condition access systems Conditional access A system which is used by service providers to control the subscriber s access to certain services programs and events like Pay TV CVBS Composite video is a comb...

Страница 56: ...ing Loop though Loop through means that you connect a signal output LNB VCR UHF Antenna of the first unit to the signal input LNB DVD analog TV of the other without any processing NVOD Near Video On Demand Multi channel system broadcasting many copies of a film with staggered start times so a complete film is always available to a viewer with a short waiting period Network With respect to the rece...

Страница 57: ...e complete screen is filled without distortion or loss of video If you view 4 3 programs you will have black banners left and right of the picture 3 SEARCH MODES All The built in database is used to select the available transponders The digital channels that belong to these transponders are searched for and added to the end of the channel list Network The built in database or information from the ...

Страница 58: ...Glossary Page 4 4 EchoStar International Corporation 2004 EchoStar International Corporation All rights reserved ...
Страница 59: ...3 2 delete channel fav 2 7 descramble descrambling menu 2 27 manually 2 13 recording 2 13 use timer 2 13 diseqc committed switch 4 1 diseqc 1 0 4 1 diseqc 1 1 4 1 explanation 4 1 uncommitted switch 4 1 disposal IV dolby digital 2 22 E edit channel 2 9 favorite 2 7 pid 2 9 satellite 2 8 transponder 2 8 2 9 epg access 2 3 color keys 1 9 troubleshooting 3 2 F factory reset 2 10 favorite list add chan...

Страница 60: ... 21 move channel 2 6 mp3 create playlist 2 14 fast forward 2 14 list 2 2 playback 2 14 record 2 14 rewind 2 14 tranfer 2 14 O ota astra1 2 10 P parental control explanation 4 2 pid edit 2 9 pip keys 3 list 3 pvr color keys 1 9 list 2 2 set timer 2 3 2 5 2 12 start playback 2 11 start recording 2 3 R recording bookmarks 2 11 descramble 2 13 edit 2 13 fast forward 2 11 playback 2 11 remove scene 2 1...

Страница 61: ...2 teletext supported 2 4 summertime 3 2 symbols infobanner 4 T teletext access 2 4 latest news flash 2 4 subtitles 2 4 tetris 2 25 the contents of the box 1 4 time shift 2 12 3 5 timer change 2 5 delete 2 5 look up 2 5 set 2 5 sleep 2 3 vcr 2 3 2 5 transponder add 2 8 edit 2 8 U uhf troubleshooting 3 3 V vcr timer 2 3 2 5 ventilation III ...

Страница 62: ...Index Page 5 4 EchoStar International Corporation 2004 EchoStar International Corporation All rights reserved ...
Страница 63: ...Notes www echostar int com 2004 EchoStar International Corporation All rights reserved ...

Страница 64: ...Notes EchoStar International Corporation 2004 EchoStar International Corporation All rights reserved ...

Отзывы: