


6
TC-1 Timeclock User Guide
www.eaton.com/lightingsystems
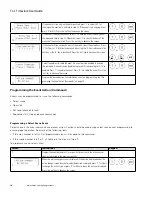
2.
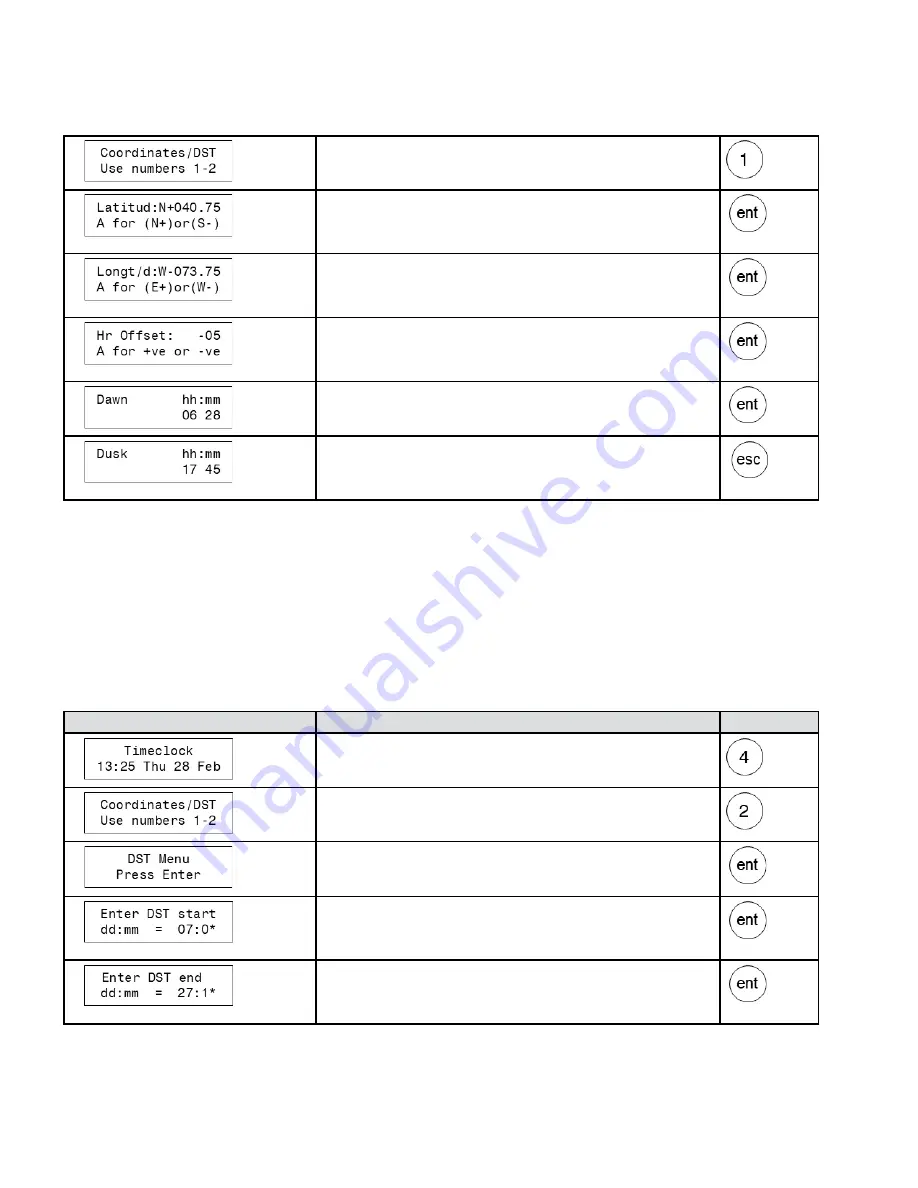
In the coordinates/DST screen, press ‘1’.
3.
Review the latitude displayed. If the coordinate is not correct, use the number
keys to correct the entry. Press the ‘A’ key to change between North and South.
Press the ‘ent’ key to advance the screen.
4.
Review the longitude displayed. If the coordinate is not correct, use the number
keys to correct the entry. Press the ‘A’ key to change between East and West.
Press the ‘ent’ key to advance the screen.
5.
Review the offset from Greenwich Mean Time (GMT). If the offset is not correct,
use the number keys to correct the entry. Press the ‘A’ key to change between
plus (+) and minus (-). Press the ‘ent’ key to advance the screen.
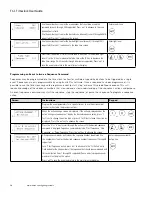
6.
Review today’s calculated dawn time for the entered coordinates. Press the ‘ent’
key to advance the screen.
7.
Review today’s calculated dusk time for the entered coordinates. The screen will
exit automatically after displaying the dusk time, or press the ‘esc’ key to exit
manually.
Daylight Savings Time Review
Some daylight savings time (DST) settings are only available from the iLumin Plus software. If the software has been used
previously to program the TC1, the TC1 online display may not be able to display or allow changes to the DST settings.
If the DST has been set for manual adjustment from the iLumin Plus software, the dates may be reviewed and changed
through the onboard TC1 display.
Dates that are manually entered will require annual adjustment as the DST dates vary
each year.
If manually entering DST dates, the date is entered in Day:Month format (DD:MM). For example, March 10th would be
entered as 10:03.
Screen
Instructions
Keypad
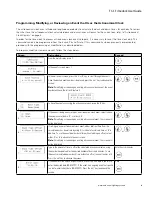
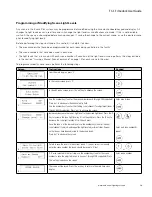
1.
From the main display, press ‘4’.
2.
In the coordinates/DST screen, press ‘2’.
3.
In the DST menu screen, press the ‘ent’ key.
4.
Review the DST start date displayed.
*
If DST has been set to manual mode via
software, enter the date that DST starts for the current year. Press the ‘ent’ key
to advance the screen.
5.
Review the DST end date displayed.
*
If DST has been set to ‘manual’ mode via
software, enter the date that DST ends for the current year. Press the ‘ent’ key
to advance the screen.
*Date displayed may not be correct if DST has been programmed using iLumin Plus software.


