Chapter 4 – Setting up an array
- 4-5 -
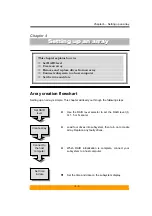
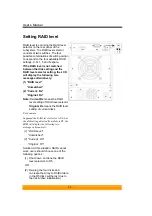
Creating an array
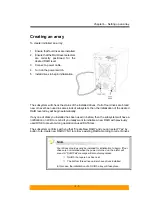
To create (initialize) an array:
1. Ensure that four drives are installed.
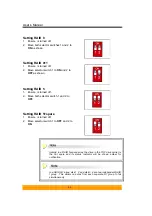
2. Ensure that the RAID level selectors
are correctly positioned for the
desired RAID level.
3. Connect a power cable.
4. Turn on the power switch.
5. Install drives to begin initialization
The subsystem will check the status of the installed drives. If all of four drives are brand
new or never been used in same kinds of subsystem, then the initialization of the desired
RAID level array will begin automatically.
If any one of disks you installed has been used in before, then the subsystem will have a
notification on LCD to remind if you really want to initialize a new RAID with previously
used DISK to prevent wrong operation caused DATA loss.
The subsystem confirms with you that “Create New RAID” and you can select “Yes” by
button to re-create new RAID or “No” to retrieve existing RAID according to current drives
Four drives should usually be installed for initialization to begin. If four
drives are not installed when the power is turned on, the alarm will
sound. A “RAID Fail” message will also display unless:
Ö
RAID 5+hot spare has been set
Ö
The bottom three drive carriers have drives installed.
In this case, the initialization of a RAID 5 array will take place.
Содержание S4-ESTT
Страница 1: ...easyRAID S4 ESTT eSATA 1 5Gb to Serial ATA Disk Array System User Manual Version 1 0 ...
Страница 2: ......
Страница 3: ...S4 ESTT eSATA 1 5Gb to serial ATA Disk Array System User Manual ...
Страница 4: ......
Страница 9: ...Preface 3 UL Listed This equipment meets UL s safety requirements ...
Страница 20: ......
Страница 30: ......
Страница 46: ......
Страница 53: ...Chapter 5 Partitioning the array 5 7 ...
Страница 55: ...Chapter 5 Partitioning the array 5 9 8 Your drive should now appear in your Computer and ready for use ...
Страница 56: ......

