background image


9.


Loose the backing paper along the length of the laminate and pulling up only from the middle stick this to the 
waste mandrel using tape. Once secured in the middle stick the left and right sides of the backing to the mandrel 
wherever they fall [Do not pull the backing].  


10.


Place the media flat onto the feed table and feed over [overlap] the backing paper towards the nip of the rollers. 
Place both hands on the media and push corner to corner to ensure it is flat with no creases, press the foot pedal 
while pushing towards the nip of the roller and this will start to feed your media. Once secured select the 
settings if required [Auto/Speed].  


Please note:  

• 

when laminating individual media, you will require a header and a footer to ensure your work goes in and all 
the way out of the machine.  

• 

Once laminating is finished, cut of your work using the exit plate as a straight cut and using the Roller 
UP/Down switch raise the roller into the upper position. Leaving the roller down for long periods can cause 
damage to the rollers.  


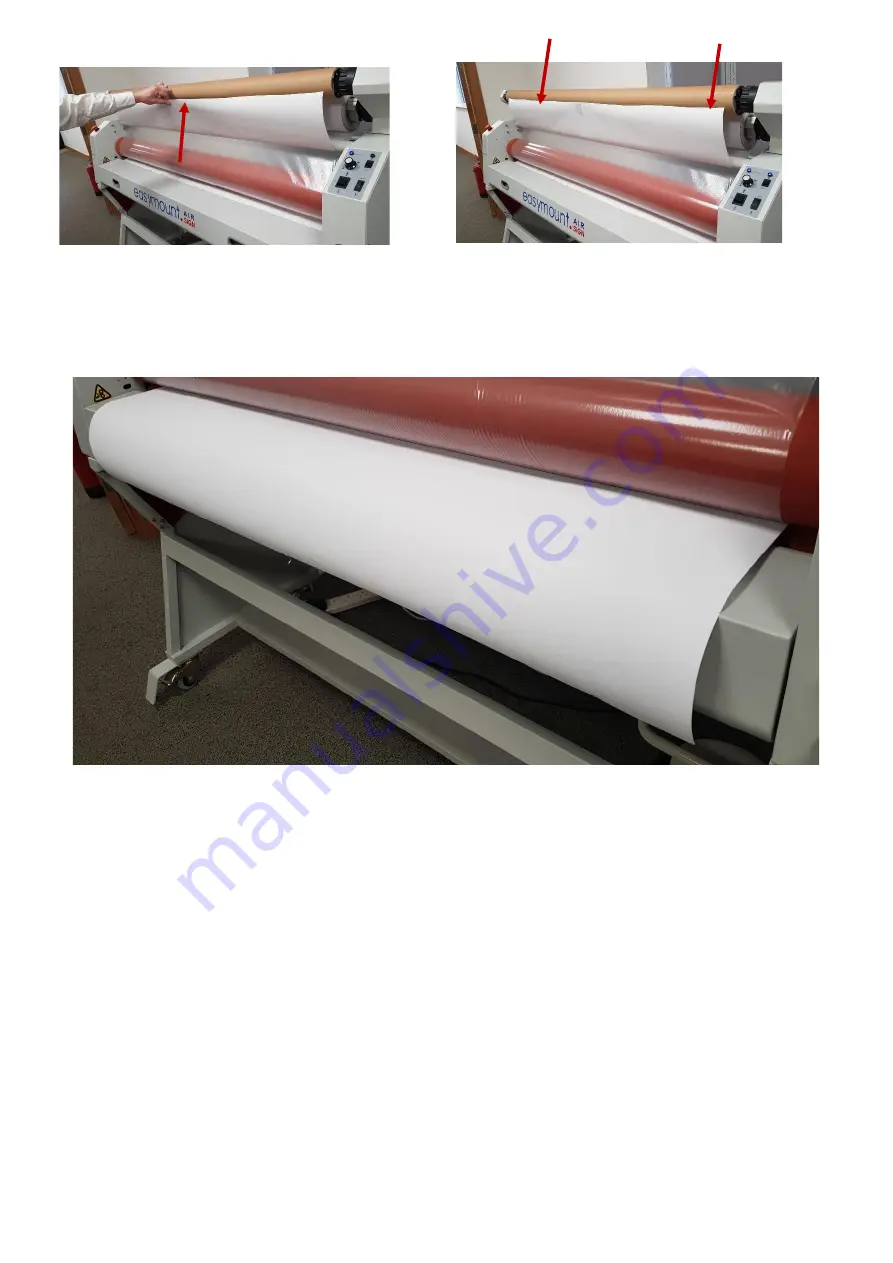
10. Loosen the waste backing paper along the length of the laminate, pull up the waste backing paper only from 
the middle and stick onto the waste mandrel using tape. Once secured in the middle, stick the left and right sides 
of the waste backing to the mandrel wherever they fall [Do not pull the backing as this can cause creasing]. 

11. Place the media [always the same size or bigger than the laminate] onto the feed table overlapping the waste 
material towards the nip of the rollers. Place both hands in the centre of the media and push towards the corners 
[this will ensure the media is flat when feeding and no creases will occur], press the foot pedal and at the same 
time push towards the roller until the machine starts to pull it through.   

If it’s a small piece of media you can continue with the foot pedal, for slightly larger media you can set the swit

ch 

to Auto. 

Please note: 


When printing your media the laminator will require a header and footer, this is for the overlap at the 
feed and to be cut at the rear of the machine once laminated. 


Once laminating is finished cut away the finished material and higher the laminating roller [Leaving the 
roller down for prolonged periods can cause a flat spot on the rollers]. 

Содержание EM-S880

Страница 1: ...0 EM S1400C EM S1600C EM S1400H EM S1600H EM S880...

Страница 2: ...vironmental requirements Page 4 Control panel and specifications Page 5 to 8 Installation of laminating films Page 9 to 10 Loading of media rolls Page 11 to 13 Trouble shooting guide Page 14 Laminatin...

Страница 3: ...and adhesive films quickly and easily Ideal for laminating single banners reel to reel laminates Excludes EM S880 posters graphics signs pop up displays and many more Please read these instructions c...

Страница 4: ...injuries could occur Please don t put burrs sharp blades or over thick rigid materials between the roller for example tools rulers and knives etc Don t cut adhesive films directly on the surface of th...

Страница 5: ...220V 240V 50Hz 60Hz Rate Input Power 25W 38W 38W Dimensions 1200 x 630 x 1295 1846 x 630 x 1365mm 2046 x 630 x 1365mm Gross Machine Weight 75kg 136Kg 156Kg EM S1400H EM S1600H Max Laminating Width 142...

Страница 6: ...mandrel brackets 2 Lock the mandrels in place by turning the black locking collars anti clockwise Connect the foot pedal to the power socket as shown in the above picture 3 Remove the film mandrel and...

Страница 7: ...kwise 5 Move towards the rear of the system and pull the laminate tight from the middle towards you while holding lower the laminating roller by turning the handle clockwise When the two rollers meet...

Страница 8: ...isable to start we advise you switch to off to During avoid accidental movement of operation this can be pressed to the rollers Auto mode and the machine will run continually until the magic eye is in...

Страница 9: ...lers 10 Loosen the waste backing paper along the length of the laminate pull up the waste backing paper only from the middle and stick onto the waste mandrel using tape Once secured in the middle stic...

Страница 10: ...the Roller Up Down Switch and pull down the feed table Feed the media from the mandrel directly to the bottom laminating roller and through the rollers as shown above Please ensure you have not threa...

Страница 11: ...o the mandrel wherever they fall Do not pull the media Roll to Roll Finished 4 Pull both the laminating film and media tightly together in the centre at the back of the system Lower the laminating rol...

Страница 12: ...ckwise Please note you can only have a pressure reading on the gauge when the roller is in the down position Incorrect roller pressure Higher the laminating roller pull the material from the middle at...

Страница 13: ...on the waste backing paper can cause the waste to be pulled through the laminator see below image The above picture shows either not enough tension to the laminate or too much tension to the waste bac...

Страница 14: ...r and check to ensure it is tight against the laminating roller The picture to the left shows the laminate is not tight to the roller on one side Raise the laminating roller pull the laminate from the...

Страница 15: ...ey are costly to repair Always ensure you look after the rollers and clean them regularly to avoid a build up of glue see advice below Never hold a sharp object such as a knife close to the rollers in...

Страница 16: ...eeds or other operator related errors which would be chargeable Your Easymount Sign Laminator rollers are covered against manufacturing defects It does not cover against any damages caused by misuse i...

Отзывы: