


44
Form E-551
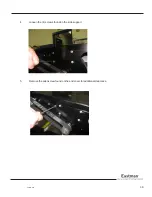
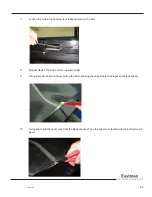
11.
Remove the belt from conveyor.
12.
Clean the wear surfaces found under the belt with a clean dry cotton rag.
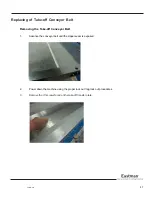
Replacing of Take-off Conveyor Belt
1.
Install the new belt back on the conveyor surface in the same way as it was removed. Ensure that the belt
is underneath the lip of the side frame except for 10" on either side of the belt seam on both the operator
side and non-operator side.
2.
Align the zipper fingers so that the belt edge is straight.
3.
Thread the seam wire through the over lapped zippers fingers.
4.
Trim the excess seam wire to flush with edge of belt on both the operator side and non-operator side.
5.
Tuck the belt under side frame so that no edge of belt is exposed.
6.
Tighten the tension jack screw on both the operator side and non-operator side of the conveyor frame so
that the belt is tight enough to drive and not rub on the blower frame below.
Note: if the belt is tensioned too much conveyor fault(s) may occur.
7.
Tighten the (2) screws found on the side frame.
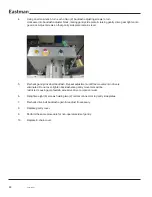
8.
Re-Install the (4) screws on the tension assembly cover plate which is located at the front on the
operator side.
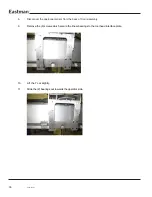
9.
Re-install the transfer plate and secure it with the same (7) screws on the take-off transfer plate.
10.
Power up the machine and confirm if there is sufficient tension available to drive the belt else adjust the
tension as required
Содержание MPC 5000
Страница 25: ...25 FormE 551 8 Remove the screws found on the non operator side of Y pulley plate 9 Remove the pulley plate ...
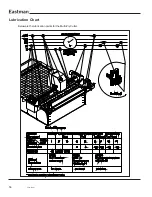
Страница 56: ...56 FormE 551 Lubrication Chart Below are the lubrication points for the Multi Ply Cutter ...
Страница 65: ...65 FormE 551 Additional Comments Maintenance Signature Date ...


