FRONT SUSPENSION AND STEERING
Read all of Section B and this section before attempting any procedure. Pay particular attention to all Notes, Cautions and Warnings
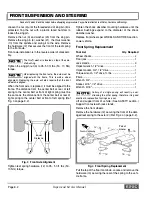
Rack Ball Joint Installation
Clean threads. Apply primer (LOCTITE LOCQUIC
PRIMER T, #7471) and thread locking adhesive (LOC
TITE RED #271) to rack ball end before attachment to
steering rack. The ball joint (21) and jam nut (36) should
be threaded into the rack until the dimension between
the end of the rack and the center of the ball joint stud is
14 27/32" (37.7 cm). Tighten the jam nut (36) to 25 - 30 ft.
lbs. (34 - 41 Nm) torque (Ref Fig. 9 on page E-7).
See Rack Replacement above for installation of rack into
steering housing.
,�------ 14 27/32" - - - - -
-I
(37.7 cm)
25 - 30 ft. lbs
(34 - 41 Nm)
Fig. 9 Rack Ball Joint Installation
Steering Pinion and Bearing Replacement
Tool List
Qty. Required
Retaining ring pliers .................................................... 1
To remove the steering pinion bearing, refer to Steering
Shaft Replacement above. Once the steering shaft is
removed, remove the pinion retainer (37) from the steer
ing housing and pull the pinion (38) and bearing (39) as
an assembly from the housing (Ref Fig. 8 on page E-5).
The steering pinion bearing (39) can be removed from
the pinion gear (38) by removing the external snap ring
(40) and pressing the bearing from the pinion shaft.
The steering pinion gear bushing (41) is designed to last
the life of the vehicle. If in the unlikely event that it should
require replacement, a competent machine shop must
remove the bushing without damage to the bore. A new
pinion bushing can then be inserted. The rack and steer
ing pinion must be replaced as a set.
MAINTENANCE
Good routine maintenance of the front suspension and
steering consists of routine lubrication (See Lubrication
Chart and the Periodic Service Schedule in Section 'A').
Be sure to use only the recommended lubricants. Main
tain the correct adjustment of the front bearings and
repack them in accordance with the periodic service
schedule or if a bearing replacement is required. Routine
examination of the tires will provide indications that an
alignment is required.
Lubrication
Tool List
Qty. Required
Grease gun .................................................................. 1
Grease the rack tensioner (26) at fitting (29), the idler
bushing (15) at (42), rack ball joint (21) at (43) (Ref Fig. 8
on page E-5), tie rod ends (17) and king pin bushings
(22) (Ref Fig. 2 on page E-1) per Periodic Service
Schedule.
CAUTION
Do not use more than three (3) pumps
of grease in each grease fitting at any
one time. Excess grease may cause grease seals to fail or
grease migration into areas that could damage components.
Wheel Bearing Inspection/ Packing
Tool List
Qty. Required
Floor jack ..................................................................... 1
Jack stands ................................................................. 2
Wheel chocks .............................................................. 4
Bearing packer ............................................................ 1
Grease gun ................................................................. 1
Wrench, 1 1 /2" ............................................................. 1
Needle nose pliers ....................................................... 1
Non-ferrous punch ....................................................... 1
Ball peen hammer ....................................................... 1
Ratchet, 1 /2" drive ....................................................... 1
Socket, 3/4", 1 /2" drive ................................................ 1
Extension, 6", 1/2" drive .............................................. 1
Lift the front of the vehicle and support on jack stands as
per Section 'B'. Rotate the front wheel and feel for any
roughness. Grasp the outside of the tire and rock it. If
any movement is detected the wheel bearing may
require replacement/adjustment. If the wheel bearing is
satisfactory, a worn king pin/bearing is indicated. See
'King Pin Bushing Replacement'.
Remove the wheel.
Repair and Service Manual
Page E-7
Содержание FLEET 1999
Страница 6: ...TABLE OF CONTENTS Notes __________________________ _ Page iv Repair and Service Manual...
Страница 10: ...SAFETY INFORMATION Notes _________________________ _ Page viii Repair and Service Manual...
Страница 26: ...SAFETY Notes _ _ ___________________________ _ Page B ii Repair and Service Manual...
Страница 48: ...BODY Notes _ _ ___________________________ _ Page C ii Repair and Service Manual...
Страница 56: ...WHEELS AND TIRES Notes __________________________ _ Page D ii Repair and Service Manual...
Страница 60: ...FRONT SUSPENSION AND STEERING Notes ________________________ _ Page E ii Repair and Service Manual...
Страница 72: ...SPEED CONTROL Notes _ _ ________________________ _ Page F ii Repair and Service Manual...
Страница 80: ...ENGINE Notes _ _ __________________________ _ Page G ii Repair and Service Manual...
Страница 94: ...FUEL SYSTEM Notes _ _ _________________________ _ Page H ii Repair and Service Manual...
Страница 104: ...CONTINUOUSLY VARIABLE TRANSMISSION CVT Notes _______________________ _ Page J ii Repair and Service Manual...
Страница 110: ...ELECTRICAL Notes _ _ _________________________ _ Page K ii Repair and Service Manual...
Страница 120: ...ACCESSORY WIRING Notes __________________________ _ Page L ii Repair and Service Manual...
Страница 148: ...REAR SUSPENSION Notes __________________________ _ Page N ii Repair and Service Manual...
Страница 154: ...REAR AXLE Notes _ _ ___________________________ _ Page P ii Repair and Service Manual...
Страница 158: ...PAINT Notes _ _ ___________________________ _ Page Q ii Repair and Service Manual...
Страница 162: ...TROUBLESHOOTING Notes _ _ ________________________ _ Page R ii Repair and Service Manual...
Страница 170: ...LIMITED WARRANTY Notes __________________________ _ Page S ii Repair and Service Manual...
Страница 176: ...LIMITED WARRANTY Notes __________________________ _ Page S 6 Repair and Service Manual...
Страница 178: ...GENERAL SPECIFICATIONS Notes _________________________ _ Page T ii Repair and Service Manual...


