background image


DVDO-C2-1 PTZ Video Conference Camera


User Manual


DVDO


Network Function 

6.1  System Requirements 

Operating System: Windows 2000/2003/XP/ 
vista/7/8/10 
Network Protocol: TCP/IP 
Client PC: P4  /  128M RAM  /  40G HDD  / 
scaling graphics card with DirectX 8.0+. 

6.2  Equipment Installation 

1)  Connect USB camera to the internet or to 

your PC directly via ethernet cable. 

2)  Turn on DC 12V power. 
3)  If the network connection is normal, the 

green connection light at the network 
interface will light up within 5 seconds, and 
the orange data indicator will flash, 
indicating that the physical connection of 
the camera has been completed. 

6.3  Internet Connection 

There are two main ways to connect USB 
camera to the internet. 


Connect by Network Cable 


Connect by Switch / Router 

6.4  Camera Controlled by LAN 

6.4.1 Setup IP Address 

Determine camera IP address as follows: 

Method 1: Press * and # and 4 on remote 
controller one by one, the camera IP address 
will be shown on screen. 
Method 2: Connect camera to PC with network 
cable, use “upgrade_En.exe” to search for IP 
address. 


To change IP address, two methods as below: 
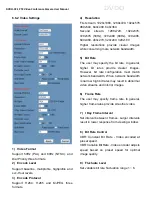
Method 1: Log in to the web interface, select 
“Network > Lan Settings”, change IP address, 
subnet mask and gateway. Click “Apply” and 
restart the camera. 


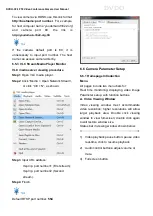
Method 2: Open “upgrade_En.exe”, change IP 
and click “Set”. USB camera will restart. 

Содержание C2-1

Страница 1: ...Version V1 0 1 DVDO C2 1 PTZ Video Conference Camera User Manual...

Страница 2: ...3 4 5 Remote Control 4 4 6 RS 232 Interface 5 4 7 Serial Communication Control 6 5 GUI Settings 7 5 1 MENU 7 5 2 EXPOSURE 7 5 3 COLOR 7 5 4 IMAGE 8 5 5 P T Z 8 5 6 NOISE REDUCTION 8 5 7 AUDIO 8 5 8 SE...

Страница 3: ...11 6 5 2 Dynamic DNS View Camera 11 6 5 3 VLC Stream Media Player Monitor 12 6 6 Camera Parameter Setup 12 6 6 1 Homepage Introduction 12 6 6 2 Video Settings 14 6 6 3 Image Settings 15 6 6 4 Audio S...

Страница 4: ......

Страница 5: ...it Mechanical damage may be caused by touching camera lens by hand Do not use in corrosive liquid gas or solid environments to avoid plastic cover damage Make sure there are no obstacles within rotat...

Страница 6: ...ly through the RS232 serial port H 264 Slice SVC Encoding Supports Slice SVC encoding mode for video conferencing and advanced USB applications Dual Stream The first stream can provide YUY2 MJPEG or H...

Страница 7: ...x to 1080p 30fps USB Audio Support USB Video Communication Protocol UVC 1 5 UVC PTZ Supported Input Output Interface Network Interface 1 x RJ45 10 100M Adaptive Ethernet Ports USB Interface 1 x USB 3...

Страница 8: ...dby mode Press it again to enter normal mode Note Power consumption in standby mode is approximately half of normal mode 2 Number Key To set preset or recall preset 3 Key Used with other buttons 4 Pre...

Страница 9: ...Address 3 F4 Address 4 13 Reset Key Used to erase a preset position RESET Numeric button 0 9 Or RESET to erase all presets 14 PTZ Control Key Press arrow buttons to pan and tilt Press HOME button to...

Страница 10: ...Position 1 bit Data bits 8 bits Stop bits 1 bit Parity None After powering on the camera goes to the upper right limit and then back to the middle position The zoom lens is pulled to the farthest pos...

Страница 11: ...Comp Exposure compensation range from 7 7 With ExpCompMode On Backlight Backlight compensation On Off Effective only in Auto mode Bright Intensity control from 0 17 Effective only in Bright mode Gain...

Страница 12: ...ntrast Select from 0 14 Sharpness Select Auto 0 15 Flip H On Off Flip V On Off B W Mode On Off Gamma Select Default 0 45 0 5 0 56 0 63 Style Select Default Norm Clarity Clarity LED Bright Soft 5S 5 5...

Страница 13: ...UP and press HOME key to enter the communication setup page as shown below COMMUNICATION SETUP COMMUNICATION SETUP Protocol VISCA V_Address 1 V_AddrFix Off Net Mode Serial Baudrate 9600 Select Item Ch...

Страница 14: ...hat the physical connection of the camera has been completed 6 3 Internet Connection There are two main ways to connect USB camera to the internet Connect by Network Cable Connect by Switch Router 6 4...

Страница 15: ...n now be viewed as shown When using this camera for the first time VLC player software must be installed Please visit http www videolan org vlc download and install VLC player software Once VLC is ins...

Страница 16: ...3 Input URL address rtsp ip port number 1 First stream rtsp ip port number 2 Second stream Step 4 Finish Default RTSP port number 554 6 6 Camera Parameter Setup 6 6 1 Homepage Introduction Menu All p...

Страница 17: ...you can save presets for quick recall of these positions Type a number between 0 and 254 into the Preset box Click the Set button to save the current location to that preset number Click the Call butt...

Страница 18: ...more network bandwidth 5 Bit Rate The user may specify the bit rate In general higher bit rates provide clearer images However bit rate configuration must match network bandwidth When network bandwidt...

Страница 19: ...ault 4 3 Contrast Contrast 0 14 slider Default 8 4 Sharpness Sharpness 0 15 slider Default 3 5 Hue Hue 0 14 slider Default 7 6 Flip Mirror Flip checkbox turns image upside down Mirror checkbox reverse...

Страница 20: ...rver program s transmission port Port mapping must be consistent with port numbers default port 80 B RTSP Port RTSP protocol supported default port 554 Use VLC tools broadcast C PTZ Port PTZ protocol...

Страница 21: ...lean the lens Do not use any solvents which may damage the surface Operating Precautions Do not shoot extremely bright objects such as sunlight light sources etc Avoid unstable lighting conditions whi...

Страница 22: ...onnect the network connect USB video conference camera and PC separately and reset the IP address of PC 3 Check IP address subnet mask and gateway settings for USB camera 4 Check for MAC address confl...

Отзывы: