DUEMMEGI
MCP 4 – User's manual
Contatto
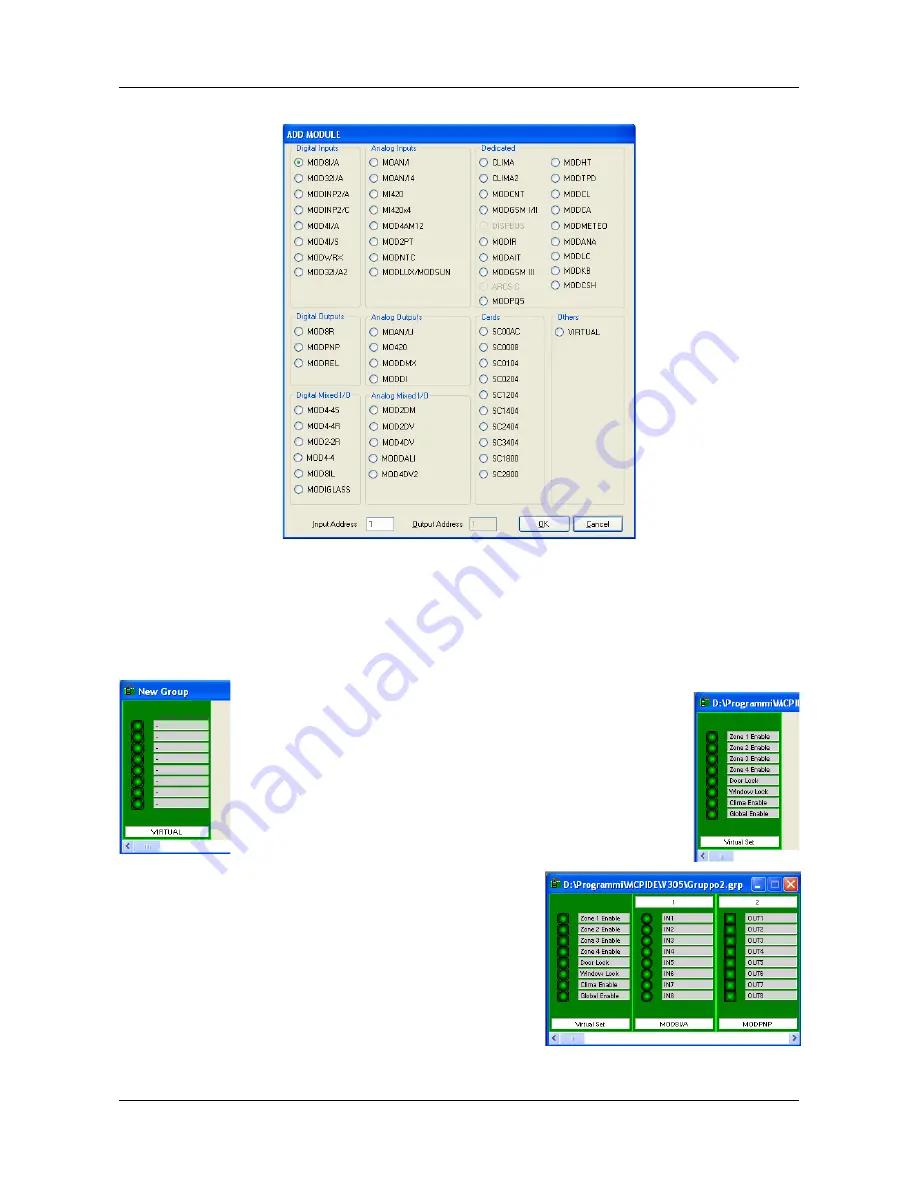
Select one of the listed modules and specify the address in the related te4 box (for mixed and some special
modules, both input and output address has to be specified).
To insert a virtual module (made by 8 points, assigned in any order) select VIRTUAL in the Others column; in
this case, of course, no address is required. The number of each virtual point will be assigned as follow. After
having selected the VIRTUAL option, press OK. The group window will look like the following:
Now hold down the Shift button on the keyboard and double click with
the mouse on the virtual LED to be assigned to a virtual point (be sure
to click ON the LED).
A yellow label will be shown at the place of the clicked LED: type in a
number in the range 1 to 2032 to assign that LED to the desired virtual
point.
Click on the right side of each LED while holding down the Shift button
on the keyboard to assign a label to the related point. Finally, click on
the white band on the lower side of the virtual module (always holding
down Shift button) to assign a name to it.
To check or to edit the virtual point assigned to a virtual LED,
simply click again on the LED itself holding down Shift Key. The
same operation allow to edit the other fields.
The result may be like the figure here on the right side.
For instance, add now a MOD8I/A and a MODPNP module to the
same group as in the following figure. The write and edit
operations described before (click while holding down the Shift
key) can be performed on any kind of module in the group
window. So use it to change the name assigned to each module
(the white band on the lower side) or to change the address (the
white band on the upper side).
DUEMMEGI
s.r.l. - Via Longhena, 4 – 20139 MILANO
Tel. 02/57300377 - Fax 02/55213686 –
www.duemmegi.it
Rel.: 1.2 October 2018
Page 67 of 87


