


41
Configuring RPS DC Unit as Expansion
9
Using a second Remote Power Switch DC unit, you can increase the number of control relays your primary unit
has from 8 to 16. Use the following procedure to daisychain your secondary Remote Power Switch unit to your
primary. It is important to be aware that any discretes or analogs on the secondary/expansion unit will be ignored.
When in this configurations, the only job of the secondary unit is to provide extra controls.
NOTE:
If you are not starting with two brand-new units, be sure to initialize both units back to factory settings to
avoid polling issues.
1. Power on both units.
2. Daisychain the units using a RJ45 to RJ45 crossover cable (available for order from DPS - see the Optional
Accessories section of this User Manual).
3. Configure your Ethernet settings for the Primary unit via LAN or Craft Port (see Initial Configuration section of
this User Manual for steps).
NOTE: No ethernet or web configuration is necessary for the secondary unit.
4. Once configured, log in to the web browser of your primary unit.
a. Browse to unit's IP address in web browser of choice.
b. Enter user name (default username:
admin
)
c. Enter password (default password:
dpstelecom
)
d. Press enter.
5. Navigate to the
Provisioning
menu.
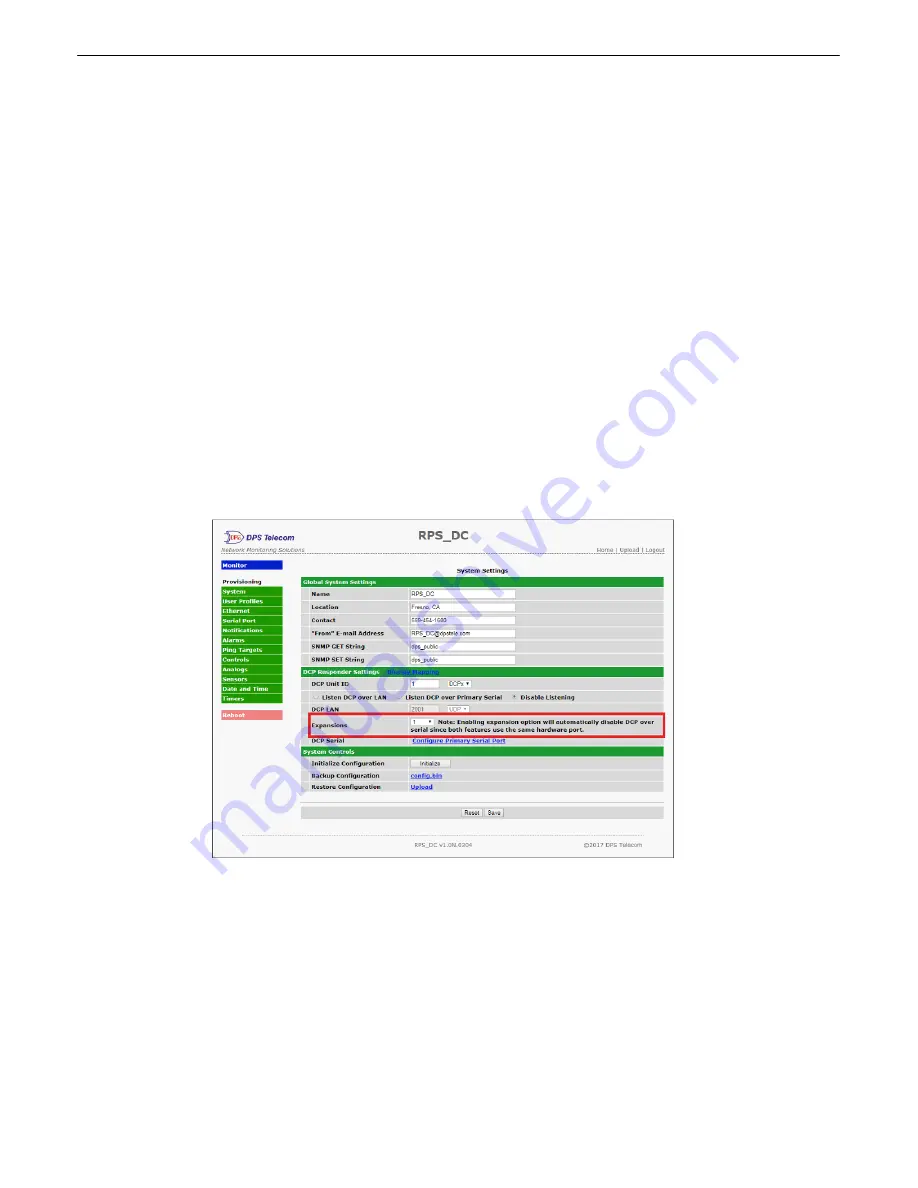
6. Navigate to the
System Settings
section.
7. Under
DCP Responder Settings
, change the
Expansions
drop down to
1.
8. Press the
Save
button.
9.
Reboot
your device.
Once your changes have been written, the LED labeled
Primary
on both units will flash red and green, indicating
that the connection is made. You can now go to the
Provisioning
menu and open the
Controls
page to edit up to
16 controls. You can also use the Group feature across both units.
NOTE:
If the connection is broken (ie the RJ45 crossover cable is damaged, cut, or unplugged), a System Alarm


