background image

EN

HC302, HC502

Explanation of symbols

9

1

Explanation of symbols

D
!
!

A

I

Action:

 This symbol indicates that action is required on your part. The 

required action is described step-by-step.

This symbol describes the result of an action.

Fig.

1

5, page 3:

 This refers to an element in an illustration. In this case, 

item 5 in figure 1 on page 3.

2

Safety instructions

The manufacturer accepts no liability for damage in the following cases:

Faulty assembly or connection

Damage to the product resulting from mechanical influences and excess 
voltage

Alterations to the product without express permission from the manu-
facturer

Use for purposes other than those described in the operating manual

DANGER! 
Safety instruction:

 Failure to observe this instruction will cause 

fatal or serious injury.

WARNING! 
Safety instruction:

 Failure to observe this instruction can cause 

fatal or serious injury.

CAUTION! 
Safety instruction:

 Failure to observe this instruction can lead to 

injury.

NOTICE! 

Failure to observe this instruction can cause material damage and 
impair the function of the product.

NOTE 

Supplementary information for operating the product.

Содержание HC302 Series

Страница 1: ...d Operating Manual 8 Medikamentenk hlschrank Montage und Bedienungsanleitung 24 R frig rateur pour m dicaments Instructions de montage et de service 42 Medicamentenkoelkast Montagehandleiding en gebru...

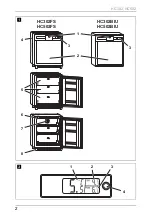
Страница 2: ...HC302 HC502 2 2 1 5 7 8 6 HC302FS HC502FS HC302BIU HC502BIU 3 3 4 1 3 4 2 1 2...

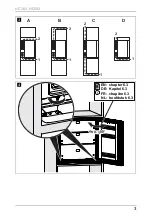
Страница 3: ...HC302 HC502 3 1 2 1 1 1 2 2 2 A D C B 3 min 100 4 EN chapter 6 3 DE Kapitel 6 3 FR chapitre 6 3 NL hoofdstuk 6 3...

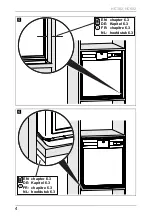
Страница 4: ...HC302 HC502 4 5 EN chapter 6 3 DE Kapitel 6 3 FR chapitre 6 3 NL hoofdstuk 6 3 6 EN chapter 6 3 DE Kapitel 6 3 FR chapitre 6 3 NL hoofdstuk 6 3...

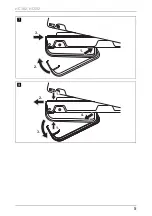
Страница 5: ...HC302 HC502 5 1 2 3 7 4 1 1 3 2 8...

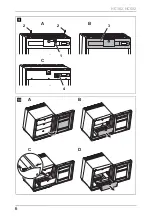
Страница 6: ...HC302 HC502 6 A C B 1 2 2 3 4 9 C D A B 0...

Страница 7: ...02 7 820 422 FS 450 BIU 440 540 580 HC302 a EN chapter 6 3 DE Kapitel 6 3 FR chapitre 6 3 NL hoofdstuk 6 3 HC502 948 486 FS 494 BIU 484 552 592 b EN chapter 6 3 DE Kapitel 6 3 FR chapitre 6 3 NL hoofd...

Страница 8: ...son hand over this instruction manual along with it Table of contents 1 Explanation of symbols 9 2 Safety instructions 9 3 Scope of delivery 12 4 Intended use 12 5 Technical description 13 6 Installin...

Страница 9: ...ge to the product resulting from mechanical influences and excess voltage Alterations to the product without express permission from the manu facturer Use for purposes other than those described in th...

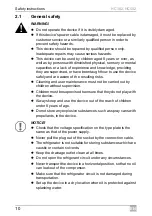
Страница 10: ...out by children without supervision Children must be supervised to ensure that they do not play with the device Always keep and use the device out of the reach of children under 8 years of age Do not...

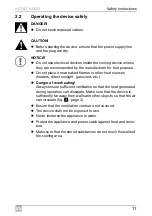
Страница 11: ...her heat sources heaters direct sunlight gas ovens etc Danger of overheating Always ensure sufficient ventilation so that the heat generated during operation can dissipate Make sure that the device is...

Страница 12: ...anufacturer s website 4 Intended use The refrigerator is designed to store medicaments and medical products which may be stored at temperatures 2 C and 8 C Quantity Description 1 Refrigerator 1 Handle...

Страница 13: ...entilation openings ensure sufficient ventilation By remov ing the foot frame and cooling unit cover the refrigerator can be used as a built in version The built in version HC302BIU HC502BIU is intend...

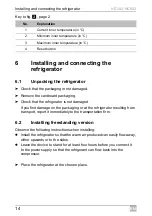
Страница 14: ...t it immediately to the transportation firm 6 2 Installing freestanding version Observe the following instructions when installing Install the refrigerator so that the warm air produced can easily flo...

Страница 15: ...the drawers cannot be used Mount the refrigerator to the furniture by two screws through the fittings at the bottom fig 4 page 3 6 4 Connecting the refrigerator to the power supply A Connect the plug...

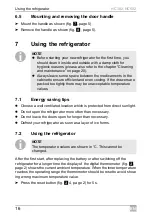
Страница 16: ...efrigerator for a longer time the display of the digital thermometer fig 2 page 2 shows the current ambient temperature When the inner temperature reaches the operating range the thermometer should be...

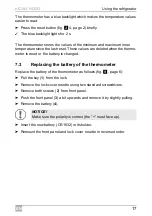
Страница 17: ...ermo meter is reset or the battery is changed 7 3 Replacing the battery of the thermometer Replace the battery of the thermometer as follows fig 9 page 6 Pull the key 1 from the lock Remove the lock c...

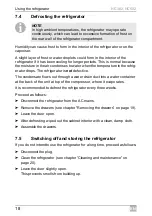
Страница 18: ...t evaporates It is recommended to defrost the refrigerator every three weeks Proceed as follows Disconnect the refrigerator from the AC mains Remove the drawers see chapter Removing the drawers on pag...

Страница 19: ...emoving the drawers You can remove the drawers e g for cleaning Proceed as follows fig 0 page 6 Open the door A Pull out the drawer B Push the fixing pins from the outside to the inside C Remove the d...

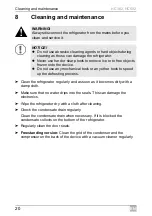
Страница 20: ...ondensate collects on the bottom of the refrigerator Regularly clean the door seals Freestanding version Clean the grid of the condenser and the compressor on the back of the device with a vacuum clea...

Страница 21: ...r There is too much water in the water container Clean the water container Signal Explanation General error The display blinks each second The display shows alternately the current inner temperature a...

Страница 22: ...aterial in the appropriate recycling waste bins wherever possible M If you wish to finally dispose of the product ask your local recycling centre or specialist dealer for details about how to do this...

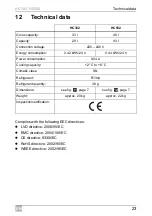
Страница 23: ...02 95 EC WEEE directive 2002 96 EC HC302 HC502 Gross capacity 33 l 49 l Capacity 29 l 43 l Connection voltage 220 240 V Energy consumption 0 42 kWh 24 h 0 44 kWh 24 h Power consumption 0 54 A Cooling...

Страница 24: ...s Produktes an den Nutzer weiter Inhaltsverzeichnis 1 Erkl rung der Symbole 25 2 Sicherheitshinweise 26 3 Lieferumfang 28 4 Bestimmungsgem er Gebrauch 29 5 Technische Beschreibung 29 6 K hlschrank auf...

Страница 25: ...ein Element in einer Abbil dung hin in diesem Beispiel auf Position 5 in Abbildung 1 auf Seite 3 GEFAHR Sicherheitshinweis Nichtbeachtung f hrt zu Tod oder schwerer Verletzung WARNUNG Sicherheitshinw...

Страница 26: ...araturen an diesem K hlschrank d rfen nur von Fach kr ften durchgef hrt werden Durch unsachgem e Reparaturen k nnen erhebliche Gefahren entstehen Dieser K hlschrank kann von Kindern ab 8 Jahren und da...

Страница 27: ...ffnung stets sauber ffnen Sie auf keinen Fall den K hlkreislauf Transportieren Sie den K hlschrank niemals in waagerechter Stellung damit kein l aus dem Kompressor auslaufen kann Achten Sie beim Trans...

Страница 28: ...Sorgen Sie daf r dass der K hlschrank in ausreichendem Abstand zu W nden oder Gegenst nden steht sodass die Luft zirkulieren kann Abb 3 Seite 3 Achten Sie darauf dass die L ftungs ffnungen nicht abged...

Страница 29: ...S ist f r den freistehenden Gebrauch konzipiert Die K hlaggregatabdeckung sch tzt die warmen Teile des K hlaggregats Der Fu rahmen mit Bel ftungsgitter stellt die Bel ftung sicher Durch Entfernen des...

Страница 30: ...te 2 Nr in Abb 1 Seite 2 Beschreibung 1 T rschloss 2 T r 3 Digitalthermometer siehe Abb 2 Seite 2 4 K hlaggregatabdeckung 5 Schubladen 6 Innenlicht 7 L fter 8 Fu rahmen Nr Beschreibung 1 Momentane Inn...

Страница 31: ...Verpackung oder am K hlschrank finden melden Sie diese sofort dem Transportunternehmen 6 2 Freistehende Variante aufstellen Beachten Sie folgende Hinweise beim Aufstellen Stellen Sie den K hlschrank...

Страница 32: ...schrank am M belst ck indem Sie zwei Schrauben durch die Befestigungsbohrungen auf der Bodenseite schrauben Abb 4 Seite 3 6 4 K hlschrank elektrisch anschlie en A Stecken Sie den Stecker des Anschluss...

Страница 33: ...ls n tig Lassen Sie die T ren nicht l nger offen stehen als n tig Tauen Sie den K hlschrank ab sobald sich eine Eisschicht gebildet hat HINWEIS Bevor Sie den neuen K hlschrank in Betrieb nehmen sollte...

Страница 34: ...falscher h chster Temperaturwert angezeigt wird Dr cken Sie die Reset Taste Abb 2 4 Seite 2 f r 5 s Das Thermometer hat eine blaue Hintergrundbeleuchtung die das Ablesen der Temperaturwerte erleichte...

Страница 35: ...kungsrosette mit Hilfe von zwei Schraubendrehern Schrauben Sie die beiden Schrauben 2 aus der Frontplatte Dr cken Sie die Frontplatte 3 etwas nach oben und entfernen Sie sie durch leichtes Ziehen Entn...

Страница 36: ...drei Wochen abgetaut werden Gehen Sie wie folgt vor Trennen Sie den K hlschrank vom Netz Demontieren Sie die Schubladen siehe Kapitel Schubladen demontie ren auf Seite 37 Lassen Sie die T r offen Wis...

Страница 37: ...ie Schubladen demontieren z B zur Reinigung Gehen Sie wie folgt vor Abb 0 Seite 6 ffnen Sie die T r A Ziehen Sie die Schublade heraus B Dr cken Sie die Befestigungsstifte von au en nach innen C Entfer...

Страница 38: ...Tauwasser auf dem Boden des K hlschranks Reinigen Sie die T rdichtungen regelm ig Freistehende Variante Reinigen Sie das Gitter des Kondensators und den Kompressor auf der Ger ter ckseite regelm ig m...

Страница 39: ...Sie den Abfluss Die eingelagerten Medizinprodukte verhindern dass das Wasser zum Tauwasserabfluss flie t Stellen Sie sicher dass die Medizinprodukte nicht die R ckwand ber hren Wasser flie t auf den...

Страница 40: ...ten WARNUNG Kinderfalle Vor der Entsorgung Ihres alten K hlschranks Bauen Sie die Schublade aus Belassen Sie die Schubladen im K hlschrank damit Kinder nicht hineinsteigen k nnen ACHTUNG Bei dem Ger t...

Страница 41: ...S Richtlinien 2002 95 EC WEEE Richtlinien 2002 96 EC HC302 HC502 Bruttoinhalt 33 l 49 l Nutzinhalt 29 l 43 l Anschlussspannung 220 240 V Leistungsaufnahme 0 42 kWh 24 h 0 44 kWh 24 h Stromverbrauch 0...

Страница 42: ...ansmettre au nouvel acqu reur Sommaire 1 Explication des symboles 43 2 Consignes de s curit 43 3 Pi ces fournies 46 4 Usage conforme 46 5 Description technique 46 6 Installation et raccordement du r f...

Страница 43: ...accordement des influences m caniques et des surtensions ayant endommag le mat riel des modifications apport es au produit sans autorisation explicite de la part du fabricant une utilisation diff rent...

Страница 44: ...teur en toute s curit et de comprendre les dangers qui en r sultent Le nettoyage et la maintenance ne doivent pas tre effectu s par des enfants sans surveillance Les enfants doivent tre surveill s pou...

Страница 45: ...commande Ne placez pas le r frig rateur pr s de flammes ou d autres sources de chaleur chauffage rayons solaires fours gaz etc Risque de surchauffe Veillez toujours ce que la chaleur produite lors du...

Страница 46: ...pas la qualit des produits m dicaux Le circuit frigorifique est sans entretien Le r frig rateur est disponible en variante poser FS et en variante encastrer BIU La variante poser HC302FS HC502FS est...

Страница 47: ...r initialisation de sorte que vous pouvez v rifier si les dispositifs m dicaux sont stock s des temp ra tures appropri es 5 2 l ments de commande L gende de fig 2 page 2 N dans fig 1 page 2 Descriptio...

Страница 48: ...le r frig rateur veuillez le signaler imm diatement la soci t de transport 6 2 Installation de la variante pos e Observez les consignes suivantes en ce qui concerne l installation Installez le r frig...

Страница 49: ...utiliser les tiroirs Fixez le r frig rateur au meuble en vissant deux vis travers les trous de fixation sur le fond fig 4 page 3 6 4 Raccordement lectrique du r frig rateur A Enfichez le connecteur d...

Страница 50: ...laissez pas les portes ouvertes plus longtemps que n cessaire D givrez le r frig rateur d s qu une couche de glace s est form e REMARQUE Avant de mettre en service votre nouveau r frig rateur vous de...

Страница 51: ...ur de tem p rature maximale erron e ne soit affich e Appuyez sur la touche de r initialisation fig 2 4 page 2 pendant 5 s Le thermom tre a un r tro clairage bleu ce qui facilite la lecture des valeurs...

Страница 52: ...rieur du r frig rateur Une l g re couche de givre ou quelques gouttes d eau peuvent se d poser l int rieur du r frig rateur s il a t utilis pendant un temps assez long Ceci est normal car l humidit d...

Страница 53: ...oulez mettre le r frig rateur hors service pendant une p riode prolong e proc dez de la fa on suivante D branchez le r frig rateur du secteur Nettoyez le r frig rateur voir le chapitre Entretien et ne...

Страница 54: ...de d givrage s accumule en bas du r frig rateur Nettoyez r guli rement les joints des portes Variante pos e Nettoyez r guli rement la grille du condenseur et le compresseur au dos de l appareil avec u...

Страница 55: ...e est bouch e Nettoyez l vacuation Les aliments m dicaux stock s emp chent que l eau s coule vers l vacuation Assurez vous que les pro duits m dicaux ne touchent pas la paroi arri re De l eau coule su...

Страница 56: ...d chets AVERTISSEMENT Risque d enfermement pour les enfants Avant de mettre au rebut votre ancien r frig rateur d montez le tiroir Laissez les tiroirs dans le r frig rateur afin que les enfants ne pui...

Страница 57: ...RoHS 2002 95 CE Directives DEEE 2002 96 CE HC302 HC502 Capacit 33 l 49 l Capacit utile 29 l 43 l Tension de raccordement 220 240 V Puissance absorb e 0 42 kWh 24 h 0 44 kWh 24 h Consommation de couran...

Страница 58: ...oduct aan de gebruiker Inhoudsopgave 1 Verklaring van de symbolen 59 2 Veiligheidsinstructies 59 3 Omvang van de levering 62 4 Gebruik volgens bestemming 62 5 Technische beschrijving 62 6 Koelkast ops...

Страница 59: ...schade montage of aansluitfouten beschadiging van het product door mechanische invloeden en over spanningen veranderingen aan het product zonder uitdrukkelijke toestemming van de fabrikant gebruik vo...

Страница 60: ...varing en kennis gebruikt worden als ze worden begeleid of hun is uitgelegd hoe ze de koelkast veilig kunnen gebruiken Ook dienen ze inzicht te hebben in de gevaren die het gebruik van het toestel met...

Страница 61: ...de koelkast behalve als deze elektrische toestellen daarvoor door de fabrikant worden aanbevolen Plaats de koelkast niet in de buurt van open vuur of andere warmtebronnen verwarming sterke zonnestral...

Страница 62: ...eschikt voor medische producten Het koelcircuit is onderhoudsvrij De koelkast is als vrijstaande variant FS en als inbouwvariant BIU verkrijg baar De vrijstaande variant HC302FS HC502FS is voor vrijst...

Страница 63: ...p bij het laatste terugzetten zodat u kunt controleren of medi sche producten bij correcte temperaturen worden opgeslagen 5 2 Bedieningselementen Legenda bij afb 2 pagina 2 Nr in afb 1 pagina 2 Beschr...

Страница 64: ...zij Laat het toestel minstens vier uur staan alvorens het elektrisch aan te slui ten zodat koelmiddel in de compressor kan terugstromen Zet de koelkast op de gewenste plaats 6 3 Inbouwvariant opstelle...

Страница 65: ...tuk Batterij van de digitale thermometer vervangen op pagina 67 Het display wordt actief De eerste twee seconden toont het display geen temperatuurwaarden maar Daarna wordt de temperatuur weergegeven...

Страница 66: ...omgevingstemperatuur Als de binnentemperatuur de bedrijfstemperatuur bereikt moet de thermometer worden teruggezet zodat geen onjuiste hoogste temperatuur wordt weerge geven Druk 5 seconden op de rese...

Страница 67: ...meter wordt teruggezet of als de batterij wordt vervangen 7 3 Batterij van de digitale thermometer vervangen Vervang de batterij van de digitale thermometer als volgt afb 9 pagina 6 Trek de sleutel er...

Страница 68: ...verdampt De koelkast moet elke drie weken worden ontdooid Ga als volgt te werk Scheid de koelkast van het stroomnet Demonteer de laden zie hoofdstuk Laden demonteren op pagina 69 Laat de deur open Wis...

Страница 69: ...n doek Controleer de dooiwaterafvoer regelmatig Reinig de dooiwaterafvoer indien nodig Als deze verstopt is blijft het dooiwater achter op de bodem van de koelkast Reinig de deurafdichtingen regelmati...

Страница 70: ...topt Reinig de afvoer De opgeslagen medische producten voorkomen dat het water naar de dooiwaterafvoer stroomt Controleer of de medische producten de achterwand niet raken Water stroomt op de bodem Er...

Страница 71: ...rvoorschriften WAARSCHUWING Gevaar voor kinderen Voor het afvoeren van uw oude koelkast Demonteer de lade Laat de laden in de zodat kinderen er niet kunnen instappen LET OP Bij het apparaat wordt een...

Страница 72: ...htlijnen 2002 95 EC WEEE richtlijnen 2002 96 EC HC302 HC502 Bruto inhoud 33 l 49 l Nuttige inhoud 29 l 43 l Aansluitspanning 220 240 V Opgenomen vermogen 0 42 kWh 24 h 0 44 kWh 24 h Stroomverbruik 0 5...

Страница 73: ......

Страница 74: ......

Страница 75: ......

Страница 76: ...lux B V Ecustraat 3 NL 4879 NP Etten Leur 31 76 5029000 31 76 5029019 Mail info dometic nl NEW ZEALAND Dometic New Zealand Ltd Unite E The Gate 373 Neilson Street Penrose 1 Auckland 64 9 622 1490 64 9...

Отзывы: