21
5.2
USB Control
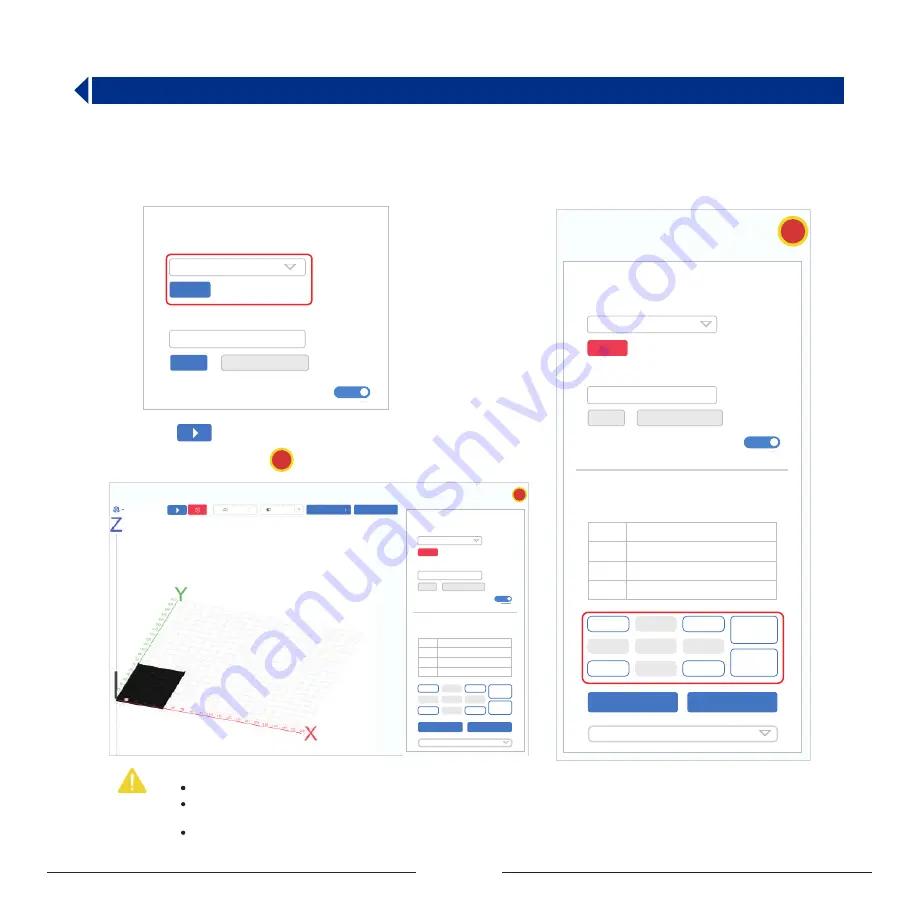
Users can control each axis of MOOZ-2 PLUS, set working origin, or print, etc. on MOOZStudio using USB online function.
Prerequisites:
MOOZ-2 PLSU and PC have been connected via USB cable
Step 1 :
Open MOOZStudio, select the serial port, and click Connect.
Step 2:
After the connection is successful, you can click the buttons
on the axes interface to control each axis of the MOOZ-2 PLUS and set
work origin, etc.
Step 3 :
Click to print online. If an unexpected occurs during printing, you
can click emergency stop button to stop printing.
Note:
This function is only used for laser engraving and CNC engraving.
For your safety, the protective cover is turned on by default. You can click Open on the touch screen to close the protective cover. Pease ensure
your security and DO NOT TOUCH the laser beam and carving bit during the process after closing the protective cover.
Children must be supervised by adults. Please power off the device after the use.
Connection
Port:
COM3
Wifi:
192.168.20.85:8686
Connect
Protective Shield:
Transfer Gcode
Connect
Stop
Connection
Port:
COM3
Wifi:
192.168.20.85:8686
Connect
Protective Shield:
Axes:
Axes
X
0mm
0mm
0mm
Y
Z
Machine Position
Transfer Gcode
Connect
Stop
X-
X0
Z0
Z+
Z-
Y0
X0Y0
Set Work Origin
Go To Work Origin
Y+
Y-
HOME
X+
1mm
Open
Open
Connection
Port:
COM3
Wifi:
192.168.20.85:8686
Connect
Protective Shield:
Axes:
Axes
X
0mm
0mm
0mm
Y
Z
Machine Position
Transfer Gcode
Connect
Stop
X-
X0
Z0
Z+
Z-
Y0
X0Y0
Set Work Origin
Go To Work Origin
Y+
Y-
HOME
X+
1mm
Open
Path Simula
3D View
Upload G-code
Export G-code
Содержание MOOZ-2 PLUS
Страница 1: ...INDUSTRIAL GRADE TRANSFORMABLE METALLIC 3D PRINTER V1 0 2020 07 2 PLUS...
Страница 2: ......
Страница 28: ...27...
Страница 29: ......


