4 Ports USB 2.0 DVI KVM Switch with HUB and Audio User’s Manual
-
7
-
5
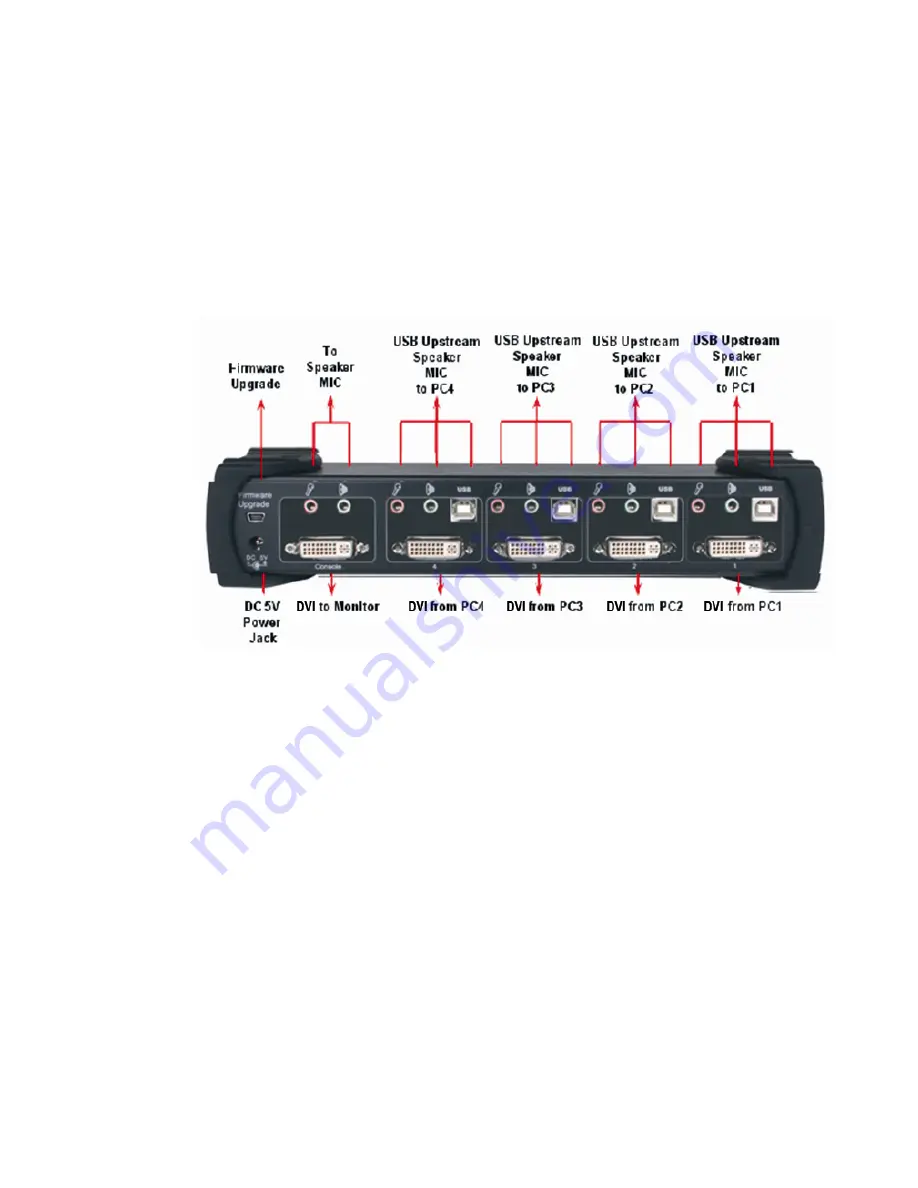
Apply DC 5V power adaptor to power this KVM Switch.
6
Connect the DVI cable between the DVI port on the computer’s display card and the
DVI input port of KVM.
7
Make sure that the USB function of your computer is enabled and working properly.
Connect the USB cable’s Type-A end to the computer’s USB port, and the cable’s
Type-B end to the KVM’s USB upstream port.
8
Turn on the computers and make sure that the USB ports are enabled and working
properly.
3.3 Firmware download connector
The min-USB female connector on the rear of KVM switch is for firmware
upgrade function. To update your KVM firmware, please contact with your dealer.
3.4
USB enumeration time
This KVM Switch supports USB plug & play; all the components can be added
and removed at any time without the need to shut the unit down. However, it will
take several seconds to enumerate USB device, the time consumed depends on the
number of USB devices and the speed of computer.
3.5
Notice for Sun Micro System user
Due to some Sun Micro systems do not support the USB 2.0 HUB feature during
the booting period, if you are using such Sun Micro System, it is possible that you


