


‐
8
‐
7.
Quick
startup
guide
Step
one:
Selecting
the
Transducer
and
Probe
zero
&
calibration
Right
now,
there
is
probe
S1025
available
and
its
information
is
as
below:
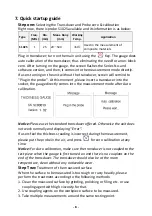
Type
Freq.
(MHz)
Dia.
(mm)
Meas.
Rang
(mm)
Working
Temp.
Application
S1025
1
25
20
~
590
<60
℃
Used
in
the
measurement
of
composite
materials
Plug
in
transducer;
turn
on
the
main
unit
using
the
Key.
The
gauge
does
auto
calibration
of
the
transducer,
thus
eliminating
the
need
for
an
on
‐
block
zero.
After
turning
on
the
gauge,
the
screen
flashes
the
Series
No.
and
software
version,
and
then,
it
comes
into
the
measurement
mode
directly.
If
users
turning
on
the
unit
without
the
transducer,
screen
will
remind
to
"Plug
in
the
probe".
At
this
moment,
please
insert
a
transducer
into
the
socket,
the
gauge
directly
comes
into
the
measurement
mode
after
Auto
calibration.
Notice:
Please
use
the
standard
transducer
offered.
Otherwise
the
unit
does
not
work
normally
and
displaying
“Error”.
If
users
feel
the
thickness
reading
is
incorrect
during
the
measurement,
please
put
the
probe
in
the
air,
and
press
for
zero
calibration
at
any
time.
Notice:
For
Auto
calibration,
make
sure
the
transducer
is
not
coupled
to
the
test
piece
when
the
gauge
is
first
turned
on
and
there
is
no
couplant
on
the
end
of
the
transducer.
The
transducer
should
also
be
at
the
room
temperature,
clean
without
any
noticeable
wear.
Step
Two:
Treatment
of
the
measured
surface
When
the
surface
to
be
measured
is
too
rough
or
rusty
heavily,
please
perform
the
treatment
according
to
the
following
methods:
1.
Clean
the
measured
surface
by
grinding,
polishing
or
filing,
etc.
or
use
coupling
agent
with
high
viscosity
for
that.
2.
Use
coupling
agents
on
the
workpiece
surface
to
be
measured.
3.
Take
multiple
measurements
around
the
same
testing
point.


