CYCLE RATES
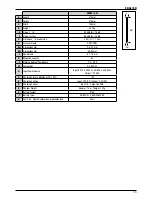
These tools are designed to operate up to the following
cycle rates:
Intermittent Operation
– 16-17 nails per minute
Continuous Operation
– 1000 nails per hour
Exceeding these rates could cause the tool to overheat,
resulting in loss of performance or damage to tool
components. By using the nailer at its recommended cycle
rate, you will be able to drive several thousand nails in a
typical working day.
SAFETY TRIP
These tools are supplied fitted with a sequential safety trip
and are marked with an inverted equilateral triangle (
▼
).
Do not attempt to use a tool marked in this way if the
safety trip is missing or appears damaged.
The sequential trip requires the operator to hold the tool
against the work with the safety trip depressed before
pulling the trigger. In order to drive additional fasteners, the
trigger must be released and the tool lifted away from the
work, before repeating.
This makes accurate fastener placement easier, for
instance on framing, toe nailing and crating applications.
The sequential trip allows exact fastener location without
the possibility of driving a second fastener on recoil. The
sequential trip tool has a positive safety advantage because
it will not accidentally drive a fastener if the tool is contacted
against the work or anything else, while the operator is
holding the trigger.
FASTENER LOCKOUT
These tools
employ a mechanism to prevent dry firing of
the tool.
When the magazine is not loaded with nails or when the
remaining number of nails becomes less than 4/5, the
contact arm cannot operate and the tool will not fire.
TOOL OPERATION CHECK
SEQUENTIAL TRIP OPERATION
A) Without touching the trigger, press the contact arm
against the work surface.
THE TOOL MUST NOT CYCLE.
B) Hold the tool off the work surface and, avoiding to point
the tool at yourself or others, pull the trigger.
THE TOOL MUST NOT CYCLE.
C) With the tool off the work surface, pull the trigger. Press
the safety trip against the work surface
THE TOOL MUST NOT CYCLE.
D) Without touching the trigger, press the safety trip against
the work surface then pull the trigger.
THE TOOL MUST CYCLE.
TOOL USE
Having checked that the tool is working properly, press the
nose against the work piece and pull the trigger. Check
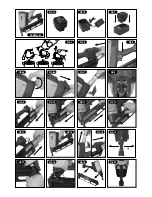
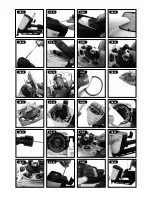
whether the fastener has been driven as required (Fig. 14).
ADJUSTING THE NAILING DEPTH
To ensure that each nail penetrates to the same depth,
be sure that the tool is always held firmly against the
workpiece.
If nails are driven too deep or shallow into the workpiece,
adjust the nailing in the following order:
1. Remove the fuel cell and the battery from the tool (Fig.
15).
2. If nails are driven too deeply, move the contact arm
forward. If nails are driven too shallow, move the contact
arm backward (Fig. 16).
3. Stop moving the contact arm when a suitable position is
reached for a nailing test.
4. Connect the fuel cell and the battery to the tool.
ALWAYS WEAR EYE PROTECTION.
Perform a nailing test.
5. Remove the fuel cell and the battery from the tool.
6. Make further adjustments until the drive depth is correct,
testing after each adjustment.
7. UTILITY HOOK
These tools have a utility hook installed in the magazine.
Maintenance & troubleshooting
Remove the fuel cell and battery from the tool and completely
empty the magazine before starting maintenance or repairs.
Read and understand the warnings in this manual, in the
Tool Technical Data and on the tool itself and use extra care
when evaluating problem tools.
14
Содержание DGN9033-XJ
Страница 2: ...DGN9033 XJ ...
Страница 4: ...3 ...

