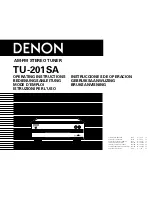
ENGLISH
7
5 PART NAMES AND FUNCTIONS
(1) Front Panel
q
Power operation switch (ON/STANDBY)
(This turns the power for the entire system on and
off.)
Press this once to turn the power on, then press
again to set the power to STANDBY mode.
The LED color changes as follows, according to the
condition:
During power ON : green
During STANDBY : red
During TIMER STANDBY: orange
w
REMOTE SENSOR
Point the remote control unit (RC-906) inducted in
the pre-main amplifier PMA-201SA.
e
Timer button (TIMER)
• Press this button during power ON mode to
confirm or change the display. Each time this
button is pressed, the display changes as follows:
(2) Rear Panel
i
FM antenna terminal
(ANTENNA TERMINAL FM)
• Connect the FM antenna here.
o
AM antenna terminal
(ANTENNA TERMINAL AM)
• Connect the AM antenna here.
!0
Output jacks (LINE OUT)
•
Connect these to the amplifier’s TUNER input
jacks.
•
When the TU-201SA is connected in a system
with the 201SA series, be sure to connect these
jacks to the TUNER input jacks on the pre-main
amplifier (PMA-201SA).
!1
System connectors
(SYSTEM CONNECTOR 1 and 2)
•
When connecting the TU-201SA in a system with
the 201SA series, connect these to the system
connectors on other components using the
included system cords.
!2
Power cord
• Plug this cord into a wall power outlet.
Remote Control
• The TU-201SA does not come with a remote
control unit.
Remote control is only possible from the
system remote control unit (RC-906) included
with the pre-main amplifier (PMA-201SA)
when the TU-201SA is connected in a system
with the 201SA series. (Refer to “System
Remote Control” on page 13.)
y
Memory/set button (MEMORY/SET)
• Use this as the memory button when presetting
AM and FM stations.
• Use this as the set button when setting the time
and timer and when inputting data.
• When the PTY search mode, press this button to
select the type of program.
• Press this button for at least 3 seconds to change
the function of the PRESET/TUNING buttons
(Preset mode or Tuning mode).
u
Preset/Tuning buttons
(PRESET/TUNING UP AND DOWN)
• Use these buttons to call out the preset stations.
(PRESET UP DOWN)
• Use these buttons to tune in AM and FM stations.
(TUNING UP/DOWN) (See page 8.)
Clock: Indicates the current time.
Timer Standby: Indicates the timer standby
mode. Use the PRESET/TUNING buttons to set
the timer standby mode on or off.
• Press this buttons for at least 3 seconds to set the
timer (refer to page 10) or to confirm the timer
contents (refer to page 11).
Each time the PRESET/TUNING button is pressed,
the display changes as follows:
Frequency
Clock
Timer Standby
TIME
EVERYDAY
ONCE
RDS
PTY
TP
(3) Display
!3
Mode indicators
• These indicate the various modes.
•
:
This lights when the timer is set to the standby
mode. It does not light if the current time and
the timer have not been set.
•
TIME:
This lights when the display is set to the time
display.
•
TIMER:
This lights when the timer is set.
It also lights while the timer is being set.
•
ON:
This lights when the timer on time is set.
•
OFF
:
This lights when the timer off time is set.
•
TUNED:
This lights when a station is properly tuned in.
•
STEREO:
This lights in the AUTO mode when a stereo
broadcast is tuned in.
•
MONO:
This lights in the AUTO mode when a monaural
broadcast is tuned in and when the MONO
mode is set with the BAND button.
•
AUTO:
This lights when the AUTO mode is set with the
BAND button.
•
MEMO:
This flashes when storing AM and FM stations
in the preset memory to indicate that the station
can be stored in the memory.
•
SLEEP:
This lights when the sleep timer is activated.
•
RDS (Radio Data System):
When the RDS button is pressed, a station is
searched for and automatically tuned in, the
“RDS” indicator lights and the station’s name is
displayed on the frequency display.
•
PS (Program Service Name):
This lights when the station name is displayed.
•
TP (Traffic Program):
“TP” lights when an RDS traffic information
station is received.
•
PTY (Program Type):
This indicator lights when the type of RDS
program is specified.
•
RT (Radio Text):
“RT” lights when a station offering radio text
services is tuned in.
!4
Preset number display
• The preset number is displayed here.
!5
Main display
• The reception band, reception frequency, time,
timer setting times, etc., are displayed here.
TIME:
Use this to set the time.
EVERYDAY: Use this to set the everyday timer.
ONCE:
Use this to set the once timer.
• Press this button during in STANDBY mode to
switch ON/OFF (“Saving Energy Mode”) the clock
display.
r
Display
• Refer to page 7.
t
Band/RDS button (BAND/RDS)
• Each time this button is pressed, the band and FM
reception mode change as follows.
FM AUTO
FM MONO
AM
• When the FM band, press this button for at least
3 seconds to select RDS search modes.
Each time this button is pressed, the display
changes as follows:


