


Get
ting Star
ted
Connections
Set
up
Pla
ybac
k
Remot
e Contr
ol
Multi-Zone
Inf
or
mation
Tr
oubleshooting
Set
up
b
If the access points are not detected automatically, use the
i
button to select the “Manual” and press the
ENTER
button.
Setting becomes manual. For details, see “Manual settings”
(
v
page 36).
b
If the access points are repeat search, use the
i
button to select
the “Search” and press the
ENTER
button.
e
If there is an encryption setting for the access point you selected
in step
w
, enter same encryption key as used for the access
point. (If there is no encryption setting, proceed to step
t
.
1
Fitting a rod antenna (
v
page 20).
b
If a LAN cable is connected, remove it.
2
Turn on the AVP-A1HD (
v
page 56).
3
Set the access point at the GUI menu “Manual Setup”
– “Network Setup” – “Network Setup”.
When searching access points to connect automatically, refer to
“Automatic settings”.
When searching access points to connect manually, refer to
“Manual settings”.
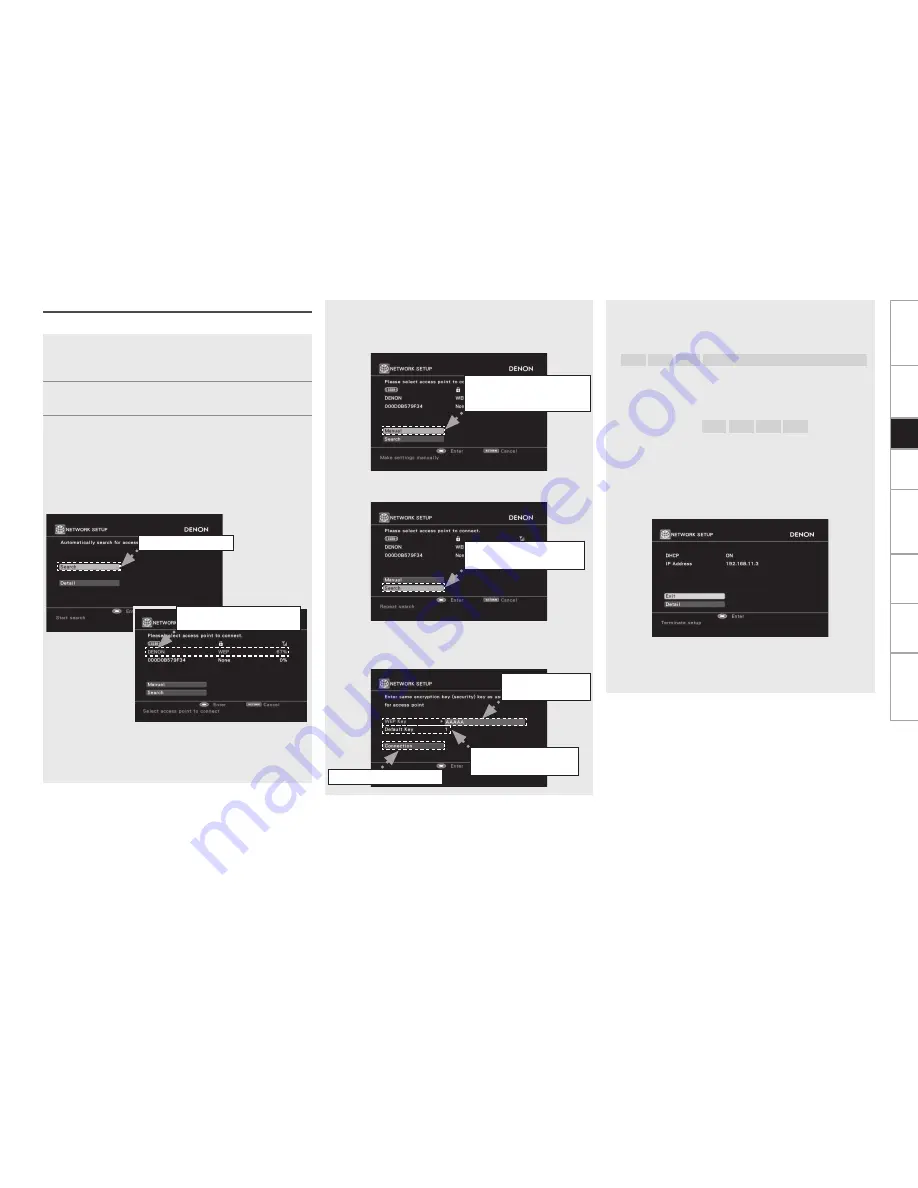
n
Automatic settings
q
Select “Search” and press the
ENTER
button.
The access point you have set is displayed.
w
Use the
ui
button to select the access point, and then press
the
ENTER
button.
Select when searching
access points again.
Wireless LAN settings
Use this procedure to configure the Wireless LAN settings.
w
Select the access point.
Example) DENON
Select when access
points cannot be searched
automatically.
q
Select “Search”.
r
Set only during
“WEP” in step
w
.
t
Select “Connection”.
e
Enter
encryption key.
Use the
uio
p
button to input the “Key” (encryption key) and
press the
ENTER
button.
Enter the same encryption key as used for the access point.
[Characters that can be input]
A ~ Z
a ~ z
0 ~ 9
! “ # % & ’ ( ) * + , - . / : ; < = > ? @ [ \ ]
(space)
When no security settings have been used in the Internet
connection settings, this step is not necessary.
r
When encryption is by “WEP”, select the “Default Key” using
the
i
button, and then press the
o
p
button.
[Selectable items]
1
2
3
4
Select the same default key as used for the access point. This
should normally be set to “1”.
t
Use the
i
button to select “Connection” and press the
ENTER
button.
Network connection starts.
When connection is established with the access point,
“Connection completed.” is displayed.
AVP-A1HD performs automatic network setup due to the DHCP
function.
When connecting to a network that has no DHCP function,
perform the setting in step 4.
Set
up


