background image


20 


Adjusting the Sound 


Important:

 If the 

Vol –

/

+

 and 

Mute

 buttons do not work, set the 

Output Volume

 to 

Variable

 instead of 

Fixed

 (see 

Adjusting the Settings > Setting > Audio Setup

 to learn how to do this). 


To adjust the volume,

 use the 

Vol –

/

+

 buttons on the remote control. Alternatively, use the volume 

adjustment controls on your TV, your TV’s remote control, your audio receiver or amplifier, etc. 

Important:

 These buttons control the output level of the 

audio outputs

 and 

7.1 outputs

 only. If you are 

not using those outputs, use the volume control on your TV, your TV’s remote control, your audio receiver 
or amplifier, etc. 
 

To mute

/

unmute the audio,

 press 

Mute

 (

) on the remote control. 

Important:

 This button mutes/unmutes the 

audio outputs

 and 

7.1 outputs

 only. If you are not using 

those outputs, use the mute button your TV’s remote control, your audio receiver or amplifier, etc. 
 

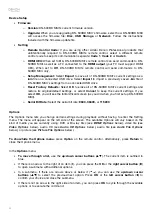
To change the audio setting,

 press 

Audio

 on the remote control. The current audio setting will appear in 

the upper-left corner of the screen. Each press after that will select the next available setting. The available 
settings depend on the supported audio configurations of your video. For example, a video file may let you 
select 

Stereo

Mono

Left

, or 

Right

, while a Blu-ray Disc may let you select 

DTS-HD MA

 (Master Audio) 

or 

Dolby Digital

 in various languages. This feature is available during video playback only. 

Alternatively, change the audio setting in the Options menu. See 

Adjusting the Settings > Options

 to 

learn how to do this. 
 

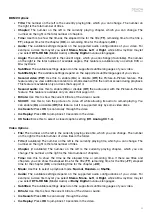
To select the language of the audio used with the Picture-in-Picture feature,

 press 

2nd Audio

 on the 

remote control. (Picture-in-Picture feature lets you view additional content in a small screen within the 
normal screen during playback. This feature is available only on discs that support it.) 

Alternatively, enable/disable this feature in the Options menu. See 

Adjusting the Settings > Options > 

BDMV Options

 to learn how to do this. 


Adjusting the Picture 

 
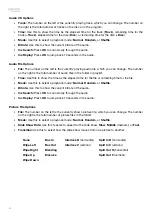
To change the picture resolution,

 press 

HDMI

 on the remote control. Each press will select the next 

available resolution: 

Auto

 (DN-500BD MKII will detect the optimal resolution automatically), 

480i

/

576i

480p

/

576p

720p

1080i

, or 

1080p

Alternatively, change the resolution in the Setting menu. See 

Adjusting the Settings

 to learn how to do this. 

 
To enable

/

disable the Picture-in-Picture feature,

 press 

PIP

 on the remote control. This feature lets you 

view additional content in a small screen within the normal screen during playback. This feature is 
available only on discs that support it. 

Alternatively, enable/disable this feature in the Options menu. See 

Adjusting the Settings > Options

 to 

learn how to do this. 

Tip:

 You can enable/disable the 

PIP Mark

 feature to indicate that there is secondary video you can view 

using the Picture-in-Picture feature. See 

Adjusting the Settings > Setting > Playback Setup

 to learn 

how to do this.  
 

To change the zoom distance,

 press 

Zoom

 on the remote control. Each press will select the next 

available zoom distance: 

2x

3x

4x

1

/

2

1

/

3

, and 

1

/

4

. When no zoom distance is shown on the screen, the 

picture is at its normal zoom distance.  
 

To change the camera angle,

 press 

Angle

 on the remote control to select the desired angle. This feature 

is available only on certain DVD or Blu-ray Discs. 

Alternatively, enable/disable this feature in the Options menu. See 

Adjusting the Settings > Options

 to 

learn how to do this. 

Содержание DN-500BD MKII

Страница 1: ...User Guide English 3 30 Guía del usuario Español 31 59 Guide d utilisation Français 60 87 Guida per l uso Italiano 88 115 Benutzerhandbuch Deutsch 116 144 Appendix English 145 147 ...

Страница 2: ...2 ...

Страница 3: ...the unit causing the unit not to operate properly If this happens let the unit sit for an hour or two while powered off and wait until there is little difference in temperature before using the unit Cautions on using mobile phones Using a mobile phone near this unit may cause noise If this occurs move the mobile phone away from this unit when it is in use Moving the unit Before moving the unit tur...

Страница 4: ...k IR Lock or Hide OSD See Other Features for more information 9 Shift Press and hold this button to perform the secondary function of any one of the five buttons next to it described below 10 Skip Back Press this button to skip to the previous chapter track or file Press and hold Shift and press this button to cycle through the Repeat modes See the Operation chapter for more information 11 Skip Fo...

Страница 5: ...s output sends an HDMI audio and video signal from an external device Use a standard HDMI cable to make this connection 6 LAN Port This input lets you connect a host device usually a computer to DN 500BD MKII You can use the host device to control DN 500BD MKII via commands sent from it Alternatively use this connection to access the internet Use a standard Ethernet cable to make this connection 7...

Страница 6: ...riable instead of Fixed see Adjusting the Settings Setting Audio Setup to learn how to do this 7 Number Buttons 0 9 Press these buttons to enter their corresponding numbers While playing media and not viewing an additional menu or screen entering a number or numbers will select that disc chapter or audio track 8 Return Press this button to return to the previous menu screen 9 Clear Press this butt...

Страница 7: ...1 2 1 3 and 1 4 When no zoom distance is shown on the screen the picture is at its normal zoom distance 33 Angle Press this button to select a different camera angle This feature is available only on certain DVD or Blu ray Discs 34 Red Green Yellow Blue Press these buttons to perform functions that are specific to the disc you are using Your disc may provide information about how to use these butt...

Страница 8: ...or 2 Optional Connect DN 500BD MKII to your sound system by doing either both of the following Use XLR cables or a stereo RCA cable to connect the audio outputs balanced or unbalanced to the analog inputs of your external receiver amp powered speakers etc Use RCA cables to connect the 7 1 outputs to your 7 1 surround sound system 3 Optional Connect a USB hard drive with playable content to the USB...

Страница 9: ...g standard for your location NTSC PAL or Multi Select Multi only if your TV supports both NTSC and PAL systems 6 On Page 4 select your TV s resolution Once you press OK the resolution will change temporarily At that point select Yes or No to confirm that you want to use that resolution If you do not do this within 12 seconds the resolution will return to the previous setting 7 On Page 5 select you...

Страница 10: ...to learn some basic operations See Additional Functions to learn more advanced ones Basic Functions Important Do not place heavy objects on top of DN 500BD MKII Doing so can cause issues with disc playback or damage the unit To play a disc 1 Press Eject on DN 500BD MKII or the remote control to open the disc tray 2 Insert a disc into the disc tray and press Eject on DN 500BD MKII or the remote con...

Страница 11: ...the title menu without stopping playback press Title Popup on the remote control To select a Repeat mode press Repeat on the remote control or press Shift and Skip Back on DN 500BD MKII It will cycle through 3 modes Off Normal operation Chapter Repeat CH The current chapter will repeat continuously In this Repeat mode pressing will Skip Back Forward will skip to the beginning of the current chapte...

Страница 12: ... a video that is stored in DN 500BD MKII s memory You can set up to 12 bookmarks and then jump to those locations directly saving you the time of scanning through the video later To create a bookmark press Mark on the remote control at the desired location during video playback The screen will show the number of the bookmark current title current chapter and current time To jump to a bookmark 1 Pr...

Страница 13: ...stop playback press Stop on DN 500BD MKII or the remote control To pause playback press Pause on DN 500BD MKII or the remote control To resume playback press Pause or Play on DN 500BD MKII or the remote control To rewind or fast forward press Search Back Forward on the remote control Each time you press the same button the speed will increase You can do this up to 5 times before it returns to norm...

Страница 14: ...e remote once more or press Shift and Skip Forward on DN 500BD MKII once more A B will disappear from the screen and playback will continue normally To jump to a specific track of the disc 1 Use the number buttons 0 9 on the remote control to select the number of the desired track 2 To confirm your choice press OK or wait a few seconds The desired track will start playing To cancel press Clear To ...

Страница 15: ...desired track and then press OK to confirm your choice If the current slot of the Program outlined in yellow contains a track number press Clear on the remote control to clear that slot While viewing the Program page you cannot use any buttons on DN 500BD MKII or the remote control other than the ones described above Playing Files Video Audio or Picture DN 500BD MKII can play and view the followin...

Страница 16: ...D MKII or the remote control other than the ones described above To stop playback press Stop on DN 500BD MKII or the remote control To pause playback press Pause on DN 500BD MKII or the remote control To resume playback press Pause or Play on DN 500BD MKII or the remote control While viewing pictures these buttons let you pause or resume playback of the slide show To rewind or fast forward press S...

Страница 17: ...eturn to the next highest folder one level above the current one Alternatively use the up cursor button to move to folder labeled at the top of the list and then press OK or Play Press OK or Play to play a selected file If you have previously played the file and stopped it before the end the file will start playing from that point Press Title Popup to view options related to creating a playlist Se...

Страница 18: ...e the picture 90 counterclockwise Press the right cursor button to rotate the picture 90 clockwise Additional Functions A playlist is a customized set of audio photo or video files that play in a predetermined sequence You can use playlists to play your media in an order you choose Important Playlists can contain only photo files only audio files or only video files You cannot create playlists wit...

Страница 19: ... press OK to select Remove from Playlist The selected files in that folder will be removed from the playlist This does not erase those files from the USB drive The files will still be in their original folders A bookmark is a specific location in a video that is stored in DN 500BD MKII s memory You can set up to 12 bookmarks and then jump to those locations directly saving you the time of scanning...

Страница 20: ...o on the remote control Picture in Picture feature lets you view additional content in a small screen within the normal screen during playback This feature is available only on discs that support it Alternatively enable disable this feature in the Options menu See Adjusting the Settings Options BDMV Options to learn how to do this Adjusting the Picture To change the picture resolution press HDMI o...

Страница 21: ...t accidental changes to playback To enable disable the IR Lock feature press and hold Shift and then press Pause on DN 500BD MKII s front panel When IR Lock is enabled the IR Lock light to the right of the display will turn on While IR Lock is enabled you can still use any function on the front panel unless the Lock feature is enabled Hide OSD The Hide OSD feature hides the options normally shown ...

Страница 22: ...left right cursor buttons to select one of the five icons at the top of the window Playback Setup Video Setup Audio Setup Network Setup or Device Setup Selecting each icon will show the relevant menus and settings in the window below it Press OK or the down cursor button to view and edit those settings To move through a list use the up down cursor buttons The current item is outlined in blue If th...

Страница 23: ... language of the text shown in DN 500BD MKII s menus screens windows etc o Menu The language of the text shown in disc menus The disc must be able to display the selected language for this feature to work properly o Audio The language of the audio on a disc The disc must be able to play audio in the selected language for this feature to work properly o Subtitle The language of the subtitles shown ...

Страница 24: ...e PAL standard When set to Off DN 500BD MKII will always play 1080p 24 Hz Blu ray video at 24 Hz Your TV must support 1080p 24 Hz Blu ray video for this to work properly Important This option applies only to the HDMI output at a 1080p resolution o DVD 24p Conversion When set to On DN 500BD MKII will convert the frame rate of a 1080p DVD video playing at 24 Hz to 60 Hz for locations using the NTSC ...

Страница 25: ...slucent or Transparent o Window Color The color of the window around the text Default White Black Red Green Blue Yellow Magenta or Cyan o Window Opacity The opacity of the window around the text Solid Translucent or Transparent Audio Setup Function o Secondary Audio Mark When set to On the screen will show a mark to indicate that there is secondary video you can view using the Picture in Picture f...

Страница 26: ... and the volume will be set to the Maximum Volume see below o Maximum Volume Select the highest possible volume level of the audio outputs and 7 1 outputs 10dB 6dB 0dB 6dB or 10dB Be careful higher volume levels can cause distortion clipping which can damage your amplifier or speakers If the Output Volume see above is set to Fixed the audio outputs and 7 1 outputs will play audio at this volume le...

Страница 27: ... will obtain IP address information via Dynamic Host Configuration Protocol DHCP When set to Off you must enter the IP address Subnet Mask Default Gateway DNS1 and DNS2 manually Use the left right cursor buttons to move between the squares Use the number buttons 0 9 to select numbers for each square Press the down cursor button to delete a number Press OK to confirm the entire address Press Return...

Страница 28: ...cel to keep the current settings If you select OK you will see the Initial Wizard screen as you did when you first set up DN 500BD MKII o Serial Bit Rate Select the serial bit rate 9600 38400 or 115200 Options The Options menu lets you change certain settings during playback without having to enter the Setting menu The menu will appear on the left side of the screen The available Options will vary...

Страница 29: ...s to show the current bitrate of the video or audio Still Off Use this to turn the picture of a video off while allowing its audio to remain playing You can enable On or disable Off this feature but it is supported only by some video discs Ins Search Press OK to scan slowly through the video Ins Replay Press OK to jump back 10 seconds in the video CC Select Use this to select a closed caption sett...

Страница 30: ...er or playlist Time Use this to show the time as the elapsed time for the file or remaining time for the file Mode Use this to select a playback mode Normal Random or Shuffle Bitrate Use this to show the current bitrate of the audio Ins Search Press OK to scan slowly through the audio Ins Replay Press OK to jump back 10 seconds in the audio Picture File Options File The number on the left is the c...

Страница 31: ...no funcione correctamente Si esto ocurriera deje la unidad apagada durante una o dos horas y espere hasta que haya una menor diferencia de temperatura antes de utilizar la unidad Precauciones sobre el uso de teléfonos móviles Utilizar un teléfono móvil cerca de esta unidad puede ocasionar ruido Si esto ocurriera aleje el teléfono móvil de la unidad cuando lo esté utilizando Cómo mover la unidad An...

Страница 32: ...o IR Lock Bloqueo IR o Hide OSD Ocultar OSD Para más información consulte Otras características 9 Función secundaria Mantenga pulsado este botón para ejecutar la función secundaria de cualquiera de estos cinco botones descrito a continuación 10 Saltar hacia atrás Pulse este botón para saltar a la pista capítulo o archivo anterior Mantenga pulsado Shift y pulse este botón para alternar los modos de...

Страница 33: ...o externo Utilice un cable HDMI estándar para realizar esta conexión 6 Puerto LAN Esta entrada le permite conectar un dispositivo anfitrión usualmente un ordenador al DN 500BD MKII Puede utilizar dispositivo anfitrión para controlar el DN 500BD MKII mediante el envío de comandos Como alternativa utilice esta conexión para acceder a internet Utilice un cable Ethernet estándar para realizar esta con...

Страница 34: ...en lugar de fijo consulte Modificar ajustes Ajustes Ajustes de audio para aprender a hacer esto 7 Botones numéricos 0 9 Pulse estos botones para introducir sus correspondientes Al reproducir medios sin que se visualice un menú o pantalla adicional al introducirse uno o varios números se seleccionará el correspondiente capítulo del disco o pista de audio 8 Retorno Pulse este botón para volver al me...

Страница 35: ...te botón para agrandar o achicar la imagen Cada pulsación seleccionará la próxima distancia de zoom disponible 2x 3x 4x 1 2 1 3 y 1 4 Cuando no se muestra ninguna distancia de zoom en la pantalla la imagen se encuentra en su distancia de zoom normal 33 Ángulo Pulse este botón para seleccionar otro ángulo de la cámara Esta característica solo está disponible en ciertos discos DVD o Blu ray 34 Rojo ...

Страница 36: ...D MKII a su sistema de sonido realizando alguna o ambas las siguientes acciones Utilice cables XLR o un cable RCA estéreo para conectar las salidas de audio balanceadas o no balanceadas a las entradas analógicas de su receptor externo amplificador altavoces alimentados etc Utilice cables RCA para conectar las salidas 7 1 a su sistema de sonido surround 7 1 3 Opcional Conecte una unidad de disco US...

Страница 37: ...ución volverá al ajuste anterior 7 En la página 5 seleccione la relación de aspecto de su TV Una vez que pulsa OK la relación de aspecto cambiará y continuará en la página cinco 5 Si no desea utilizar esa relación de aspecto pulse saltar hacia atrás para volver a la página anterior y seleccionar otra 8 En la página 6 pulse OK para visualizar la pantalla de inicio y comenzar a utilizar el DN 500BD ...

Страница 38: ... el control remoto para reproducir el disco desde el punto en donde lo detuvo la última vez Para detener la reproducción pulse Stop en el DN 500BD MKII o el control remoto Para pausar la reproducción pulse Pause en el DN 500BD MKII o el control remoto Para reanudar la reproducción pulse Pause o Play en el DN 500BD MKII o el control remoto Para rebobinar o realizar un avance rápido pulse Search Bac...

Страница 39: ... un loop con una sección del vídeo 1 Defina el punto de inicio deseado pulsando A B en el control remoto o pulse Shift y Skip Forward en el DN 500BD MKII Aparecerá A en la pantalla 2 Defina el punto de inicio deseado pulsando A B en el control remoto o pulse Shift y Skip Forward en el DN 500BD MKII Aparecerá A B en la pantalla y el loop comenzará y se repetirá continuamente 3 Para detener el loop ...

Страница 40: ...e Info Un marcador es una ubicación específica en un vídeo que se almacena en la memoria del DN 500BD MKII Puede almacenar hasta 12 marcadores y luego saltar a esas ubicaciones directamente ahorrándose el tiempo de recorrer el vídeo más tarde Para crear un marcador pulse Mark en el control remoto en la ubicación deseada durante la reproducción del vídeo Esta pantalla mostrará el número del marcado...

Страница 41: ...rá a reproducirse automáticamente Para detener la reproducción pulse Stop en el DN 500BD MKII o el control remoto Para pausar la reproducción pulse Pause en el DN 500BD MKII o el control remoto Para reanudar la reproducción pulse Pause o Play en el DN 500BD MKII o el control remoto Para rebobinar o realizar un avance rápido pulse Search Back Forward en el control remoto Cada vez que pulsa el mismo...

Страница 42: ...ará indefinidamente Además se permitirá que las pistas se reproduzcan más de una vez Apagado Funcionamiento normal Cómo realizar un loop con una sección de la pista 1 Defina el punto de inicio deseado pulsando A B en el control remoto o pulse Shift y Skip Forward en el DN 500BD MKII Aparecerá A en la pantalla 2 Defina el punto de finalización deseado pulsando A B nuevamente en el control remoto o ...

Страница 43: ...disco 3 Para saltar a otra parte repita los pasos 1 2 Para cerrar el panel información pulse Info Cómo crear un programa una lista de pistas que se reproducirán en un orden específico 1 Pulse Prog en el control remoto La página para crear programas aparecerá en la pantalla En la página para crear programas el tipo de medio y la cantidad total de pistas Track Total aparecerá encima de las 15 ranura...

Страница 44: ...s siguientes acciones en el centro de medios Utilice los botones subir bajar del cursor para desplazarse al elemento siguiente anterior de la lista Pulse OK o Play para entrar a la carpeta seleccionada Pulse el botón de cursor a la izquierda o Return para regresar a la carpeta superior inmediata un nivel encima del nivel actual Como alternativa utilice el botón subir del cursor para desplazarse a ...

Страница 45: ...r como un espejo la imagen verticalmente Pulsar el botón bajar del cursor para invertir como un espejo la imagen horizontalmente Pulsar el botón de cursor a la izquierda para rotar la imagen 90 en sentido antihorario Pulsar el botón de cursor a la derecha para rotar la imagen 90 en sentido horario tarjeta SD Cómo explorar y reproducir sus archivos 1 Inserte la tarjeta SD en la ranura para tarjeta ...

Страница 46: ...rol remoto aunque si se encuentra en los primeros segundos del archivo actual puede pulsarlo solo una vez Al ver imágenes pulse este botón una vez en lugar de dos Para volver al principio del archivo pulse Skip Back una vez en el DN 500BD MKII o el control remoto Si se encuentra en los primeros segundos del archivo actual sin embargo esto saltará al archivo anterior Al ver imágenes si pulsa este b...

Страница 47: ...reproducción y las marcas de verificación desaparecerán Como reproducir una lista de reproducción 1 Vaya a la carpeta raíz del centro de medios 2 Seleccione la carpeta Playlist y luego pulse OK 3 Seleccione la carpeta del tipo de archivo deseado Fotos música o vídeo 4 Seleccione el archivo desde el cual desea comenzar la reproducción y luego pulse Play en el DN 500BD MKII en el control remoto o pu...

Страница 48: ...es disponibles aparecerán en la pantalla 2 Utilice los botones izquierda derecha del cursor para recorrer los marcadores Cuando selecciona un marcador verá el título capítulo y tiempo actuales arriba de él Los marcadores disponibles son blancos y los marcadores que no están utilizados son grises 3 Pulse OK para saltar al marcador deseado La reproducción se reanudará desde la ubicación de ese marca...

Страница 49: ... control remoto La característica Picture in Picture le permite ver contenido adicional en una pequeña pantalla dentro de la pantalla normal durante la reproducción Esta característica solo está disponible en aquellos discos que la soportan Como alternativa habilite deshabilite esta característica en el menú de opciones Consulte Modificar ajustes Opciones Opciones de BDMV para aprender a hacerlo C...

Страница 50: ...en la reproducción Para activar desactivar la característica Lock mantenga pulsado Shift y luego pulse Pause en el panel frontal del DN 500BD MKII Cuando IR Lock esté habilitado se encenderá la luz IR Lock a la derecha de la pantalla Cuando IR Lock esté habilitado aún podrá utilizar cualquiera de las funciones del panel frontal a menos que esté habilitada la característica Lock Hide OSD Ocultar OS...

Страница 51: ...se a través de una lista utilice los botones subir bajar del cursor El elemento actual se resalta en azul Si hay una flecha a la derecha de un elemento puede pulsar el botón OK o el botón de cursor a la derecha para abrir un submenú con opciones adicionales Si hay una flecha a la izquierda de un elemento puede pulsar el botón de cursor a la izquierda para volver al menú inmediato superior En un su...

Страница 52: ...r o 3D Output Cuando se ajusta a Auto el DN 500BD MKII determinará automáticamente la salida de vídeo 3D si un vídeo lo utiliza Cuando se ajusta a Off ningún vídeo utilizará la salida 3D o TV Aspect Ratio Seleccione la relación de aspecto deseada 16 9 Full 16 9 Normal 4 3 Pan Scan o 4 3 Letterbox o TV System Seleccione el estándar de transmisión para su ubicación NTSC PAL o Multi Por defecto esto ...

Страница 53: ...ar estos atributos según sus preferencias descritas a continuación o Font Color El color del texto Predeterminado blanco negro rojo verde azul amarillo magenta o cyan o Font Size El tamaño del texto Predeterminado estándar pequeño o grande o Font Style El estilo del texto Predeterminado monoespaciada con remates proporcionalmente espaciadas con remates monoespaciada sin remates o proporcionalmente...

Страница 54: ...ámico Cuando se ajusta a On el DN 500BD MKII aplicará algo de compresión para suavizar los niveles alto y bajo del volumen del audio Cuando se ajusta a Off el DN 500BD MKII no utilizará ninguna compresión Cuando se ajusta a Auto el DN 500BD MKII utilizará la compresión especificada por el disco Blu ray que se está reproduciendo para los otros discos no se utilizará compresión Importante Esta opció...

Страница 55: ...te ver más arriba Importante La unidad USB no debe utilizar un sistema de archivos NTFS Ajustes o Interface Seleccione como el DN 500BD MKII accederá a internet Ethernet el puerto LAN debe estar conectado a su conexión Ethernet o Wireless el DN 500BD MKII se conectará a su enrutador inalámbrico Cuando modifique este ajuste se le preguntará si desea continuar finalizando su conexión actual Cuando s...

Страница 56: ... volver al menú anterior Proxy Port Utilice los botones numéricos 0 9 seleccionar los números para cada cuadrado Pulse Return para volver al menú anterior Device Setup Configuración del dispositivo Firmware o Version La versión del firmware actual del DN 500BD MKII o Upgrade Cuando actualiza el firmware del DN 500BD MKII s seleccione como accederá el DN 500BD MKII al archivo del firmware Disco alm...

Страница 57: ...ero total de títulos Capítulo El número de la izquierda es el capítulo actualmente en reproducción el cual puede modificar El número de la derecha es el número total de capítulos Time Tiempo Utilice esto para mostrar el tiempo transcurrido para este título TT el tiempo restante para este título TT el tiempo transcurrido para este capítulo CH o el tiempo restante para este capítulo CH Audio Los aju...

Страница 58: ...pítulo CH o el tiempo restante para este capítulo CH Mode Utilice esto para seleccionar un modo de reproducción Normal aleatorio o mezclado Audio Los ajustes disponibles dependen de las configuraciones de audio soportadas por su vídeo Por ejemplo un archivo de vídeo puede permitirle seleccionar Stereo Estéreo Mono Monoaural Left Izquierda o Right Derecha mientras que un disco Blu ray puede permiti...

Страница 59: ...vo de imagen File El número de la izquierda es el archivo de imagen que se muestra actualmente el cual puede modificar El número de la derecha es el número total de archivos de imagen en la carpeta Mode Utilice esto para seleccionar un modo de reproducción Normal aleatorio o mezclado Slide Show Rate Utilice esto para seleccionar una velocidad para la exhibición de diapositivas Lenta intermedia o r...

Страница 60: ...ernes empêchant l appareil de fonctionner correctement Dans ce cas laissez l appareil hors tension au repos pendant une heure ou deux jusqu à ce que la différence de température diminue Précautions relatives à l utilisation des téléphones mobiles L utilisation d un téléphone mobile à proximité de cet appareil peut entrainer des phénomènes de bruit Si tel est le cas éloignez le téléphone mobile de ...

Страница 61: ...ock ou verrouillage de l affichage Hide OSD Veuillez consulter la section Autres fonctions pour plus d information 9 Touche Shift Maintenez cette touche enfoncée pour accéder aux fonctions secondaires des cinq autres touches décrites ci dessous 10 Saut arrière Appuyez sur cette touche pour revenir au chapitre à la piste ou au fichier précédent Maintenez la touche Shift enfoncée puis appuyez sur ce...

Страница 62: ...n appareil externe Utilisez un câble HDMI standard pour faire ce raccordement 6 Port de réseau local LAN Cette entrée vous permet de connecter un périphérique hôte généralement un ordinateur au DN 500BD MKII Vous pouvez utiliser le périphérique hôte pour transmettre des messages afin de commander le DN 500BD MKII Vous pouvez également utiliser cette connexion pour accéder à l Internet Utilisez un ...

Страница 63: ...ption Output Volume sur Variable au lieu de sur Fixed veuillez consulter la section Réglage des paramètres Menu des paramètres Paramètres audio afin d en savoir plus 7 Touches numériques 0 à 9 Ces touches permettent de saisir leurs numéros correspondants Lors de la lecture de médias sans qu un menu ou fenêtre secondaire soit ouvert entrer un ou plusieurs numéros permet de sélectionner le chapitre ...

Страница 64: ...de repère dans une vidéo 32 Zoom Cette touche permet d effectuer un zoom avant ou arrière sur l image Chaque pression successive permet de sélectionner le niveau de zoom suivant 2x 3x 4x 1 2 1 3 et 1 4 Lorsqu aucun niveau de zoom ne s affiche l image est au niveau de zoom normal 33 Angle Appuyez sur la touche afin de sélectionner un angle de caméra différent Cette fonction n est disponible qu avec...

Страница 65: ...00BD MKII à votre système audio en effectuant l une ou les deux opérations suivantes Utilisez des câbles XLR ou un câble RCA stéréo pour relier les sorties audio symétriques ou asymétriques aux entrées analogiques de votre récepteur amplificateur enceintes amplifiées etc Utilisez des câbles RCA pour relier les sorties 7 1 à votre système audio ambiophonique 7 1 3 Facultatif Raccordez un disque dur...

Страница 66: ...SC PAL ou Multi Sélectionnez Multi uniquement si votre téléviseur prend en charge les systèmes NTSC et PAL 6 Sur la page 4 sélectionnez la résolution de votre téléviseur Lorsque vous appuyez sur la touche OK la résolution change temporairement À ce moment là sélectionnez Oui Yes afin de confirmer que vous souhaitez utiliser cette résolution ou non No pour revenir à la résolution précédente Si vous...

Страница 67: ...onsulter la section Fonctions supplémentaires pour apprendre les opérations plus avancées Fonctions de base Important Ne placez pas d objets lourds sur le DN 500BD MKII car cela pourrait provoquer des problèmes de lecture du disque ou endommager l appareil Pour faire la lecture d un disque vidéo 1 Appuyez sur la touche d éjection du DN 500BD MKII ou de la télécommande pour ouvrir le plateau à disq...

Страница 68: ...e appuyez sur la touche Title Popup de la télécommande Pour sélectionner un mode de répétition appuyez sur la touche Repeat de la télécommande ou appuyez sur la touche Shift et la touche de saut arrière du DN 500BD MKII Ceci permet de parcourir les 3 modes Off désactivé Fonctionnement normal CH répétition de chapitre Le chapitre en cours se répète indéfiniment Dans ce mode appuyez sur les touches ...

Страница 69: ... stockée dans la mémoire de DN 500BD MKII Vous pouvez programmer jusqu à 12 points de repère afin de passer directement à ces emplacements vous épargnant le temps que vous auriez autrement passé à rechercher cet emplacement chaque fois que vous souhaitez y accéder Pour créer un point de repère appuyez sur la touche Mark de la télécommande à l emplacement désiré pendant la lecture vidéo L écran aff...

Страница 70: ...che d arrêt de lecture du DN 500BD MKII ou de la télécommande Pour interrompre la lecture appuyez sur la touche pour interrompre la lecture du DN 500BD MKII ou de la télécommande Pour reprendre la lecture appuyez sur la touche pour interrompre la lecture ou de lecture du DN 500BD MKII ou de la télécommande Pour effectuer un retour arrière avance rapide appuyez sur la touche de recherche arrière av...

Страница 71: ...çon aléatoire indéfiniment et peuvent être lues plus d une fois Off désactivé Fonctionnement normal Pour boucler une section de la piste 1 Programmez le point de départ de la boucle en appuyant sur la touche A B de la télécommande ou en appuyant sur la touche Shift et la touche de saut avant du DN 500BD MKII A devrait s afficher à l écran 2 Programmez le point de fin de la boucle en appuyant à nou...

Страница 72: ... le disque 3 Pour passer à un autre minutage répétez les étapes 1 et 2 Appuyez sur la touche Info pour fermer la fenêtre d information Pour créer un programme une liste de pistes qui seront lues dans un ordre particulier 1 Appuyez sur la touche Prog de la télécommande La fenêtre de programmation Program devrait s afficher Dans la fenêtre de programmation le type de média et le nombre total de pist...

Страница 73: ...ias Utilisez les touches de déplacement verticales afin de passer à l item précédent ou suivant de la liste Appuyez sur la touche OK ou de lecture afin d entrer dans le dossier sélectionné Appuyez sur la touche de déplacement gauche ou Return pour revenir au dossier supérieur précédent Vous pouvez également utilisez la touche de déplacement du haut afin de déplacer le curseur sur le dossier nommé ...

Страница 74: ...es opérations suivantes Appuyez sur la touche de déplacement du haut afin d inverser l image verticalement Appuyez sur la touche de déplacement du bas afin d inverser l image horizontalement Appuyez sur la touche de déplacement gauche afin de faire pivoter l image de 90 degrés vers la gauche Appuyez sur la touche de déplacement droite afin de faire pivoter l image de 90 degrés vers la droite Carte...

Страница 75: ... la télécommande cependant si vous êtes dans les premières secondes du fichier en cours vous n avez qu appuyer qu une fois Lors de la lecture de fichiers d images vous n avez qu à appuyer une fois sur la touche Pour revenir au début du fichier appuyez une fois sur la touche de saut arrière du DN 500BD MKII ou de la télécommande Cependant si vous êtes dans les premières secondes du fichier en cours...

Страница 76: ... lecture 1 Dans la fenêtre de centre des médias ouvrez le dossier de niveau supérieur 2 Sélectionnez le dossier Playlist et appuyez sur OK 3 Sélectionnez le dossier pour le type de fichier souhaité Photo image Music musique ou Video vidéo 4 Sélectionnez le fichier à partir duquel vous souhaitez commencer la lecture puis appuyez sur la touche de lecture du DN 500BD MKII ou de la télécommande ou app...

Страница 77: ...ichés à l écran 2 Utilisez les touches de déplacement horizontales afin de parcourir les points de repère Lors de la sélection d un point de repère le titre le chapitre et le minutage correspondants s affichent au dessus Les points de repère programmés sont blancs et les points de repère inutilisés sont gris 3 Pour passer directement au point de repère appuyez sur la touche OK La lecture reprendra...

Страница 78: ...tion d incrustation d image vous permet d afficher du contenu supplémentaire dans une petite fenêtre à même la fenêtre normale pendant la lecture Cette fonction n est disponible qu avec certains disques qui la prennent en charge Vous pouvez également activer et désactiver cette fonction dans le menu des options Veuillez consulter la section Réglage des paramètres Options Option BDMV afin d en savo...

Страница 79: ... panneau avant est activé Verrouillage de l affichage Hide OSD La fonction de verrouillage de l affichage masque les options normalement affichées sur la fenêtre d accueil Blu ray Disc Media Center et Setting simplifiant le processus de démarrage Lorsque l option DVD CD Auto Play est activée On vous n avez qu à simplement insérer un disque et la lecture commence immédiatement vous n avez pas à acc...

Страница 80: ...pplémentaire peut être affiché avec la fonction d incrustation d image Lorsque réglé sur Off ces indications de contenu supplémentaire ne s affichent pas mais vous pouvez toujours utiliser la fonction d incrustation d image o Auto Resume Lorsque réglé sur On le DN 500BD MKII mémorise l endroit où vous avez arrêté la lecture du disque Lorsque vous faites à nouveau la lecture de ce disque vous pouve...

Страница 81: ... régions utilisant le système NTSC ou 50 Hz pour les régions utilisant le système PAL Lorsque réglé sur Off le DN 500BD MKII joue toujours les vidéos DVD 1080p 24 Hz à 24 Hz Votre téléviseur doit prendre en charge les vidéos DVD 1080p 24 Hz afin que cette fonction puisse fonctionner Important Cette option s applique seulement à la sortie HDMI avec une résolution de 1080p o HDMI Color Space Sélecti...

Страница 82: ...é lors de l utilisation d un récepteur audio vidéo ou d un processeur qui prend en charge l encodage avancé tel que DTS HD Master Audio ou Dolby TrueHD o Coaxial Optical Output Sélectionnez le format de l audio transmis par la sortie coaxiale 48K pris en charge par la plupart des équipements audio 96K un taux d échantillonnage supérieur avec une réponse en fréquence plus étendue 192K le taux d éch...

Страница 83: ...e de stockage de masse USB connecté au port USB du DN 500BD MKII ou On board mémoire interne du DN 500BD MKII Notez que vous aurez besoin d une certaine quantité d espace libre sur le disque pour télécharger correctement le contenu voir ci dessus Important Le périphérique de stockage de masse USB ne doit pas utiliser un système de fichiers NTFS Setting o Interface Sélectionnez comment le DN 500BD ...

Страница 84: ...e touche Appuyez sur Return pour revenir au menu précédent Proxy Port Utilisez les touches numérotées 0 9 pour sélectionner les chiffres pour chaque case Appuyez sur Return pour revenir au menu précédent Paramètres de l appareil Device Setup Firmware o Version Version courante du progiciel du DN 500BD MKII o Upgrade Lorsque vous mettez à jour le micrologiciel du DN 500BD MKII sélectionnez comment ...

Страница 85: ...commande Options BDMV Title Le nombre sur la gauche est le titre en cours de lecture et il est possible de le modifier Le nombre sur la droite est le nombre total de titres Chapter Le nombre sur la gauche est le chapitre en cours de lecture et il est possible de le modifier Le nombre sur la droite est le nombre total de chapitres Time Utilisez cette option pour afficher le temps écoulé du titre TT...

Страница 86: ... le temps restant du chapitre CH Mode Utilisez cette option pour sélectionner un mode de lecture Normal Random aléatoire ou Shuffle lecture mélangée Audio Les paramètres disponibles dépendent des configurations audio prises en charge par la vidéo Par exemple un fichier vidéo peut vous permettre de sélectionner les paramètres Stereo Mono Left ou Right alors qu un disque Blu ray peut vous permettre ...

Страница 87: ...l est possible de le modifier Le nombre sur la droite est le nombre total de fichiers d image dans le dossier Mode Utilisez cette option pour sélectionner un mode de lecture Normal Random aléatoire ou Shuffle lecture mélangée Slide Show Rate Utilisez cette option pour sélectionner une vitesse pour le diaporama Slow lent Middle moyen ou Fast rapide Transition Utilisez cette option pour sélectionner...

Страница 88: ... può causare un malfunzionamento dell apparecchio Se ciò accade lasciare che l apparecchio rimanga spento per un ora o due e attendere fino a quando la differenza di temperatura non sarà minima prima di utilizzare l apparecchio Precauzioni circa l uso di telefoni cellulari L utilizzo di un telefono cellulare vicino all apparecchio può causare rumore Se ciò accade allontanare il telefono cellulare ...

Страница 89: ...azioni si veda Altre funzioni 9 Shift tenere premuto questo tasto per eseguire la funzione secondaria di no qualsiasi dei cinque tasti accanto ad esso descritto qui di seguito 10 Skip Back indietro premere questo tasto per tornare al capitolo alla traccia o al file precedente Tenere premuto Shift e premere questo tasto per scorrere tra le modalità di ripetizione Repeat Per maggiori informazioni si...

Страница 90: ...spositivo esterno Servirsi di un cavo HDMI standard per effettuare questo collegamento 6 Porta LAN questo ingresso consente di collegare un dispositivo host solitamente un computer al DN 500BD MKII Si può utilizzare tale dispositivo per controllare il DN 500BD MKII inviandogli comandi Alternativamente è possibile servirsi di questo collegamento per accedere a Internet Servirsi di un cavo Ethernet ...

Страница 91: ...per sapere come fare 7 Tasti numerici 0 9 premere questi tasti per inserire i numeri corrispondenti Mentre si riproducono media e non si visualizzano menu o schermate aggiuntivi inserendo uno o più numeri si selezionerà il capitolo o la traccia audio di quel disco 8 Indietro premere questo tasto per tornare al menu alla schermata precedente 9 Cancella premere questo tasto per svuotare il campo cor...

Страница 92: ...immagine Ciascuna pressione successiva selezionerà la successiva distanza di zoom disponibile 2x 3x 4x 1 2 1 3 e 1 4 Quando sullo schermo non compare alcuna distanza di zoom l immagine è a dimensioni normali 33 Angle angolazione premere questo tasto per selezionare una diversa angolazione della videocamera Questa funzione è disponibile solo su determinati dischi DVD o Blu ray 34 Rosso Verde Giallo...

Страница 93: ...la TV 2 Opzione collegare il DN 500BD MKII all impianto audio procedendo in uno o in entrambi dei seguenti modi Servirsi di cavi XLR o di un cavo stereo RCA per collegare le uscite audio bilanciate o non bilanciate agli ingressi analogici del ricevitore esterno amp casse ecc Servirsi di cavi RCA per collegare le uscite 7 1 all impianto audio 7 1 surround 3 Opzione collegare un hard drive USB con c...

Страница 94: ...nfigurazione precedente 7 A Pagina 5 selezionare le proporzioni della TV Una volta premuto OK le proporzioni cambieranno e si passerà a pagina 5 Se non si desidera utilizzare quelle proporzioni premere Skip Back salta indietro per tornare alla pagina precedente e selezionarne una diversa 8 A Pagina 6 premere OK per visualizzare la schermata principale Home e iniziare a utilizzare il DN 500BD MKII ...

Страница 95: ... punto in cui è stato fermato l ultima volta Per interrompere la riproduzione premere Stop sul DN 500BD MKII o sul telecomando Per interrompere momentaneamente la riproduzione premere Pause sul DN 500BD MKII o sul telecomando Per riprendere la riproduzione premere Pause o Play sul DN 500BD MKII o sul telecomando Per riavvolgere tornare indietro o avanzare veloci premere Search Back Forward sul tel...

Страница 96: ...del capitolo desiderato 2 Per confermare la scelta premere OK o attendere alcuni secondi La riproduzione del capitolo desiderato avrà inizio Per annullare premere Clear cancella Per saltare a uno specifico titolo capitolo o minuto del disco 1 Premere GoTo vai a sul telecomando Il pannello Informazioni comparirà in cima allo schermo Per annullare l operazione prima di selezionare un titolo un capit...

Страница 97: ...o e il tempo correnti al di sopra di esso I segnalibri creati sono bianchi quelli inutilizzati sono grigi 3 Premere OK per passare al segnalibro desiderato La riproduzione riprenderà dal punto in cui è stato salvato il segnalibro Per annullare l operazione e tornare alla riproduzione normale premere Mark Per cancellare un segnalibro 1 Tenere premuto Mark sul telecomando per 6 secondi La riproduzio...

Страница 98: ... premere Stop sul DN 500BD MKII o sul telecomando Per interrompere momentaneamente la riproduzione premere Pause sul DN 500BD MKII o sul telecomando Per riprendere la riproduzione premere Pause o Play sul DN 500BD MKII o sul telecomando Per riavvolgere tornare indietro o avanzare veloci premere Search Back Forward sul telecomando A ciascuna pressione del tasto la velocità aumenterà Ciò può essere ...

Страница 99: ...ine casuale La riproduzione continuerà in maniera ininterrotta Inoltre le tracce potranno essere riprodotte più di una volta Off funzionamento normale Per effettuare la riproduzione in loop della traccia 1 Impostare il punto di inizio desiderato premendo A B sul telecomando oppure premere Shift e Skip Forward salta avanti sul DN 500BD MKII Sullo schermo appare la scritta A 2 Impostare il punto fin...

Страница 100: ... disco 3 Per passare a un altro punto ripetere i Passaggi 1 2 Per chiudere il pannello Informazioni premere Info Per creare un Programma un elenco di tracce che verranno riprodotte in un ordine specifico 1 Premere Prog sul telecomando La pagina Programma apparirà sullo schermo Nella pagina Programma il tipo di media e il numero totale di tracce Track Total compariranno al di sopra dei 15 spazi dis...

Страница 101: ...la selezionata Premere il tasto cursore sinistro o Return per tornare alla cartella superiore un livello più in alto rispetto a quello corrente Alternativamente servirsi del tasto cursore su per passare alla cartella denominata in cima all elenco quindi premere OK o Play Premere OK o Play per riprodurre un file selezionato Se il file è stato già riprodotto in precedenza ed è stato fermato prima de...

Страница 102: ...rsore destro per far ruotare l immagine di 90 in senso orario scheda SD Per navigare tra i file e riprodurre un file 1 Inserire la scheda SD nello slot per scheda SD 2 Premere Home sul telecomando per visualizzare la schermata principale Home 3 Servirsi dei tasti cursore sinistra destra per selezionare Media Center quindi premere OK Il Media Center apparirà sullo schermo 4 Procedere in uno dei seg...

Страница 103: ...remere il tasto cursore su per girare l immagine in senso verticale Premere il tasto cursore giù per girare l immagine in senso orizzontale Premere il tasto cursore sinistro per far ruotare l immagine di 90 in senso antiorario Premere il tasto cursore destro per far ruotare l immagine di 90 in senso orario Funzioni aggiuntive Una playlist è un set personalizzato di file audio immagine o video che ...

Страница 104: ...remere OK per selezionare Remove from Playlist rimuovi dalla playlist I file selezionati in quella cartella saranno rimossi dalla playlist Questo non cancella tali file dalla chiavetta USB I file saranno ancora presenti nelle cartelle originali Un segnalibro è un punto specifico di un video salvato nella memoria del DN 500BD MKII Si possono impostare fino a un massimo di 12 segnalibri per poi pass...

Страница 105: ... consente di visualizzare contenuti aggiuntivi in un piccolo schermo all interno dello schermo normale durante la riproduzione Questa funzione è disponibile solo su dischi che la supportano Alternativamente abilitare disabilitare questa funzione nel menu Opzioni Si veda Regolazione delle impostazioni Opzioni Opzioni BDMV per maggiori informazioni su come farlo Regolazione dell immagine Per modific...

Страница 106: ...Per abilitare disabilitare la funzione IR Lock tenere premuto Shift quindi premere Pause sul pannello anteriore del DN 500BD MKII Quando IR Lock è attivo la relativa spia IR Lock sulla destra del display si accenderà Quando IR Lock è attivo è comunque possibile utilizzare qualsiasi funzione del pannello anteriore a meno che la funzione Lock non sia attiva Hide OSD nascondi OSD La funzione Hide OSD...

Страница 107: ...orrente è evidenziata in blu Se è presente una freccia alla destra di una voce è possibile premere OK oppure il tasto cursore destro per aprire un sottomenu con opzioni aggiuntive Se è presente una freccia alla sinistra di una voce è possibile premere OK oppure il tasto cursore sinistro tper tornare al menu superiore Nel sottomenu un cerchio è presente accanto all opzione attualmente selezionata P...

Страница 108: ... utilizzerà l uscita video 3D o Proporzioni TV selezionare le proporzioni desiderate 16 9 Full 16 9 Normal 4 3 Pan Scan o 4 3 Letterbox o Impianto TV Selezionare lo standard di trasmissione adeguato alla propria residenza NTSC PAL o Multi In via predefinita questo dovrebbe già essere configurato sul formato corretto per il Paese dell utente Selezionare Multi solo se la propria TV supporta sia NTSC...

Страница 109: ...ai caratteri del testo se presente Bianco Nero Rosso Verde Blu Giallo Magenta o Ciano o BG Color colore di sfondo il colore dello sfondo Predefinito Bianco Nero Rosso Verde Blu Giallo Magenta o Ciano o BG Opacity opacità dello sfondo l opacità dello sfondo Solido Traslucido o Trasparente o Colore finestra il colore della finestra attorno al testo Predefinito Bianco Nero Rosso Verde Blu Giallo Mage...

Страница 110: ...zionare il massimo livello di volume possibile per le uscite audio e le uscite 7 1 10dB 6dB 0dB 6dB o 10dB Attenzione livelli di volume più elevati possono causare distorsioni tagli che possono danneggiare gli amplificatori o gli altoparlanti Se il Volume di uscita vedi sopra è impostato su Fixed fisso le uscite audio e le uscite 7 1 riprodurranno l audio a questo volume Impostazioni di rete Funzi...

Страница 111: ...relative all indirizzo IP tramite Dynamic Host Configuration Protocol DHCP Quando impostato su Off si dovrà inserire manualmente indirizzo IP Maschera Subnet Gateway predefinito DNS1 e DNS2 Servirsi dei tasti cursore sinistro destro per muoversi lungo le caselle Servirsi dei tasti numerici 0 9 per inserire i numeri in ciascuna casella Premere il tasto cursore giù per cancellare un numero Premere O...

Страница 112: ...redefinite oppure selezionare Cancel per mantenere le impostazioni correnti Se si seleziona OK si visualizzerà la schermata Initial Wizard come avvenuto in occasione della prima configurazione del DN 500BD MKII o Bit Rate Seriale Selezionare il bit rate seriale 9600 38400 o 115200 Opzioni Il menu Opzioni consente di modificare determinate impostazioni durante la riproduzione senza dover entrare ne...

Страница 113: ...u ray Sottotitoli le impostazioni disponibili dipendono dalle lingue dei sottotitoli supportate dal video Stile dei sottotitoli le impostazioni disponibili dipendono dalle lingue dei sottotitoli supportate dal video Second video secondo video PIP servirsi di questo comando per abilitare On o disabilitare Off la funzione Picture in Picture Questa funzione consente di visualizzare contenuti aggiunti...

Страница 114: ...deo potrebbe consentire di selezionare Stereo Mono Left o Right stereo mono sinistra o destra mentre un disco Blu ray potrebbe consentire di scegliere DTS HD MA Master Audio o Dolby Digital in varie lingue Sottotitoli le impostazioni disponibili dipendono dalle lingue dei sottotitoli supportate dal video Bitrate servirsi di questo comando per mostrare la frequenza di bit corrente del video o dell ...

Страница 115: ...ro sulla sinistra indica il file immagine visualizzato attualmente che può essere modificato Il numero sulla destra indica il numero totale di file immagine presenti nella cartella Modalità servirsi di questo comando per selezionare una modalità di riproduzione Normale Random o Shuffle Frequenza presentazione servirsi di questo comando per selezionare la velocità desiderata per la presentazione Sl...

Страница 116: ...ktioniert In solchen Fällen lassen Sie das Gerät ausgeschaltet ein bis zwei Stunden ruhen und warten bis sich die Temperaturunterschiede angeglichen haben bevor Sie das Gerät wieder verwenden Vorsichtsmaßnahmen bei der Verwendung von Mobiltelefonen Die Verwendung eines Mobiltelefons in der Nähe dieses Geräts kann Störgeräusche verursachen Wenn dies geschieht bewegen Sie das Mobiltelefon weiter weg...

Страница 117: ... oder Hide OSD Siehe Weitere Funktionen für weitere Informationen 9 Shift Halten Sie diese Taste gedrückt um auf die sekundäre Funktion von einer der fünf Tasten daneben zuzugreifen siehe unten 10 Skip Back Drücken Sie diese Taste um zum vorherigen Kapitel Track oder Datei zu springen Halten Sie Shift gedrückt und drücken Sie diese Taste um durch die Wiederholungs Modi zu blättern Siehe Kapitel Be...

Страница 118: ...eosignal an ein externes Gerät Verwenden Sie ein Standard HDMI Kabel um diese Verbindung herzustellen 6 LAN Anschluss Über diesen Eingang können Sie ein Host Gerät in der Regel ein Computer mit dem DN 500BD MKII verbinden Sie können das Host Gerät verwenden um Steuerbefehle an das DN 500BD MKII zu senden Wahlweise verwenden Sie diese Verbindung um auf das Internet zuzugreifen Verwenden Sie ein Sta...

Страница 119: ...len Sie das Output Volume auf Variable statt Fixed siehe Anpassen der Einstellungen Einstellungen Audio Setup um mehr darüber zu erfahren 7 Zifferntasten 0 9 Drücken Sie diese Tasten um ihre entsprechenden Nummern einzugeben Während der Medienwiedergabe und wenn kein zusätzliches Menü oder Bildschirm angezeigt wird wählt die Eingabe einer Nummer oder mehrerer Nummern das Kapitel oder die Audiospur...

Страница 120: ...endruck wird die nächste verfügbare Zoom Entfernung ausgewählt 2x 3x 4x 1 2 1 3 und 1 4 Wenn keine Zoom Entfernung am Bildschirm angezeigt wird wird das Bild in normaler Zoom Entfernung angezeigt 33 Angle Drücken Sie diese Taste um einen anderen Kamerawinkel zu wählen Diese Funktion ist nur bei bestimmten DVDs oder Blu ray Discs verfügbar 34 Rot grün gelb blau Drücken Sie diese Tasten um Funktione...

Страница 121: ...Sie das DN 500BD MKII an Ihr Sound System an indem Sie eine oder beide der folgenden Möglichkeiten nutzen Verwenden Sie XLR Kabel oder ein Stereo Cinch Kabel um die Audioausgänge symmetrisch oder unsymmetrisch mit den analogen Eingängen Ihres externen Empfängers Verstärkers usw zu verbinden Verwenden Sie RCA Kabel um die 7 1 Ausgänge an Ihr 7 1 Surround Soundsystem anzuschließen 3 Optional Verbind...

Страница 122: ...ngsstandard für Ihr Land NTSC PAL oder Multi Wählen Sie Multi nur wenn Ihr TV sowohl NTSC als auch PAL Systeme unterstützt 6 Auf Seite 4 wählen Sie die Auflösung Ihres TV Sobald Sie OK drücken wird die Auflösung vorübergehend geändert Wählen Sie zu diesem Zeitpunkt Yes oder No um zu bestätigen dass Sie diese Auflösung verwenden möchten Wenn Sie das nicht innerhalb von 12 Sekunden tun springt die A...

Страница 123: ...lernen Siehe Zusätzliche Funktionen um fortgeschrittene Funktionen kennenzulernen Grundfunktionen Wichtig Stellen Sie keine schweren Gegenstände auf das DN 500BD MKII Anderenfalls kann es zu Probleme bei der Disc Wiedergabe oder zu Geräteschäden kommen Um eine Disc abzuspielen 1 Drücken Sie Eject am DN 500BD MKII oder auf der Fernbedienung um das Disc Fach zu öffnen 2 Legen Sie eine Disc in das Di...

Страница 124: ...das Titelmenü anzuzeigen ohne die Wiedergabe zu stoppen drücken Sie Title Popup auf der Fernbedienung Um einen Wiederholungsmodus auszuwählen drücken Sie Repeat auf der Fernbedienung oder Shift und Skip Back am DN 500BD MKII Dabei werden 3 Modi durchlaufen Off Normaler Betrieb Chapter Repeat CH Das aktuelle Kapitel wird kontinuierlich wiederholt In diesem Wiederholungsmodus können Sie Skip Back Fo...

Страница 125: ...e Stelle in einem Video die im DN 500BD MKII Speicher gespeichert ist Sie können bis zu 12 Lesezeichen setzen und dann direkt an diese Stellen springen was Ihnen später die Zeit bei der Suche durch ein Video erspart Um ein Lesezeichen zu erstellen drücken Sie Mark auf der Fernbedienung an der gewünschten Stelle während der Video Wiedergabe Auf dem Bildschirm wird die Nummer des Lesezeichens der ak...

Страница 126: ...enung Um die Wiedergabe zu pausieren drücken Sie Pause am DN 500BD MKII oder der Fernbedienung Um die Wiedergabe wieder aufzunehmen drücken Sie Pause oder Spielen am DN 500BD MKII oder auf der Fernbedienung Um zurück oder vorzuspulen drücken Sie Search Back Forward auf der Fernbedienung Jedes Mal wenn Sie die gleiche Taste drücken wird sich die Geschwindigkeit erhöhen Sie können dies bis zu 5 mal ...

Страница 127: ...Außerdem können Tracks auch mehr als einmal abgespielt werden Off Normaler Betrieb So spielen Sie einen Abschnitt des Tracks als Loop ab 1 Stellen Sie den gewünschten Startpunkt ein indem Sie A B auf der Fernbedienung drücken oder drücken Sie Shift und Skip Forward am DN 500BD MKII A wird am Bildschirm angezeigt 2 Stellen Sie den gewünschten Endpunkt ein indem Sie erneut A B auf der Fernbedienung ...

Страница 128: ...isc zu springen 3 Um an einen anderen Ort zu springen wiederholen Sie die Schritte 1 2 Um das Informationsfeld zu schließen drücken Sie Info So erstellen Sie ein Programm eine Track Liste die in einer bestimmten Reihenfolge wiedergegeben wird 1 Drücken Sie Prog auf der Fernbedienung Die Programmseite wird auf dem Bildschirm angezeigt Auf der Programmseite wird der Medientyp und die Gesamtzahl der ...

Страница 129: ...nden Aktionen im Dateimanager aus Mit den Cursortasten Up Down gelangen Sie zum vorherigen nächsten Element in einer Liste Drücken Sie OK oder Play um in einen ausgewählten Ordner zu gelangen Drücken Sie die linke Cursortaste oder Return um zum nächsthöheren Ordner eine Ebene über der aktuellen Ebene zurückzukehren Alternativ können Sie die Up Cursortaste verwenden um zum Ordner mit der Bezeichnun...

Страница 130: ...en ID3 Tag hat bleibt das Feld leer Während Sie ein Bild ansehen können Sie Folgendes tun Drücken Sie die Up Cursortaste um das Bild vertikal zu kippen spiegeln Drücken Sie die Down Cursortaste um das Bild horizontal zu kippen spiegeln Drücken Sie die linke Cursortaste um das Bild 90 gegen den Uhrzeigersinn zu drehen Drücken Sie die rechte Cursortaste um das Bild um 90 im Uhrzeigersinn zu drehen S...

Страница 131: ...BD MKII oder auf der Fernbedienung wenn Sie sich jedoch innerhalb der ersten paar Sekunden der aktuellen Datei befinden müssen Sie die Taste nur einmal drücken Wenn Sie Bilder betrachten drücken Sie diese Taste nur einmal statt zweimal Um zum Anfang der Datei zurückzukehren drücken Sie einmal Skip Back am DN 500BD MKII oder der Fernbedienung Wenn Sie sich innerhalb der ersten paar Sekunden der akt...

Страница 132: ...e Häkchen verschwinden Um eine Wiedergabeliste abzuspielen 1 Navigieren Sie zum höchsten Ordner im Media Center 2 Wählen Sie den Wiedergabelistenordner und drücken dann OK 3 Wählen Sie den Ordner für den gewünschten Dateityp Photo Music oder Video 4 Wählen Sie die Datei von der Sie die Wiedergabe starten möchten und drücken dann Play am DN 500BD MKII oder auf der Fernbedienung bzw drücken OK auf d...

Страница 133: ... Wenn die Tasten Vol und Mute nicht funktionieren stellen Sie das Output Volume auf Variable statt Fixed siehe Anpassen der Einstellungen Einstellungen Audio Setup um mehr darüber zu erfahren Um die Lautstärke einzustellen verwenden Sie die Tasten Vol auf der Fernbedienung Wahlweise können Sie die Lautstärkeregler auf Ihrem TV Ihrer TV Fernbedienung Ihrem Audio Receiver oder Verstärker usw verwend...

Страница 134: ...ie können die PIP Mark Funktion aktivieren deaktivieren um anzuzeigen dass es ein zweites Video gibt das Sie mithilfe der Bild in Bild Funktion ansehen können Siehe Anpassen der Einstellungen Einstellungen Wiedergabe Setup um mehr darüber zu erfahren Um die Zoom Entfernung zu ändern drücken Sie Zoom auf der Fernbedienung Mit jedem folgenden Tastendruck wird die nächste verfügbare Zoom Entfernung a...

Страница 135: ...etup unten Video siehe Video Setup unten Sound siehe Audio Setup unten Netzwerkverbindungen siehe Netzwerk Setup unten oder DN 500BD MKII selbst siehe Geräte Setup unten Um das Einstellungsmenü aufzurufen müssen Sie eine der folgenden Aktionen ausführen Während Sie sich im Home Bildschirm befinden verwenden Sie die linken rechten Cursortasten auf der Fernbedienung um Setting auszuwählen und dann O...

Страница 136: ...ert Sprache o OSD Die Sprache der in den Menüs Bildschirmen Fenstern etc angezeigten Texte am DN 500BD MKII o Menü Die Sprache des Texts der in den Disk Menüs angezeigt wird Die Disk muss die ausgewählte Sprache anzeigen können damit diese Funktion verwendet werden kann o Audio Die Sprache der Audiodaten auf einer Disc Die Disk muss die Audiodaten in der ausgewählten Sprache abspielen können damit...

Страница 137: ...r 50 Hz für Standorte mit dem PAL Standard konvertieren Wenn Off eingestellt ist wird das DN 500BD MKII stets 1080p 24 Hz Bluray Videos mit 24 Hz wiedergeben Ihr Fernsehgerät muss dafür 1080p 24 Hz Bluray Videos unterstützen Wichtig Diese Option gilt nur für den HDMI Ausgang bei einer Auflösung von 1080p o DVD 24p Conversion Wenn dies auf On eingestellt ist wird das DN 500BD MKII die Bildrate von ...

Страница 138: ... Weiß Schwarz Rot Grün Blau Gelb Magenta oder Türkis o Window Opacity Die Deckkraft des Fensters rund um den Text Nicht durchscheinend Durchscheinend oder Transparent Audio Setup Funktion o Secondary Audio Mark Wenn On eingestellt ist wird der Bildschirm eine Markierung anzeigen um darauf hinzuweisen dass es ein sekundäres Audiosignal gibt das Sie mit der Bild in Bild Funktion ansehen können Wenn ...

Страница 139: ...gliche Lautstärke der Audioausgänge und 7 1 Ausgänge 10dB 6dB 0dB 6dB oder 10dB Seien Sie dabei jedoch vorsichtig höhere Lautstärkepegel können Verzerrungen Clipping verursachen die Ihren Verstärker oder die Lautsprecher beschädigen können Wenn die Ausgangslautstärke siehe oben auf Fixed gesetzt ist werden die Audioausgänge und 7 1 Ausgänge die Audiosignale in dieser Lautstärke wiedergeben Netzwer...

Страница 140: ...Configuration Protocol DHCP Wenn Off eingestellt ist müssen Sie die IP Adresse Subnetzmaske Standard Gateway DNS1 und DNS2 manuell eingeben Mit den linken rechten Cursortasten können Sie zwischen den Rechtecken navigieren Verwenden Sie die Zifferntasten 0 9 um Nummern für jedes Rechteck auszuwählen Drücken Sie die Down Cursortaste um eine Nummer zu löschen Drücken Sie OK um die gesamte Adresse zu ...

Страница 141: ...len Einstellungen beizubehalten Wenn Sie OK auswählen werden Sie den Initial Wizard Bildschirm sehen wie beim ersten Setup des DN 500BD MKII o Serial Bit Rate Wählen Sie die serielle Bitrate 9600 38400 oder 115200 Optionen Im Optionenmenü können Sie bestimmte Einstellungen während der Wiedergabe ändern ohne das Einstellungsmenü aufzurufen Das Menü wird auf der linken Seite des Bildschirms angezeig...

Страница 142: ...ügbar Subtitles Die verfügbaren Einstellungen hängen von den unterstützten Untertitelsprachen des Videos ab Subtitle Style Die verfügbaren Einstellungen hängen von den unterstützten Untertitelsprachen des Videos ab Second video PIP Verwenden Sie diese Option um die Bild in Bild Funktion zu aktivieren On oder zu deaktivieren Off Mit dieser Funktion können Sie zusätzliche Inhalte in einem kleinen Bi...

Страница 143: ...ab Zum Beispiel können Sie bei einer Video Datei Stereo Mono Links oder Rechts wählen während Sie bei einer Blu ray Disc DTS HD MA Master Audio oder Dolby Digital in verschiedenen Sprachen wählen können Subtitles Die verfügbaren Einstellungen hängen von den unterstützten Untertitelsprachen des Videos ab Bitrate Verwenden Sie diese Option um die aktuelle Video oder Audio Bitrate anzuzeigen Ins Sear...

Страница 144: ... ist die aktuell wiedergegebene Bilddatei die Sie ändern können Die Nummer auf der rechten Seite ist die Gesamtzahl der Videodateien im Ordner Mode Verwenden Sie diese Option um einen Wiedergabemodus auszuwählen Normal Random oder Shuffle Slide Show Rate Verwenden Sie diese Option um die Geschwindigkeit für die Diashow auszuwählen Slow Middle medium oder Fast Transition Verwenden Sie diese Option ...

Страница 145: ...pg m2ts ogm rmvb tp ts wmv ass smi srt ssa sub Audio ape flac m4a AAC mp3 wav Picture gif jpg or jpeg png Supported File Systems FAT16 FAT32 NTFS SD card with 128 GB total capacity USB drive mass storage class with 2 TB total capacity Video Resolutions Auto 480i 576i 480p 576p 720p 1080i 1080p Aspect Ratios 16 9 Full 16 9 Normal 4 3 Pan Scan 4 3 Letterbox System NTSC PAL Multi if supported by TV H...

Страница 146: ...ial Remote Connector 9 pin D Sub female RS 232C Mode Full duplex Baud Rate 9600 38400 or 115200 bps selectable Ethernet Connector LAN port Standards Ethernet 10 Mbps Fast Ethernet 100 Mbps Other General Connections 2 XLR audio outputs L R balanced 2 RCA audio outputs L R unbalanced 8 RCA audio outputs 7 1 surround sound 1 Coaxial digital audio output 1 HDMI audio visual output 1 LAN port 1 9 pin D...

Страница 147: ...ered trademarks of DivX LLC and its affiliates in the United States and other countries and is used under license DTS HD Master Audio and the Symbol are trademarks or registered trademarks and is a trademark of DTS Inc The terms HDMI and the HDMI Logo are trademarks or registered trademarks of HDMI Licensing LLC in the United States and other countries Java is a registered trademark of Oracle and ...

Страница 148: ...denonpro com Manual Version 1 1 ...

Отзывы: