Cleaning Instructions
Proper cleaning and maintenance is imperative as well as protection from rough use and improper storage.
Cleaning with a low-alcohol (<25%) solution is recommended. If using spray cleaner, do not spray liquid directly on the unit.
Instead, spray onto a soft no-scratch cleaning cloth, such as the one provided, and wipe the product as per the solutions'
directions for use. Using paper products can scratch lenses. Should you have any questions, please call DenMat Customer
Care at 800-433-6628.
CAUTION
• DO NOT SUBMERGE PRODUCT OR SUBJECT TO SURFACE SATURATION WITH ANY LIQUID OR ULTRASONIC
CLEANER. YOUR PRODUCT IS NOT WATERPROOF.
• DO NOT USE WITH ANY POWER ADAPTER, CHARGER CORD, OR BATTERY PACK OTHER THAN PROVIDED BY
DENMAT.
• DO NOT STERILIZE VIA AUTOCLAVE, CHEMICLAVE, GLUTARALDEHYDE, IODOPHOR, OR ANY OTHER
STERILIZATION METHOD.
• NO MODIFICATION OF THIS EQUIPMENT IS ALLOWED.
• THIS UNIT CONTAINS A LITHIUM-ION BATTERY. AS A RESULT PLEASE BE SURE TO NOT STORE THE UNIT
UNCHARGED FOR AN EXTENDED PERIOD OF TIME AS THIS MAY CAUSE THE BATTERY TO DISCHARGE AND
REDUCE THE LIFETIME OF THE UNIT.
Device Description and Intended Use
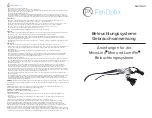
PeriOptix headlights are fully portable lighting systems worn by the operator and are intended to illuminate the working
area. They can be worn on a headband or attached to all types of magnification loupes. They are powered by a small,
lightweight battery pack that is clipped to the operator’s waist. The rechargeable lithium-ion battery provides
8-10 hours of bright, focused light between charges.
Operating Environment:
• 10° - 30°C (50° - 86°F)
• 95% or less relative humidity
• 70kPa – 106kPa
Transport/Storage:
• 0° - 40°C (32° - 104°F)
• 95% or less relative humidity
• 70kPa – 106kPa
Replacement Parts
MicroLine Mini
Headlight System
LumiPro
Headlight System
Lamp Head
LED4-2
LED6
Replacement Lamp Head Cable
LED4-C
LED6-C
Curing Filter
LED4-F4
LED6-F
Battery Pack
LED4-BP1A
LED6-BP1A
Battery Pack Charger Cord
LED-BP-CC
Battery Pack Charger Adapter
LED-BP-CA
7
3
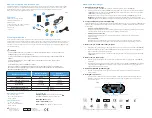
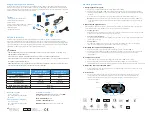
FIG. 1
Den-Mat Holdings, LLC
1017 W. Central Avenue
Lompoc, CA 93436 USA
MDSS GmbH
Schiffgraben 41
30175 Hannover, Germany
2
5a
Contents
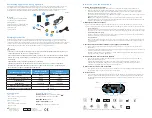
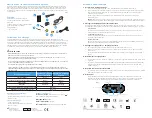
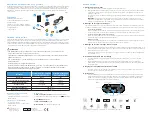
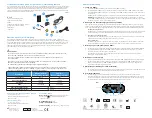
1. Battery pack charger adapter
2. Battery pack charger cord
3. Battery pack
4. Lamp head with cable. (a. Mini b. LumiPro)
5. Curing filter (a. Mini b. LumiPro)
6. Elastic strap
7. Shirt clip
6
1
4a
5b
4b
Technical Data:
Headlight System:
Internally powered by 3.7Vdc ( ),
6700 mAH rechargeable lithium-ion battery pack
Mini (LED4-BP1A):
540mA
LumiPro (LED6-BP1A):
470mA
Power Supply:
100 – 240Vac(
~
), 50/60 Hz, 0.5A
Naudojimo instrukcijos
1. Akumuliatoriaus įkrovimas
a. Kroviklio laidą (1 PAV., 2 ELEMENTAS) prijunkite prie kroviklio adapterio (1 PAV., 1 ELEMENTAS).
b. Prijunkite kroviklio adapterį (1 PAV., 1 ELEMENTAS) prie maitinimo lizdo ir prijunkite prie akumuliatoriaus (1 PAV.,
3 ELEMENTAS) įkrovos prievado (2 PAV., 1 ELEMENTAS). Pradės mirksėti žalia įkrovos būsenos lemputė (2 PAV.,
6 ELEMENTAS), rodanti, kad įkrova prasidėjo.
c. Kai akumuliatorius iki galo įkraunamas, žalia įkrovos būsenos lemputė (2 PAV., 6 ELEMENTAS) dega nuolat.
PASTABA Kai akumuliatoriuje likę 10 % ar mažiau galios, įsijungia raudonas akumuliatoriaus indikatorius (2 PAV.,
4 ELEMENTAS). Mažos įkrovos indikatorius išsijungia, kai akumuliatorius kraunamas ir pasiekia daugiau nei 10 % įkrovos.
2. Lempos pritaisymas prie didinamųjų stiklų
Pritaisykite galvos lempą prie didinamųjų stiklų naudodami pateiktą laikiklį ir techninę įrangą, jei įsigijote su didinamaisiais
stiklais. Jei lempa buvo įsigyta jau turint didinamuosius stiklus, susisiekite su „DenMat“ ir užsisakykite tinkamą laikiklį bei
techninę įrangą.
a. Atverčiamojo stiliaus didinamieji stiklai
Pastumkite spaustuką, esantį ant priekinio didinamųjų stiklų strypelio taip, kad viena apskrita išpjova būtų viršuje,
o kita išpjova būtų strypelio apačioje. Spaustukas turi patikimai įsitvirtinti vietoje.
b. Didinamieji stiklai su lęšiais (TTL)
Sulygiuokite laikiklio varžtų angas su korpuse išgręžtomis skylėmis. Pateiktu „Phillips“ atsuktuvu tvirtai
priveržkite varžtus.
c. Universalus laikiklis
Atidarykite spaustuką ir stumkite žemyn virš nosies tiltelio. Apmuštos spaustuko svirtelės turėtų sugriebti
kiekvienoje akinių stiklų pusėje. Priveržkite sparnuotąjį varžtą, kad pritvirtintumėte spaustuką prie korpuso.
3. Galvos lempos ir akumuliatoriaus įtaisymas
a. Pritaisykite galvos lempos kabelį prie didinamųjų stiklų korpusų maža elastinga juostele. (1 PAV., 6 ELEMENTAS).
b. Naudokite marškinėlių spaustuką (1 PAV., 7 ELEMENTAS), esantį ant galvos lempos kabelio, kad pritaisytumėte
laidą prie marškinėlių arba laboratorinio chalato.
c. Pritvirtinkite akumuliatorių prie diržo arba kišenės, prijunkite galvos lempos kabelį prie lempos prievado (2 PAV.,
3 ELEMENTAS).
4. Galvos lempos naudojimas
a. Norėdami įjungti / išjungti galvos lempą, paspauskite ir palaikykite maitinimo mygtuką (2 PAV., 2 ELEMENTAS)
2 sekundes.
b. Pareguliuokite galvos lempos intensyvumą paliesdami maitinimo mygtuką (2 PAV., 2 ELEMENTAS). Intensyvumo
indikatoriai (2 PAV., 5 ELEMENTAS) nurodo galvos lempos intensyvumą. Kiekviena intensyvumo indikatoriaus
lemputė atitinka 25 % viso intensyvumo.
5. Pareguliuokite LED spindulio kryptį
a. Norėdami pareguliuoti galvos lempos padėtį, pateiktu „Phillips“ atsuktuvu priveržkite arba atlaisvinkite du
mažus varžtelius.
6. Atsargumo priemonės
a. Jei su prietaisu bus naudojami kitokie kroviklio adapteriai ir laidai, gali padidėti spinduliuotė arba sumažėti
atsparumas ir sistema neatitiks IEC 60601-1-2 reikalavimų. Galvos lempoms galima naudoti tik su prietaisu
gautą maitinimo šaltinį.
Dėl simbolių apibrėžimų apsilankykite adresu denmat.com/symbols
3
Galvos lempos prievadas
2
Jutiklinis
1
Įkrovos prievadas
6
Įkrovos būsena
4
Mažos akumuliatoriaus įkrovos indikatorius
5
Intensyvumo indikatorius
2 PAV.
32 °F
0 °C
40 °C
104 °F

