Replacing Fans: Dell XPS 430 Service Manual
fans.htm[4/15/2014 11:28:31 AM]
4. If present on your computer, remove the card retention bracket (see
Removing PCI and PCI Express Cards
).
5. Lift the processor airflow shroud out of the computer, and set it aside.
6. To replace the processor airflow shroud, align the hinge slots on the processor airflow shroud with the hinge guides on
the system board.
7. Align the other side of the processor airflow shroud towards the processor fan, and then tighten the two captive screws.
8. If you removed a card retention bracket, snap it back into place (see
Installing PCI and PCI Express Cards
).
9. Replace the computer cover (see
).
10. Connect your computer and devices to electrical outlets, and turn them on.
Replacing the Processor Fan Cage
.
2. Remove the computer cover (see
3. Remove the processor airflow shroud (see
Replacing the Processor Airflow Shroud Assembly
).
4. Disconnect the processor fan cable from the FAN_CPU connector on the system board (see
).
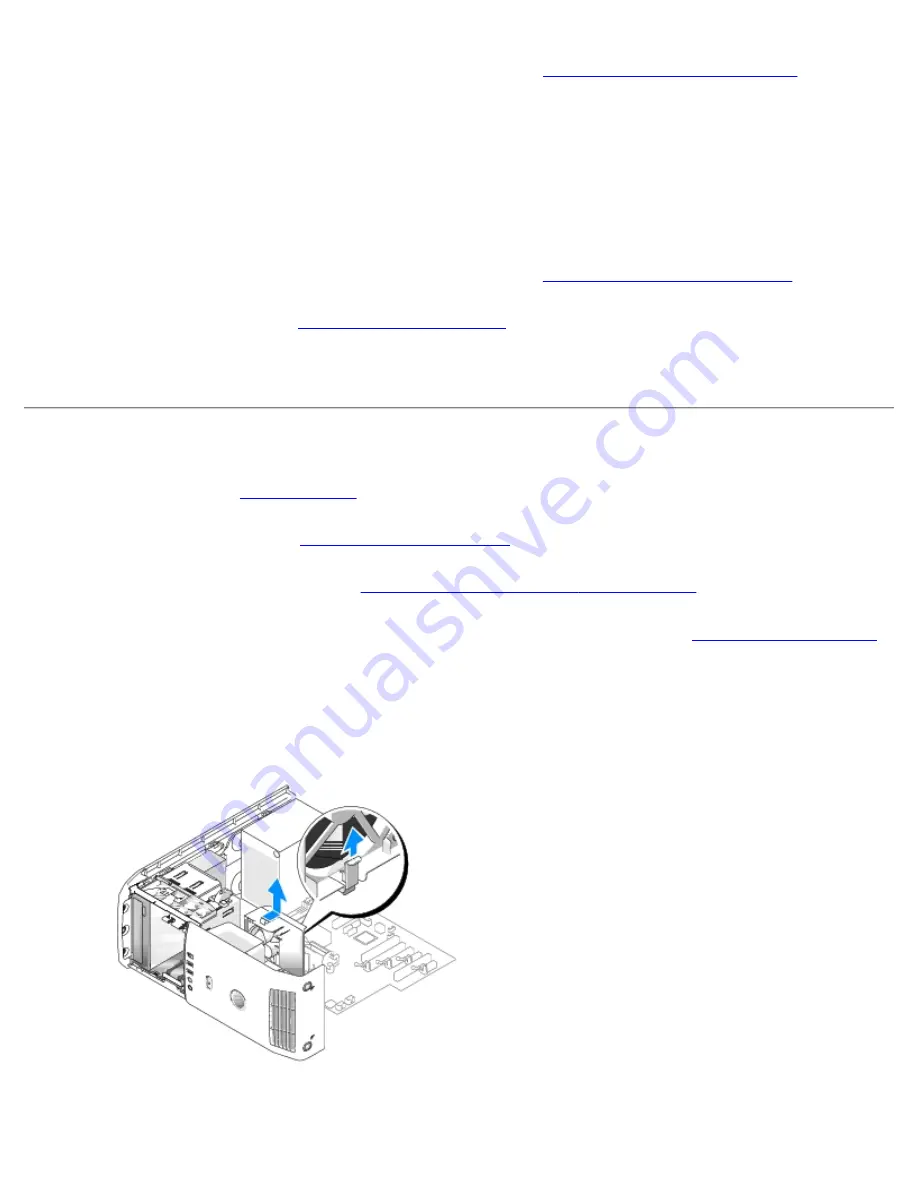
5. Lift and hold the release tab present at the bottom of the processor fan cage, press down on top of the cage and slide it
towards the back of the computer.
6. Ease the cage out of the housing.
7. To replace the processor fan cage, orient the processor fan power cable downward; insert the tabs along the bottom of
the processor fan cage into the corresponding slots on the cage housing and slide the processor fan cage towards the
front of the computer, until it snaps into place.


