2
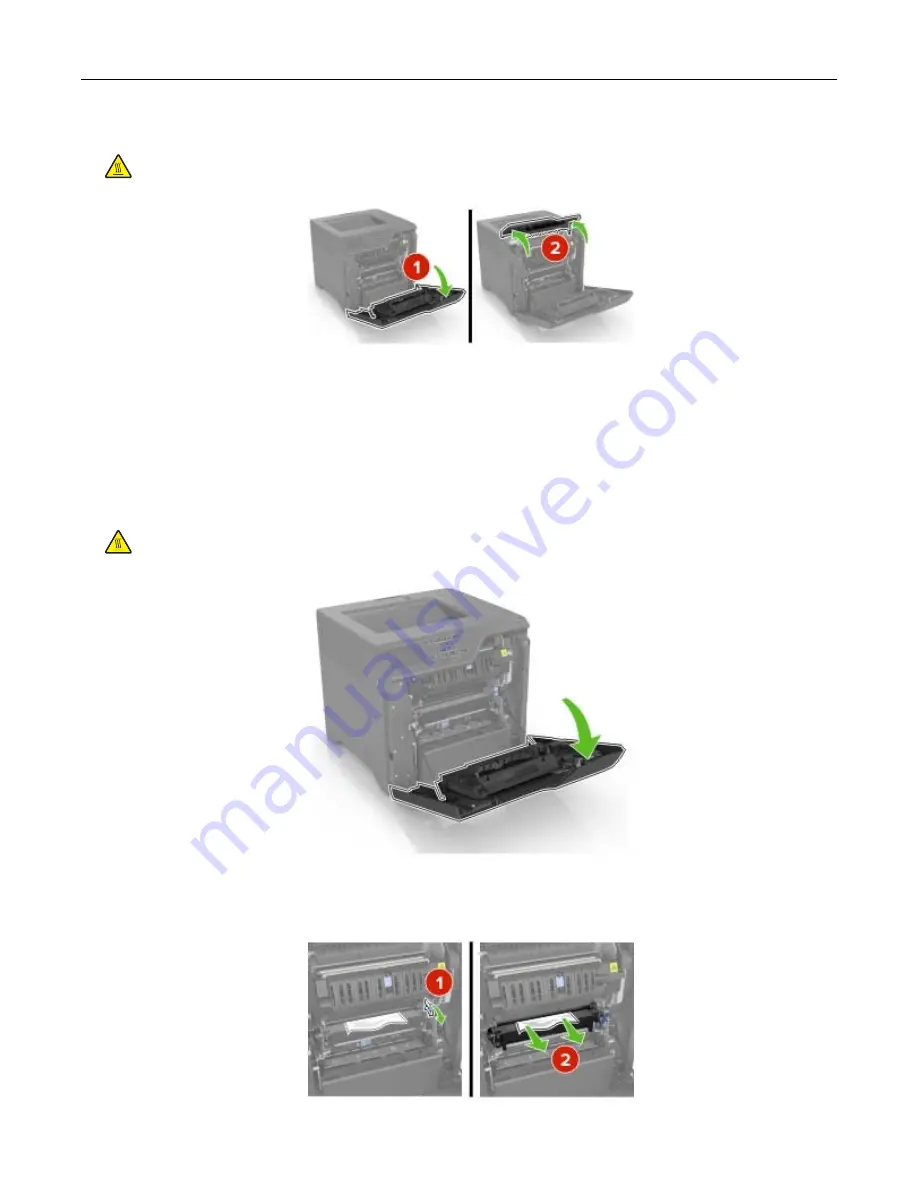
Open doors A and D, and then remove any paper fragments.
CAUTION—HOT SURFACE:
The inside of the printer might be hot. To reduce the risk of injury from a
hot component, allow the surface to cool before touching it.
3
Close doors D and A.
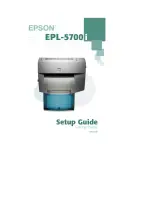
Paper jam in door A
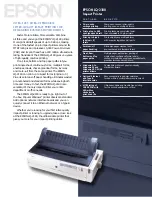
Paper jam in the fuser
1
Open door A.
CAUTION—HOT SURFACE:
The inside of the printer might be hot. To reduce the risk of injury from a
hot component, allow the surface to cool before touching it.
2
Remove the jammed paper.
Note:
Make sure that all paper fragments are removed.
Clearing jams
59
Содержание S5840cdn
Страница 33: ...Replacing the imaging unit 1 Open door B 2 Remove the waste toner bottle Maintaining the printer 33 ...
Страница 36: ...9 Insert the imaging kit 10 Insert the waste toner bottle 11 Close door B Maintaining the printer 36 ...
Страница 37: ...Replacing the imaging kit 1 Open door B 2 Remove the waste toner bottle Maintaining the printer 37 ...
Страница 40: ...9 Insert the new imaging kit 10 Insert the waste toner bottle 11 Close door B Maintaining the printer 40 ...
Страница 44: ...3 Remove the pick roller 4 Unpack the new pick roller Maintaining the printer 44 ...
Страница 54: ...3 Follow the instructions on the computer screen Maintaining the printer 54 ...
Страница 96: ...5 ISP extended cable 4 Install the ISP into its housing Upgrading and migrating 96 ...
Страница 97: ...5 Attach the housing to the controller board access cover Upgrading and migrating 97 ...
Страница 103: ...5 Open door B 6 Open door C Upgrading and migrating 103 ...


