background image

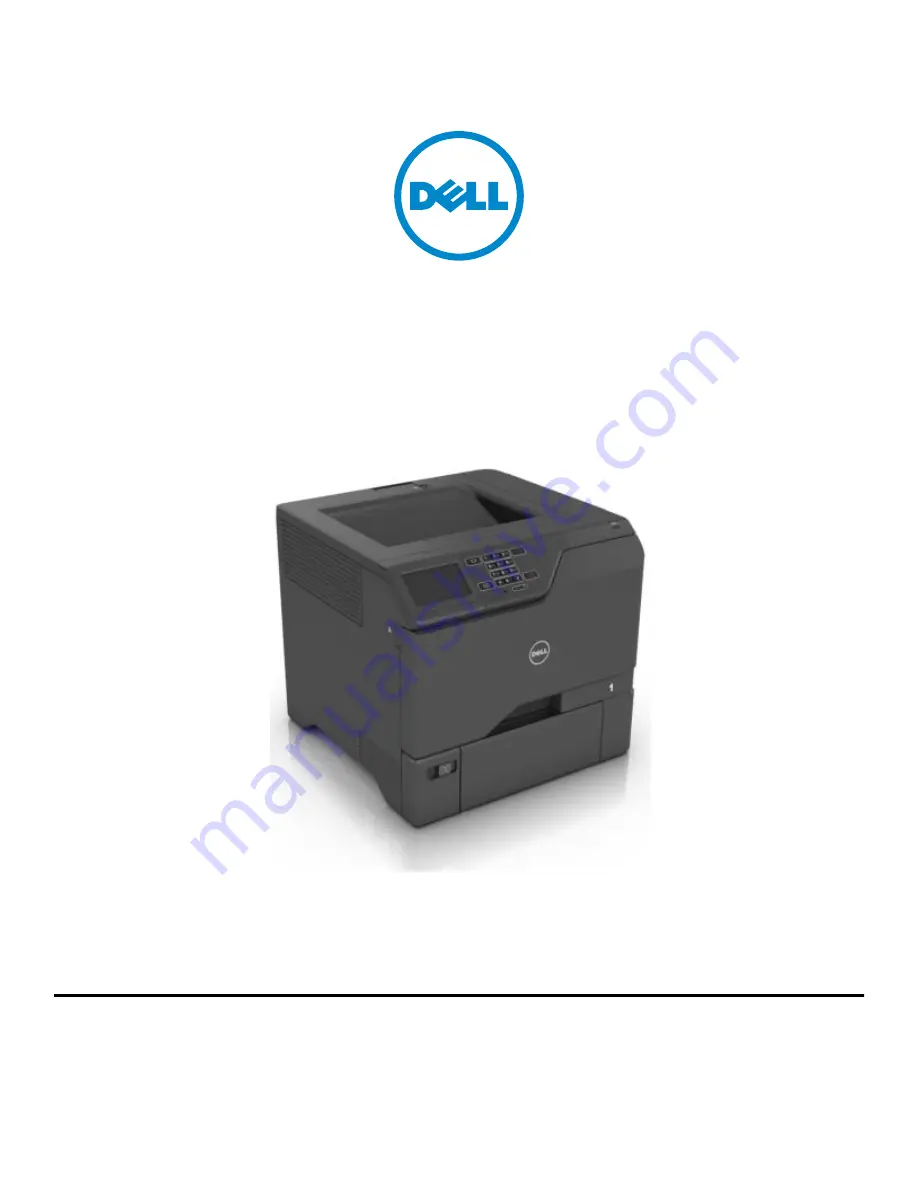
Dell S5840cdn Laser Printer

User's Guide

May 2016

Trademarks

Information in this document is subject to change without notice.

© 2016 Dell, Inc. All rights reserved.

Reproduction of this material in any manner whatsoever without the written permission of Dell Inc. is strictly forbidden.

Trademarks used in this text: 

Dell

 and the 

DELL

 logo are trademarks of Dell Inc.; 

Microsoft

 and 

Windows

 are registered trademarks of Microsoft Corporation; 

AirPrint

,

the 

AirPrint

 logo, 

Mac

, and the 

Mac

 logo are trademarks of Apple, Inc.; 

Mopria

®, the 

Mopria

® logo, and the 

Mopria

® 

Alliance

 logo are registered trademarks and service

marks of Mopria Alliance, Inc. in the United States and other countries. Unauthorized use is strictly prohibited. 

Google Cloud Print

 is a trademark of Google Inc.

Other trademarks and trade names may be used in this document to refer to the entities claiming the marks and names of their products. Dell Inc. disclaims any
proprietary interest in trademarks and trade names other than its own.

Содержание S5840cdn

Страница 1: ...tered trademarks of Microsoft Corporation AirPrint the AirPrint logo Mac and the Mac logo are trademarks of Apple Inc Mopria the Mopria logo and the Mopria Alliance logo are registered trademarks and service marks of Mopria Alliance Inc in the United States and other countries Unauthorized use is strictly prohibited Google Cloud Print is a trademark of Google Inc Other trademarks and trade names m...

Страница 2: ...stomizing the home screen 16 Using Display Customization 16 Setting up Forms and Favorites 16 Configuring Eco Settings 17 Loading paper and specialty media 18 Setting the size and type of the specialty media 18 Configuring Universal paper settings 18 Loading trays 18 Loading the multipurpose feeder 20 Linking trays 21 Printing 22 Printing from a computer 22 Printing forms 22 Printing from a flash dri...

Страница 3: ...Statement of Volatility 28 Maintaining the printer 29 Networking 29 Setting up serial printing Windows only 30 Cleaning the printer 31 Ordering supplies 31 Replacing parts and supplies 32 Moving the printer 52 Saving energy and paper 53 Recycling 53 Clearing jams 55 Avoiding jams 55 Identifying jam locations 56 Paper jam in trays 57 Paper jam in the multipurpose feeder 58 Paper jam in the standard...

Страница 4: ...Color quality problems 88 Contacting technical support 90 Upgrading and migrating 92 Hardware 92 Software 106 Firmware 106 Appendix 108 Index 110 Contents 4 ...

Страница 5: ...rmance CAUTION SHOCK HAZARD To avoid the risk of electrical shock do not place or use this product near water or wet locations CAUTION SHOCK HAZARD To avoid the risk of electrical shock do not set up this product or make any electrical or cabling connections such as the power cord fax feature or telephone during a lightning storm CAUTION POTENTIAL INJURY Do not cut twist bind crush or place heavy ...

Страница 6: ...ance around the printer CAUTION TIPPING HAZARD Installing one or more options on your printer or MFP may require a caster base furniture or other feature to prevent instability causing possible injury For more information on supported configurations contact the place where you purchased the printer CAUTION TIPPING HAZARD To reduce the risk of equipment instability load each tray separately Keep all...

Страница 7: ...ormal operation and may be equipped with a filter designed to limit ozone concentrations to levels well below the recommended exposure limits To avoid high ozone concentration levels during extensive usage install this product in a well ventilated area and replace the ozone and exhaust filters if instructed to do so in the product maintenance instructions If there are no references to filters in the ...

Страница 8: ...ecting and storing paper and specialty media Loading paper Configuring printer settings Viewing and printing documents and photos Setting up and using the printer software Configuring the printer on a network Caring for and maintaining the printer Troubleshooting and solving problems User s Guide and Quick Reference Guide The guides are available on the Software CD For more information go to www del...

Страница 9: ...tag and express service code appear on labels on the printer Software and Drivers Certified drivers for your printer and installers for Dell printer software Readme files Last minute technical changes or advanced technical reference materials for experienced users or technicians Software CD Supplies and accessories for your printer Replacement cartridges www dell com printers You can purchase printe...

Страница 10: ...ure that airflow in the room meets the latest revision of the ASHRAE 62 standard or the CEN Technical Committee 156 standard Provide a flat sturdy and stable surface Keep the printer Clean dry and free of dust Away from stray staples and paper clips Away from the direct airflow of air conditioners heaters or ventilators Free from direct sunlight and humidity extremes Observe the recommended temperatu...

Страница 11: ...t instability load each tray separately Keep all other trays closed until needed You can configure your printer by adding three optional 550 sheet trays Note You can place a custom label on the left side of the tray number 1 Standard bin 2 650 sheet duo tray 3 Optional 550 sheet trays 4 Control panel Attaching cables CAUTION SHOCK HAZARD To avoid the risk of electrical shock do not set up this prod...

Страница 12: ...s product or the manufacturer s authorized replacement Warning Potential Damage Do not touch the USB cable any wireless network adapter or the printer in the area shown while actively printing Loss of data or a malfunction can occur Use the To 1 Ethernet port Connect the printer to a network 2 USB port Attach a keyboard or any compatible option 3 USB printer port Connect the printer to a computer ...

Страница 13: ...inter from Sleep or Hibernate mode 5 Stop or Cancel button Stop the current job 6 Indicator light Check the status of the printer 7 Volume buttons Adjust the volume of the headset or speaker 8 Headset or speaker port Attach a headset or speaker 9 Backspace button Move the cursor backward and delete a character in an input field Understanding the status of the power button and indicator light Indica...

Страница 14: ... Status Supplies Show a printer warning or error message whenever the printer requires intervention to continue processing View more information on the printer warning or message and on how to clear it Note You can also access this setting by touching the top section of the home screen 2 Job Queue Show all the current print jobs Note You can also access this setting by touching the top section of ...

Страница 15: ...p Quality Job Accounting Image XPS PDF HTML PostScript PCL PPDS Tray Configuration Media Configuration Bin Configuration Network Overview Wireless AirPrint Ethernet TCP IP IPv6 SNMP 802 1x IPSec LPD Configuration HTTP FTP Settings ThinPrint USB Parallel x Serial Wi Fi Direct Flash Drive Print Security Option Card Menu Reports Help Login Methods Certificate Management Schedule USB Devices Security Audit...

Страница 16: ...ground 2 Select a background to use 3 Apply the changes Setting up Forms and Favorites 1 Open a Web browser and then type the printer IP address in the address field Notes View the printer IP address on the printer home screen The IP address appears as four sets of numbers separated by periods such as 123 123 123 123 If you are using a proxy server then temporarily disable it to load the Web page c...

Страница 17: ...Configuring Eco Settings 1 From the home screen touch Eco Settings 2 Configure the settings 3 Apply the changes Setting up and using the home screen applications 17 ...

Страница 18: ...Configuring Universal paper settings 1 From the home screen touch Settings Paper Media Configuration Universal Setup 2 Configure the settings Loading trays CAUTION TIPPING HAZARD To reduce the risk of equipment instability load each tray separately Keep all other trays closed until needed 1 Remove the tray Note To avoid jams do not remove trays while the printer is busy 2 Adjust the guides to match t...

Страница 19: ...he front of the tray For two sided printing load letterhead facedown with the header toward the back of the tray Do not slide paper into the tray Make sure that the stack height is below the maximum paper fill indicator Overfilling may cause paper jams 5 Insert the tray If necessary set the paper size and type to match the paper loaded in the tray Loading paper and specialty media 19 ...

Страница 20: ...and align the paper edges before loading 4 Load the paper Load paper and card stock with the printable side facedown and the top edge entering the printer first Load envelopes with the flap side up and against the right side of the paper guide Load European envelopes with the flap entering the printer first Loading paper and specialty media 20 ...

Страница 21: ... by periods such as 123 123 123 123 If you are using a proxy server then temporarily disable it to load the Web page correctly 2 Click Settings Paper 3 Match the paper size and type for the trays you are linking Note To unlink trays make sure that no trays have the same paper size or type 4 Save the settings Note You can also change the paper size and type settings from the printer control panel W...

Страница 22: ...igate to Forms and Favorites select form Print 2 If necessary configure the print settings 3 Send the print job Printing from a flash drive 1 Insert a flash drive into the USB port Notes If you insert the flash drive when an error message appears then the printer ignores the flash drive If you insert the flash drive while the printer is processing other print jobs then Busy appears on the display 2 From...

Страница 23: ...ion can occur Supported flash drives and file types Flash drives Notes The printer supports high speed USB flash drives with full speed standard USB flash drives must support the File Allocation Table FAT system Many flash drives are tested and approved for use with the printer For more information go to www dell com support printers File types Documents doc or docx xls or xlsx ppt or pptx pdf xps Imag...

Страница 24: ...int to any Google Cloud Print ready printer 1 From the home screen of your mobile device launch an enabled application 2 Tap Print and then select the printer 3 Send the print job Printing from a mobile device using AirPrint AirPrintTM is a mobile printing solution that allows you to print directly from Apple devices to an AirPrint certified printer Note This application is supported only in some A...

Страница 25: ...re verify jobs are deleted from the printer memory Note Verify jobs print one copy to check if it is satisfactory before printing the remaining copies Reserve Job Expiration Set the amount of time before reserved jobs are deleted without being printed Note Reserve held jobs are automatically deleted after printing Printing held jobs 1 With a document open select File Print 2 Select the printer and...

Страница 26: ...etting by touching the top section of the home screen 2 Select the job to cancel From the computer 1 Depending on the operating system do either of the following Open the printers folder and then select your printer From the System Preferences in the Apple menu navigate to your printer 2 Select the job to cancel Printing 26 ...

Страница 27: ...s process can take from several minutes to more than an hour making the printer unavailable for other tasks Configuring printer hard disk encryption 1 From the home screen touch Settings Security Disk Encryption Start Encryption Note Enabling disk encryption erases the contents of the hard disk If necessary back up important data from the printer before starting the encryption 2 Follow the instruct...

Страница 28: ...commissioned The printer hard disk is being replaced The printer is being moved to a different department or location The printer is being serviced by someone from outside your organization The printer is being removed from your premises for service The printer is being sold to another organization Disposing of a printer hard disk Note Some printer models may not have a printer hard disk installed...

Страница 29: ...ings Network Ports Wireless Wi Fi Protected Setup Start Push Button Method 2 Follow the instructions on the display Using the personal identification number PIN method 1 From the control panel navigate to Settings Network Ports Wireless Wi Fi Protected Setup Start PIN Method 2 Copy the eight digit WPS PIN 3 Open a Web browser and then type the IP address of your access point in the address field Not...

Страница 30: ...he IP address 5 Apply the changes For Macintosh users 1 From System Preferences in the Apple menu navigate to the list of printers and then select IP 2 Type the IP address in the address field 3 Apply the changes Setting up serial printing Windows only 1 Set the parameters in the printer a From the control panel navigate to the menu for the port settings b Locate the menu for the serial port settin...

Страница 31: ... not use household cleaners or detergents as they may damage the finish of the printer Make sure that all areas of the printer are dry after cleaning 5 Connect the power cord to the electrical outlet and then turn on the printer CAUTION POTENTIAL INJURY To avoid the risk of fire or electrical shock connect the power cord to an appropriately rated and properly grounded electrical outlet that is near ...

Страница 32: ...lacing parts and supplies Replacing a toner cartridge 1 Open door B 2 Remove the toner cartridge 3 Unpack the new toner cartridge 4 Insert the new toner cartridge 5 Close door B Maintaining the printer 32 ...

Страница 33: ...Replacing the imaging unit 1 Open door B 2 Remove the waste toner bottle Maintaining the printer 33 ...

Страница 34: ...e Do not expose the photoconductor unit to direct light for more than 10 minutes Extended exposure to light may cause print quality problems Warning Potential Damage Do not touch the shiny photoconductor drum under the imaging kit Doing so may affect the quality of future print jobs Maintaining the printer 34 ...

Страница 35: ...6 Unpack the new imaging unit 7 Insert the new imaging unit 8 Insert the black toner cartridge Maintaining the printer 35 ...

Страница 36: ...9 Insert the imaging kit 10 Insert the waste toner bottle 11 Close door B Maintaining the printer 36 ...

Страница 37: ...Replacing the imaging kit 1 Open door B 2 Remove the waste toner bottle Maintaining the printer 37 ...

Страница 38: ...d yellow developer units 6 Remove the black imaging unit Warning Potential Damage Do not expose the photoconductor unit to direct light for more than 10 minutes Extended exposure to light may cause print quality problems Warning Potential Damage Do not touch the shiny photoconductor drum under the imaging unit Doing so may affect the quality of future print jobs Maintaining the printer 38 ...

Страница 39: ...Note The black imaging unit includes the black developer unit and photoconductor unit 7 Insert the black imaging unit into the new imaging kit 8 Insert the toner cartridges Maintaining the printer 39 ...

Страница 40: ...9 Insert the new imaging kit 10 Insert the waste toner bottle 11 Close door B Maintaining the printer 40 ...

Страница 41: ...Replacing the waste toner bottle 1 Open door B 2 Remove the waste toner bottle 3 Unpack the new waste toner bottle Maintaining the printer 41 ...

Страница 42: ... then unplug the power cord from the electrical outlet 2 Open doors A and D CAUTION HOT SURFACE The inside of the printer might be hot To reduce the risk of injury from a hot component allow the surface to cool before touching it 3 Remove the fuser 4 Unpack the new fuser Maintaining the printer 42 ...

Страница 43: ...o an appropriately rated and properly grounded electrical outlet that is near the product and easily accessible 8 Reset the fuser maintenance counter For more information see Resetting the maintenance counter on page 52 Replacing the pick roller Replacing the pick roller in the 550 sheet tray 1 Turn off the printer and then unplug the power cord from the electrical outlet 2 Remove the tray Maintai...

Страница 44: ...3 Remove the pick roller 4 Unpack the new pick roller Maintaining the printer 44 ...

Страница 45: ...URY To avoid the risk of fire or electrical shock connect the power cord to an appropriately rated and properly grounded electrical outlet that is near the product and easily accessible Replacing the pick roller in the multipurpose feeder 1 Turn off the printer and then unplug the power cord from the electrical outlet 2 Open the multipurpose feeder Maintaining the printer 45 ...

Страница 46: ...the power cord to the electrical outlet and then turn on the printer CAUTION POTENTIAL INJURY To avoid the risk of fire or electrical shock connect the power cord to an appropriately rated and properly grounded electrical outlet that is near the product and easily accessible Replacing the separator bracket 1 Pull out the tray Maintaining the printer 46 ...

Страница 47: ...2 Remove the separator bracket 3 Unpack the new separator bracket 4 Insert the new separator bracket until it clicks into place 5 Insert the tray Maintaining the printer 47 ...

Страница 48: ...Replacing the transfer module 1 Turn off the printer and then unplug the power cord from the electrical outlet 2 Open door B 3 Remove the waste toner bottle Maintaining the printer 48 ...

Страница 49: ...the imaging kit 5 Open door A CAUTION HOT SURFACE The inside of the printer might be hot To reduce the risk of injury from a hot component allow the surface to cool before touching it Maintaining the printer 49 ...

Страница 50: ...6 Remove the transfer module 7 Unpack the new transfer module and then remove the packing material 8 Insert the new transfer module 9 Close door A Maintaining the printer 50 ...

Страница 51: ...he printer CAUTION POTENTIAL INJURY To avoid the risk of fire or electrical shock connect the power cord to an appropriately rated and properly grounded electrical outlet that is near the product and easily accessible 14 Reset the maintenance counter For more information see Resetting the maintenance counter on page 52 Maintaining the printer 51 ...

Страница 52: ...rinter has a caster base then carefully roll it to the new location Use caution when passing over thresholds and breaks in flooring If the printer does not have a caster base but is configured with optional trays then lift the printer off the trays Do not try to lift the printer and the trays at the same time Always use the handholds on the printer to lift it Any cart used to move the printer must h...

Страница 53: ...ernate mode before sending a print job The Embedded Web Server is disabled when the printer is in hibernate mode Adjusting the brightness of printer display 1 From the homes screen touch Settings Preferences Screen Brightness 2 Adjust the setting Conserving supplies Print on both sides of the paper Note Two sided printing is the default setting in the print driver Print multiple pages on a single ...

Страница 54: ...3 Follow the instructions on the computer screen Maintaining the printer 54 ...

Страница 55: ...e stack height is below the maximum paper fill indicator Do not slide paper into the tray Load paper as shown in the illustration Make sure that the paper guides are positioned correctly and are not pressing tightly against the paper or envelopes Push the tray firmly into the printer after loading paper Use recommended paper Use only recommended paper or specialty media Do not load paper that is wri...

Страница 56: ...nter control panel Store paper according to manufacturer recommendations Identifying jam locations Notes When Jam Assist is set to On the printer flushes blank pages or pages with partial prints after a jammed page has been cleared Check your printed output for blank pages When Jam Recovery is set to On or Auto the printer reprints jammed pages Jam locations 1 Standard bin 2 Fuser 3 Trays 4 Duplex ...

Страница 57: ...amage A sensor inside the optional tray is easily damaged by static electricity Touch a metal surface before removing the jammed paper in the tray 2 Remove the jammed paper Note Make sure that all paper fragments are removed 3 Insert the tray Clearing jams 57 ...

Страница 58: ... multipurpose feeder 2 Pull out the tray 3 Remove the jammed paper Note Make sure that all paper fragments are removed 4 Insert the tray Paper jam in the standard bin 1 Remove the jammed paper Note Make sure that all paper fragments are removed Clearing jams 58 ...

Страница 59: ...low the surface to cool before touching it 3 Close doors D and A Paper jam in door A Paper jam in the fuser 1 Open door A CAUTION HOT SURFACE The inside of the printer might be hot To reduce the risk of injury from a hot component allow the surface to cool before touching it 2 Remove the jammed paper Note Make sure that all paper fragments are removed Clearing jams 59 ...

Страница 60: ...re that all paper fragments are removed 5 Close door A Paper jam in the duplex unit 1 Open door A CAUTION HOT SURFACE The inside of the printer might be hot To reduce the risk of injury from a hot component allow the surface to cool before touching it Clearing jams 60 ...

Страница 61: ...2 Open the duplex cover 3 Remove the jammed paper Note Make sure that all paper fragments are removed 4 Close the duplex cover and door A Clearing jams 61 ...

Страница 62: ...ppears as four sets of numbers separated by periods such as 123 123 123 123 Is the printer IP address correct Go to step 3 Type the correct printer IP address in the address field Note Depending on the network settings you may need to type https instead of http before the printer IP address to access the Embedded Web Server Step 3 Check if the printer is on Is the printer on Go to step 4 Turn on th...

Страница 63: ...p 2 The problem is solved Step 2 Check if the flash drive is supported For more information see Supported flash drives and file types on page 23 Does the error message still appear Go to step 3 The problem is solved Step 3 Check if the front USB port is disabled For more information see Enabling the USB port on page 63 Does the error message still appear Contact technical support The problem is solve...

Страница 64: ...is installed in the appropriate connector in the controller board c Connect the power cord to the electrical outlet and then turn on the printer CAUTION POTENTIAL INJURY To avoid the risk of fire or electrical shock connect the power cord to an appropriately rated and properly grounded electrical outlet that is near the product and easily accessible Does the internal option operate correctly The pr...

Страница 65: ...ceptacle of the controller board Does the ISP operate correctly The problem is solved Contact technical support Parallel or serial interface card does not operate correctly Action Yes No Step 1 Print a menu settings page and then check if the parallel or serial interface card appears in the Installed Features list Is the parallel or serial interface card listed in the Installed Features list Go to...

Страница 66: ...p 1 a From the home screen touch Settings Print Layout Collate b Set Collate to 1 2 3 1 2 3 c Resend the print job Is the document printed and collated correctly The problem is solved Go to step 2 Step 2 a From the printer software set Collate to 1 2 3 1 2 3 b Resend the print job Is the document printed and collated correctly The problem is solved Go to step 3 Step 3 a Reduce the number of pages ...

Страница 67: ...ep 3 The problem is solved Step 3 a Remove paper from the tray and then turn it over b Resend the print job Is the paper still curled Go to step 4 The problem is solved Step 4 a Load paper from a fresh package Note Paper absorbs moisture due to high humidity Store paper in its original wrapper until you are ready to use it b Resend the print job Is the paper still curled Contact technical support ...

Страница 68: ...itioned correctly Make sure that the stack height is below the maximum paper fill indicator Make sure to print on recommended paper size and type c Insert the tray d Print the document Do paper jams still occur frequently Go to step 2 The problem is solved Step 2 a From the Paper menu on the control panel check if the printer is detecting the correct paper size b Resend the print job Do paper jams ...

Страница 69: ...onding on page 86 Job prints from the wrong tray or on the wrong paper on page 87 Confidential and other held documents do not print Action Yes No Step 1 a From the control panel check if the documents appear in the Held Jobs list Note If the documents are not listed then print the documents using the Print and Hold options b Print the documents Are the documents printed The problem is solved Go to...

Страница 70: ...he job individually Are the documents printed The problem is solved Go to step 4 Step 4 a Delete some held jobs to free up printer memory b Resend the print job Are the documents printed The problem is solved Go to step 5 Step 5 a Add printer memory b Resend the print job Are the documents printed The problem is solved Contact technical support Slow printing Action Yes No Step 1 a Make sure that t...

Страница 71: ...p 5 The problem is solved Step 5 a Connect the printer cable securely to the printer and the computer print server option or other network device b Resend the print job Is the printer still printing slow Go to step 6 The problem is solved Step 6 a From the Quality menu on the control panel set the Print Resolution to 4800CQ b Resend the print job Is the printer still printing slow Go to step 7 The...

Страница 72: ...the document printed The problem is solved Go to step 3 Step 3 a Check if the ports are working and if the cables are securely connected to the computer and the printer For more information see the setup documentation that came with the printer b Resend the print job Is the document printed The problem is solved Go to step 4 Step 4 a Turn off the printer wait for about 10 seconds and then turn it ...

Страница 73: ...exposure to light may cause print quality problems Warning Potential Damage To avoid damage do not touch the underside of the imaging unit or imaging kit b Resend the print job Is the printer still printing blank or white pages Go to step 2 The problem is solved Step 2 Replace the imaging unit or imaging kit and then resend the print job Is the printer still printing blank or white pages Contact t...

Страница 74: ...d weight from the Printing Preferences or Print dialog Notes Make sure that the settings match the paper loaded in the tray You can also change the settings on the printer control panel b Resend the print job Is the print still too dark Go to step 4 The problem is solved Step 4 Make sure that the paper has no texture or rough finishes Are you printing on textured or rough paper Change the texture s...

Страница 75: ... Go to step 2 The problem is solved Step 2 a Depending on your operating system specify the paper type and weight from the Printing Preferences or Print dialog Notes Make sure that the settings match the paper loaded in the tray You can also change the settings on the printer control panel b Resend the print job Do ghost images still appear on prints Go to step 3 The problem is solved Step 3 a Fro...

Страница 76: ...se print quality problems Warning Potential Damage To avoid damage do not touch the underside of the imaging unit or imaging kit b Resend the print job Does gray background still appear on prints Contact technical support The problem is solved Horizontal dark lines Note If horizontal dark lines keep appearing on your prints then see the Repeating defects topic Action Yes No Step 1 a Depending on y...

Страница 77: ...ou use it b Resend the print job Do horizontal dark lines still appear on prints Go to step 4 The problem is solved Step 4 a Remove and then reinstall the imaging unit or imaging kit Warning Potential Damage Do not expose the imaging unit or imaging kit to direct light for more than 10 minutes Extended exposure to light may cause print quality problems Warning Potential Damage To avoid damage do n...

Страница 78: ...recommended paper type b Resend the print job Do horizontal white lines still appear on prints Go to step 3 The problem is solved Step 3 a Remove and then reinstall the imaging unit or imaging kit Warning Potential Damage Do not expose the imaging unit or imaging kit to direct light for more than 10 minutes Extended exposure to light can cause print quality problems Warning Potential Damage To avo...

Страница 79: ... the correct paper size b Resend the print job Are the margins correct The problem is solved Go to step 3 Step 3 a Depending on your operating system specify the paper size from the Printing Preferences or Print dialog Notes Make sure that the settings match the paper loaded in the tray You can also change the settings on the printer control panel b Resend the print job Are the margins correct The...

Страница 80: ...gged or uneven characters Contact technical support The problem is solved Light print Action Yes No Step 1 a From the Quality menu on the control panel select Color Adjust b Resend the print job Is the print still too light Go to step 2 The problem is solved Step 2 a Depending on your operating system increase the toner darkness from the Printing Preferences or Print dialog Note You can also chang...

Страница 81: ...that the paper has no texture or rough finishes Are you printing on textured or rough paper Change the texture settings to match the paper you are printing on Go to step 5 Step 5 a Load paper from a fresh package Note Paper absorbs moisture due to high humidity Store paper in its original wrapper until you are ready to use it b Resend the print job Is the print still too light Go to step 6 The prob...

Страница 82: ... Yes No 1 From the control panel touch Help Supplies Guide 2 Measure the distance between the defects If the distance between the defects equals 43 90 mm 1 73 in or 45 50 mm 1 79 in then call technical support to replace the developer unit of the color where defects are seen If the distance between defects of a single color equals 94 20 mm 3 7 in 29 80 mm 1 17 in or 25 10 mm 0 99 in then replace t...

Страница 83: ...ems Warning Potential Damage To avoid damage do not touch the underside of the imaging unit or imaging kit b Resend the print job Is the printer still printing solid color or black images Contact technical support The problem is solved Text or images cut off Action Yes No Step 1 a Move the paper guides in the tray to the correct position for the paper loaded b Resend the print job Is the page or i...

Страница 84: ... 10 minutes Extended exposure to light may cause print quality problems Warning Potential Damage To avoid damage do not touch the underside of the imaging unit or imaging kit b Resend the print job Is the page or image still clipped Contact technical support The problem is solved Toner easily rubs off Action Yes No 1 Depending on your operating system specify the paper type texture and weight from...

Страница 85: ...nt density uneven Contact technical support The problem is solved Vertical dark lines or streaks Action Yes No a Remove and then reinstall the imaging unit or imaging kit Warning Potential Damage Do not expose the imaging unit or imaging kit to direct light for more than 10 minutes Extended exposure to light can cause print quality problems Warning Potential Damage To avoid damage do not touch the...

Страница 86: ...e power cord to the electrical outlet CAUTION POTENTIAL INJURY To avoid the risk of fire or electrical shock connect the power cord to an appropriately rated and properly grounded electrical outlet that is near the product and easily accessible Is the printer responding The problem is solved Go to step 2 Step 2 Check if the electrical outlet is turned off by a switch or breaker Is the electrical ou...

Страница 87: ... documentation that came with the option Is the printer responding The problem is solved Go to step 7 Step 7 Install the correct print driver Is the printer responding The problem is solved Go to step 8 Step 8 Turn off the printer wait for about 10 seconds and then turn it back on Is the printer responding The problem is solved Contact technical support Job prints from the wrong tray or on the wro...

Страница 88: ...e not linked For more information see Linking trays on page 21 b Print the document Is the document printed from the correct tray or on the correct paper The problem is solved Contact technical support Color quality problems Adjusting toner darkness 1 From the home screen touch Settings Print Quality 2 Adjust the toner darkness 3 Apply the changes Modifying the colors in printed output 1 From the ...

Страница 89: ...ght can be added in various amounts to produce a large range of colors observed in nature Computer screens scanners and digital cameras use this method to display colors What is CMYK color CMYK color is a method of describing colors by indicating the amount of cyan magenta yellow and black used to reproduce a particular color Cyan magenta yellow and black inks or toners can be printed in various a...

Страница 90: ...e selected color conversion table By examining Color Samples sets you can identify the box with color closest to the color being matched The color combination labeled on the box can then be used for modifying the color of the object in a software program For more information see the software program Help topics Manual color correction may be necessary to use the selected color conversion table for...

Страница 91: ...de the top front cover or at the back of the printer and then take note of the following The printer model The service tag number or express service code For more information go to www dell com support Troubleshooting 91 ...

Страница 92: ...ware or memory devices sometime after setting up the printer then turn the printer off and unplug the power cord from the electrical outlet before continuing If you have any other devices attached to the printer then turn them off as well and unplug any cables going into the printer 1 Turn off the printer and then unplug the power cord from the electrical outlet 2 Using a flat head screwdriver remo...

Страница 93: ...3 Unpack the memory card Warning Potential Damage Avoid touching the connection points along the edge of the card 4 Insert the memory card until it clicks into place Upgrading and migrating 93 ...

Страница 94: ...dware or memory devices sometime after setting up the printer then turn the printer off and unplug the power cord from the electrical outlet before continuing If you have any other devices attached to the printer then turn them off as well and unplug any cables going into the printer 1 Turn off the printer and then unplug the power cord from the electrical outlet 2 Using a flat head screwdriver rem...

Страница 95: ...3 Unpack the internal solutions port ISP kit 1 ISP 2 Mounting bracket 3 Thumbscrews 4 Housing Upgrading and migrating 95 ...

Страница 96: ...5 ISP extended cable 4 Install the ISP into its housing Upgrading and migrating 96 ...

Страница 97: ...5 Attach the housing to the controller board access cover Upgrading and migrating 97 ...

Страница 98: ... cover 8 Connect the power cord to the electrical outlet and then turn on the printer CAUTION POTENTIAL INJURY To avoid the risk of fire or electrical shock connect the power cord to an appropriately rated and properly grounded electrical outlet that is near the product and easily accessible Upgrading and migrating 98 ...

Страница 99: ...printer then turn them off as well and unplug any cables going into the printer 1 Turn off the printer and then unplug the power cord from the electrical outlet 2 Using a flat head screwdriver remove the controller board access cover Warning Potential Damage Controller board electronic components are easily damaged by static electricity Touch a metal surface on the printer before touching any compo...

Страница 100: ...The entire length of the connector on the card must touch and be flush against the controller board Warning Potential Damage Improper installation of the card may cause damage to the card and the controller board Upgrading and migrating 100 ...

Страница 101: ...e or memory devices sometime after setting up the printer then turn the printer off and unplug the power cord from the electrical outlet before continuing If you have any other devices attached to the printer then turn them off as well and unplug any cables going into the printer 1 Turn off the printer and then unplug the power cord from the electrical outlet 2 Using a flat head screwdriver remove ...

Страница 102: ...3 Unpack the hard disk 4 Attach the hard disk to the controller board Warning Potential Damage Do not touch or press the center of the hard disk Upgrading and migrating 102 ...

Страница 103: ...5 Open door B 6 Open door C Upgrading and migrating 103 ...

Страница 104: ...s cover 10 Connect the power cord to the electrical outlet and then turn on the printer CAUTION POTENTIAL INJURY To avoid the risk of fire or electrical shock connect the power cord to an appropriately rated and properly grounded electrical outlet that is near the product and easily accessible Upgrading and migrating 104 ...

Страница 105: ...re trained personnel to lift it safely Note If optional trays are already installed then unlock them from the printer before lifting the printer Do not try to lift the printer and trays at the same time 4 Align the printer with the optional tray and then lower the printer until it clicks into place 5 Connect the power cord to the printer and then to the electrical outlet CAUTION POTENTIAL INJURY T...

Страница 106: ...anges For Macintosh users 1 From System Preferences in the Apple menu navigate to your printer and then select Options Supplies 2 Navigate to the list of hardware options and then add any installed options 3 Apply the changes Firmware Exporting or importing a configuration file You can export the configuration settings of your printer into a text file and then import the file to apply the settings to o...

Страница 107: ...tion or Import Configuration b Follow the instructions on the screen Updating firmware Some applications require a minimum device firmware level to operate correctly For more information on updating the device firmware contact your Dell representative 1 From the Embedded Web Server click Settings Device Update Firmware 2 Browse to locate the required flash file 3 Apply the changes Upgrading and migratin...

Страница 108: ...ellWare ReadyWare and Custom Factory Integration CFI DellPlus Contacting Dell You can contact Dell electronically using the following address www dell com contactdell Product power consumption The following table documents the power consumption characteristics of the product Note Some modes may not apply to your product Mode Description Power consumption Watts Printing The product is generating ha...

Страница 109: ...sing the Hibernate Timeout Using the Schedule Power modes Using the Sleep Hibernate button Factory default Hibernate Timeout for this product in all countries or regions 3 days The amount of time the printer waits after a job is printed before it enters Hibernate mode can be modified between one hour and one month Off mode If this product has an off mode which still consumes a small amount of power...

Страница 110: ...trol panel using 13 D Dell Document Hub using 24 developer unit replacing 37 directory list printing 25 Display Customization using 16 disposing of printer hard disk 28 documents printing from a computer 22 E Eco Mode setting 53 Eco Settings using 17 Embedded Web Server problem accessing 62 enabling the USB port 63 encrypting the printer hard disk 27 envelopes loading 20 environmental setting Eco ...

Страница 111: ...08 109 O optional card installing 99 options firmware cards 92 internal solutions port 94 memory card 92 ordering supplies using Printer Home 31 P paper Universal size setting 18 paper jam clearing standard bin 58 paper jam in door A 59 paper jam in the multipurpose feeder 58 paper jam in the standard bin 58 paper jam in trays 57 paper jam clearing multipurpose feeder 58 trays 57 paper jams avoidin...

Страница 112: ...ducts 53 repeat print jobs 25 printing from a Macintosh computer 25 printing from Windows 25 repeating print defects 82 replacing imaging unit 33 replacing parts pick roller 43 separator bracket 46 transfer module 48 replacing the imaging kit 37 replacing the pick roller 43 replacing the separator bracket 46 replacing the transfer module 48 replacing the waste toner bottle 41 replacing toner cartr...

Страница 113: ...neven print density 85 vertical dark lines or streaks appear on prints 85 vertical white lines 86 white pages 73 troubleshooting printer options internal option is not detected 64 internal solutions port 65 U unable to read flash drive troubleshooting print 63 understanding the status of the power button and indicator light 13 uneven print density 85 Universal paper size setting 18 unlinking trays ...

Отзывы: