Management: Installing Array Components
215
2
From the Modular Disk Storage Manager (MDSM) software, prepare the
drive for removal. Wait until the hard-drive indicators on the drive
carrier signal that the drive can be removed safely. For more information,
see your controller documentation for information about hot-swap drive
removal.
If the drive is online, the green activity/fault indicator flashes as the drive
is powered down. When the drive indicators are off, the drive is ready for
removal.
3
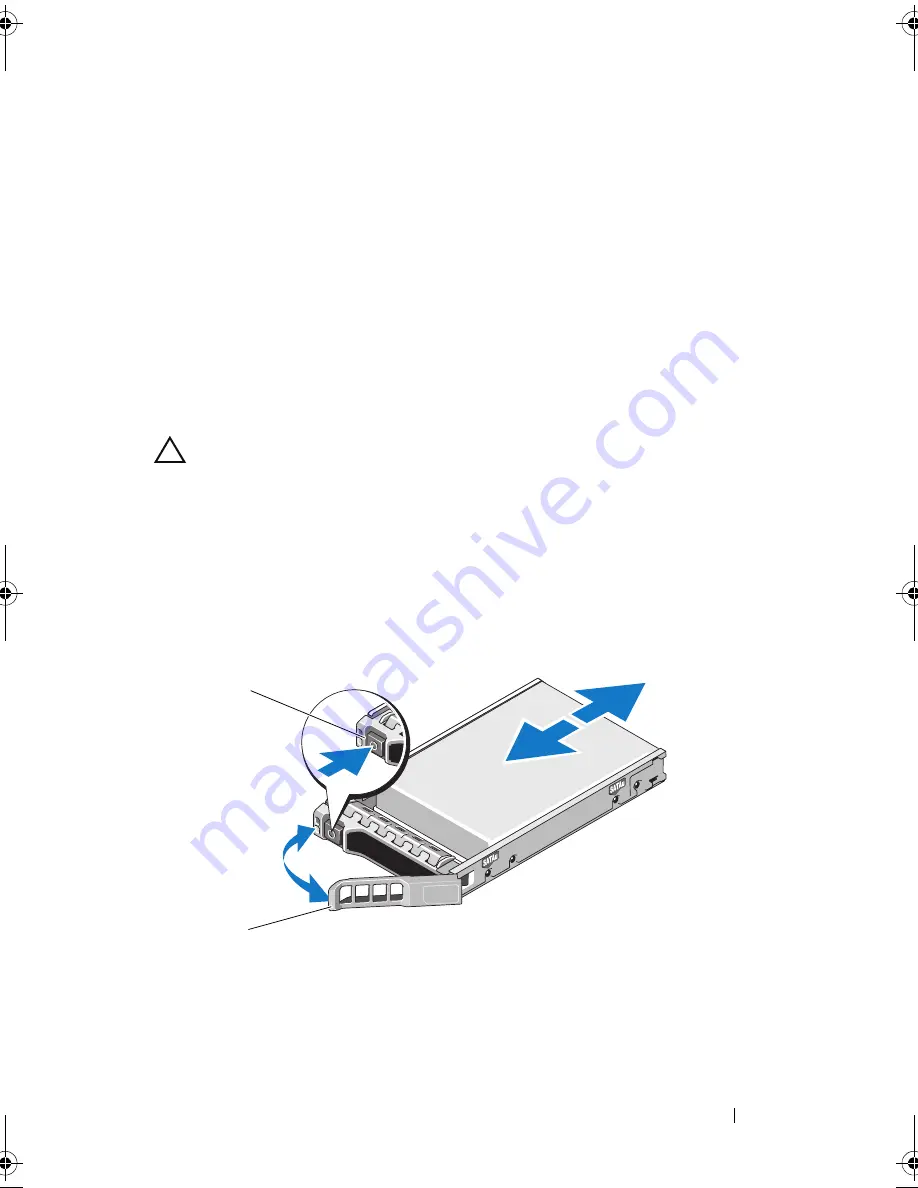
Press the release button to open the drive carrier release handle. See
Figure 16-4.
4
Slide the hard drive out until it is free of the drive bay.
CAUTION:
To maintain proper system cooling, all empty hard-drive bays must
have drive blanks installed.
5
Insert a drive blank in the empty drive bay. See "Installing a Hard-Drive
Blank" on page 214.
6
If applicable, replace the front bezel. See "Installing the Front Bezel" on
page 212.
Figure 16-4. Removing and Installing a Hard Drive
1
release button
2
hard-drive carrier handle
1
2
book.book Page 215 Saturday, September 24, 2011 9:06 AM
Содержание PowerVault MD3200i Series
Страница 18: ...18 Contents ...
Страница 22: ...22 Introduction ...
Страница 60: ...60 Planning MD3200i Series Storage Array Terms and Concepts ...
Страница 148: ...148 Configuration Disk Groups and Virtual Disks ...
Страница 172: ...172 Configuration Premium Feature Snapshot Virtual Disks ...
Страница 188: ...188 Configuration Premium Feature Upgrading to High Performance Tier ...
Страница 200: ...200 Configuration Device Mapper Multipath for Linux ...
Страница 236: ...236 Management Firmware Inventory ...
Страница 262: ...262 Troubleshooting Your Storage Array Software ...
Страница 274: ...274 Getting Help ...
Страница 282: ...282 Index ...


