3-12
Dell Dimension XPS Txxx and Txxxr Systems Reference and Troubleshooting Guide
5.
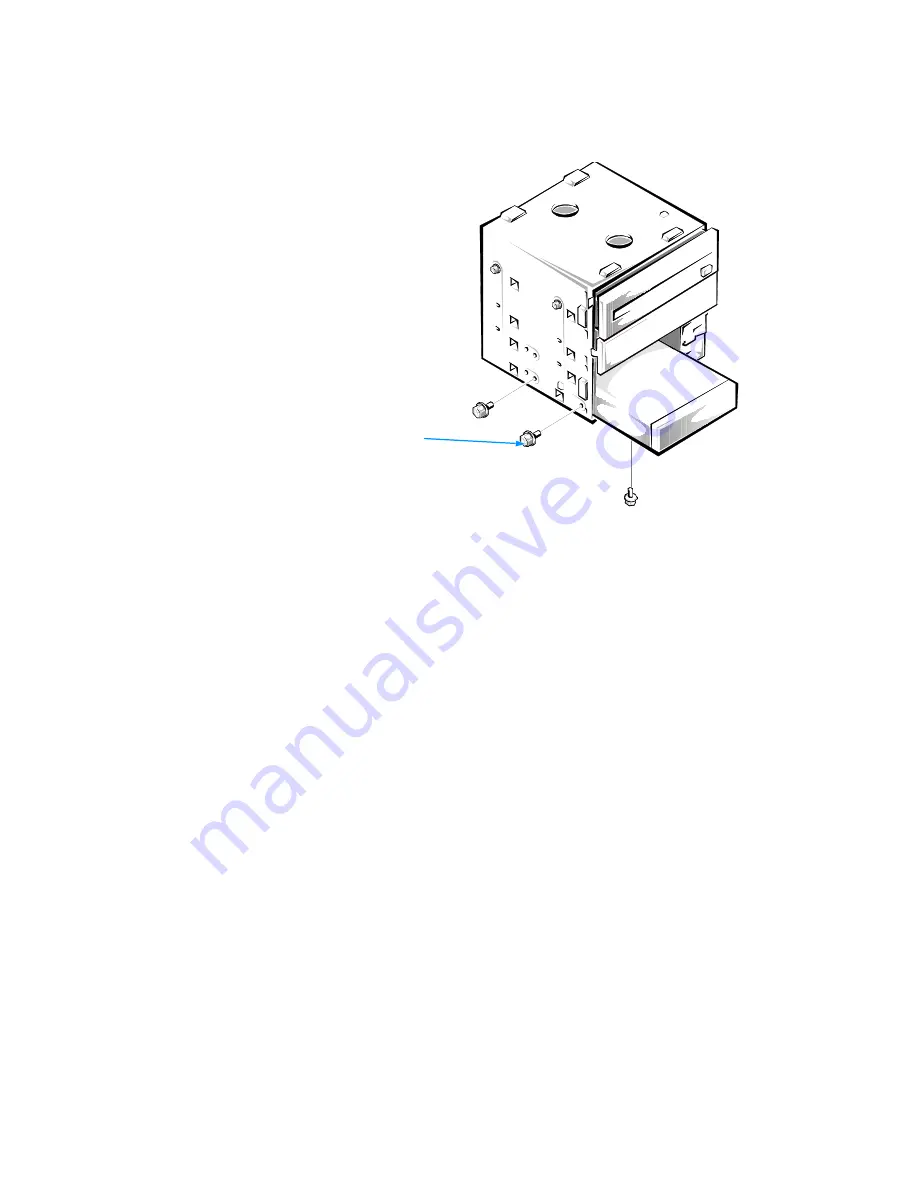
Slide the new drive into the drive bay. Secure it to the drive cage, as shown in
Figure 3-10, with one screw on the bottom and two screws on the left side.
2 ((#6% )#&
7(&
6.
If you are installing a controller card, configure and install it in an expansion slot
now (refer to “Expansion Card Upgrades” in Chapter 2 for instructions).
Install the card as close as possible to the drive cage.
* " $
" " $! "!
$
"& $ " $ ! " )
"&
7.
Reinstall the drive cage as described earlier in “Replacing the Drive Cage.”
8.
Connect a DC power cable to the drive as described earlier in “Connecting
Drives.”
9.
Attach the appropriate interface cable to the drive. If you installed a controller
card in step 6, attach the other end of the interface cable to the controller card
rather than the system board.
* 6 " : $
&
drive-mounting
screws (3)
Содержание Dimension XPS 50
Страница 1: ... ...
Страница 18: ...xx ...
Страница 68: ...3 22 Dell Dimension XPS Txxx and Txxxr Systems Reference and Troubleshooting Guide ...
Страница 82: ...4 14 Dell Dimension XPS Txxx and Txxxr Systems Reference and Troubleshooting Guide ...
Страница 94: ...5 12 Dell Dimension XPS Txxx and Txxxr Systems Reference and Troubleshooting Guide ...
Страница 108: ...6 14 Dell Dimension XPS Txxx and Txxxr Systems Reference and Troubleshooting Guide ...
Страница 128: ...7 20 Dell Dimension XPS Txxx and Txxxr Systems Reference and Troubleshooting Guide ...
Страница 134: ...A 6 Dell Dimension XPS Txxx and Txxxr Systems Reference and Troubleshooting Guide ...
Страница 196: ...8 Dell Dimension XPS Txxx and Txxxr Systems Reference and Troubleshooting Guide ...


