


120
Appendix
Changing Boot Sequence for Future Boots
1
Enter system setup (see "Entering System Setup" on page 113).
2
Use the arrow keys to highlight the
Boot Sequence
menu option and press <Enter> to access the
menu.
NOTE:
Write down your current boot sequence in case you want to restore it.
3
Press the up- and down-arrow keys to move through the list of devices.
4
Press the spacebar to enable or disable a device (enabled devices have a checkmark).
5
Press plus (+) or minus (–) to move a selected device up or down the list.
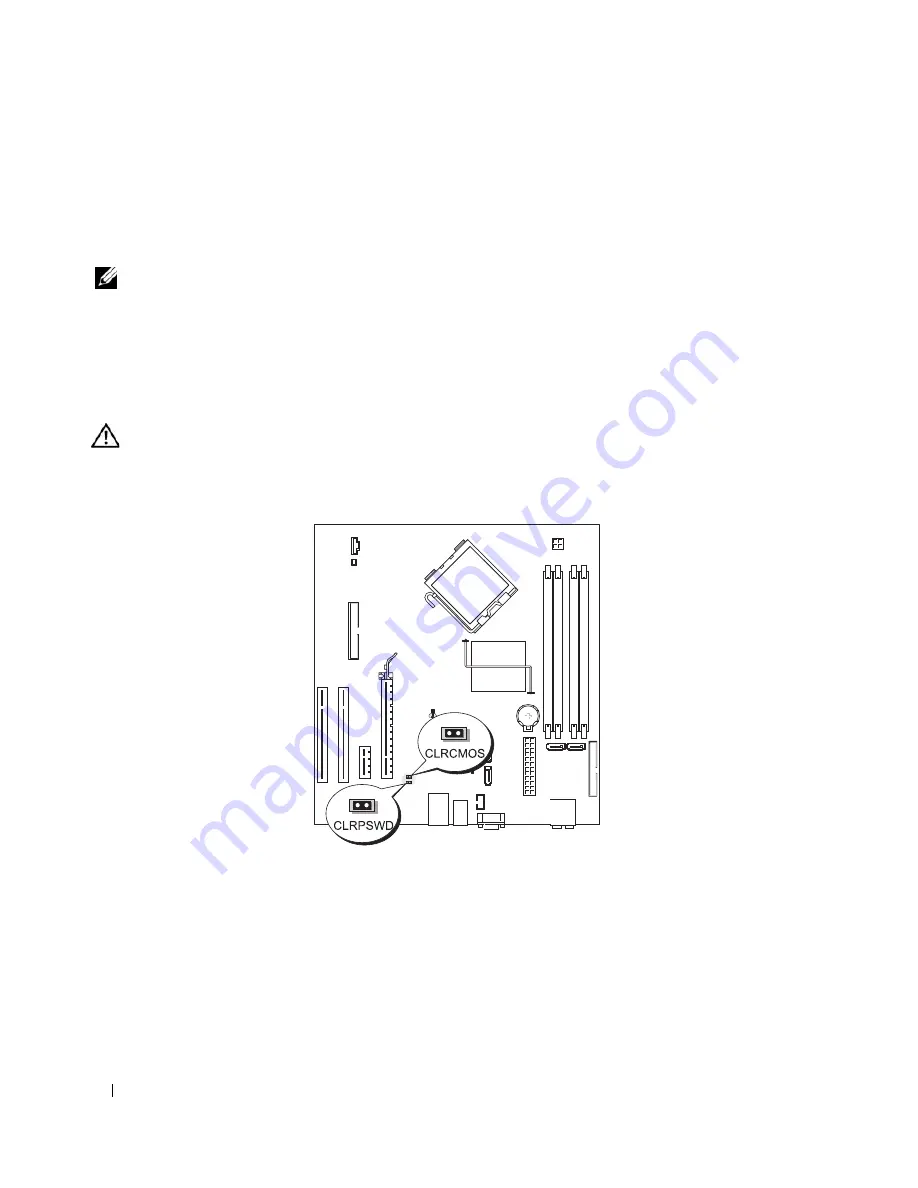
Clearing Forgotten Passwords
CAUTION:
Before you begin any of the procedures in this section, follow the safety instructions located in the
Product Information Guide
.
1
Follow the procedures in "Before You Begin" on page 59.
2
Locate the 2-pin password jumper (CLRPSWD) on the system board (see "System Board
Components" on page 68), and remove the jumper plug from pins 1 and 2 to clear the password.
3
Close the computer cover (see "Replacing the Computer Cover" on page 106).
4
Connect your computer and monitor to electrical outlets, and turn them on.
5
After the Microsoft
®
Windows
®
desktop appears on your computer, shut down the computer (see
"Turning Off Your Computer" on page 59).
6
Turn off the monitor and disconnect it from the electrical outlet.
Содержание Dimension E520
Страница 8: ...8 Contents ...
Страница 12: ...12 Finding Information ...
Страница 58: ...58 Troubleshooting Tools ...
Страница 103: ...Removing and Installing Parts 103 4 Connect the power and data cables to the drive 1 CD DVD drive 2 screws 3 1 2 ...
Страница 108: ...108 Removing and Installing Parts ...
Страница 146: ...146 Appendix ...
Страница 162: ...62 Index 162 Index ...