Setting Up the Display | 31
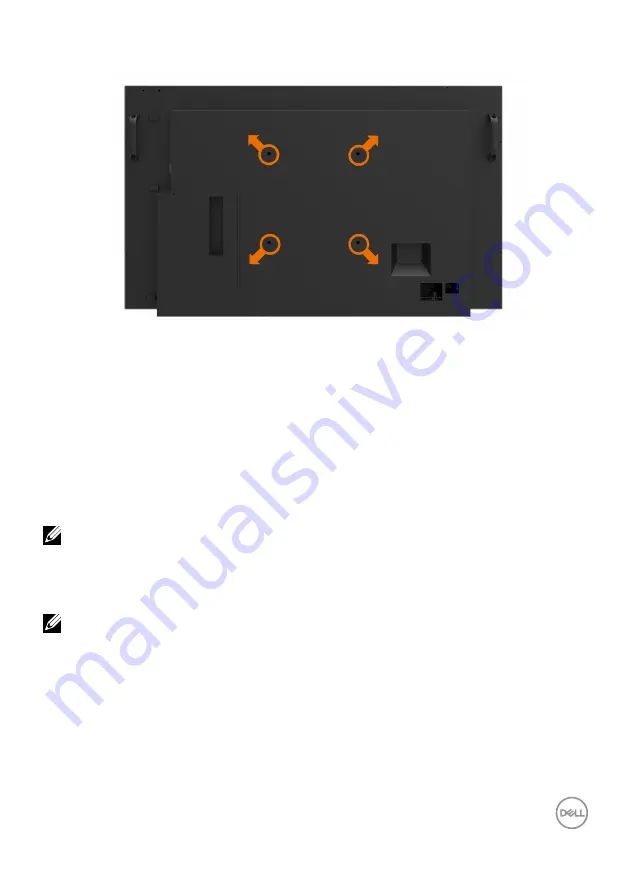
Wall Mounting (Optional)
(Screw dimension: M8 x 30 mm).
Refer to installation instruction that comes with the 3rd party wall mount that customer
purchases. Vesa-compatible base mounting kit (300 x 300) mm.
1.
Install Wall Plate to Wall.
2.
Place the display panel on a soft cloth or cushion on a stable flat table.
3.
Attach the mounting brackets from the wall mounting kit to the display.
4.
Install Display to Wall Plate.
5.
Ensure display is mounted vertically with no tilt forward or backward and a leveler is used to
assist to mount the display.
NOTE:
• Do not attempt to wall mount the Touch Display by yourself. it should be installed by
qualified installers.
• Recommended Wall Mount for this Display is can be found in the Dell support website
NOTE: For use only with UL or CSA or GS-listed wall mount bracket with minimum
weight/load bearing capacity of 53 kg (116.84 lb).
Содержание C5518QT
Страница 1: ...Model C5518QT Regulatory model C5518QTt Dell C5518QT User s Guide ...
Страница 27: ...Setting Up the Display 27 Connecting the HDMI cable Connecting the DP cable Connecting the VGA cable ...
Страница 29: ...Setting Up the Display 29 Connecting the Optiplex Connecting the HDMI cable Connecting the DP cable ...
Страница 30: ...30 Setting Up the Display Connecting the VGA cable ...
Страница 54: ...54 Operating the Display 3 The Home page opens 4 Click Network Settings tab to see the network settings ...


