Installing the expansion card
Prerequisites
1. Follow the safety guidelines listed in
.
2. Follow the procedure that is listed in
Before working inside your system
Steps
1. Unpack the expansion card and prepare it for installation.
NOTE:
For instructions, see the documentation accompanying the card.
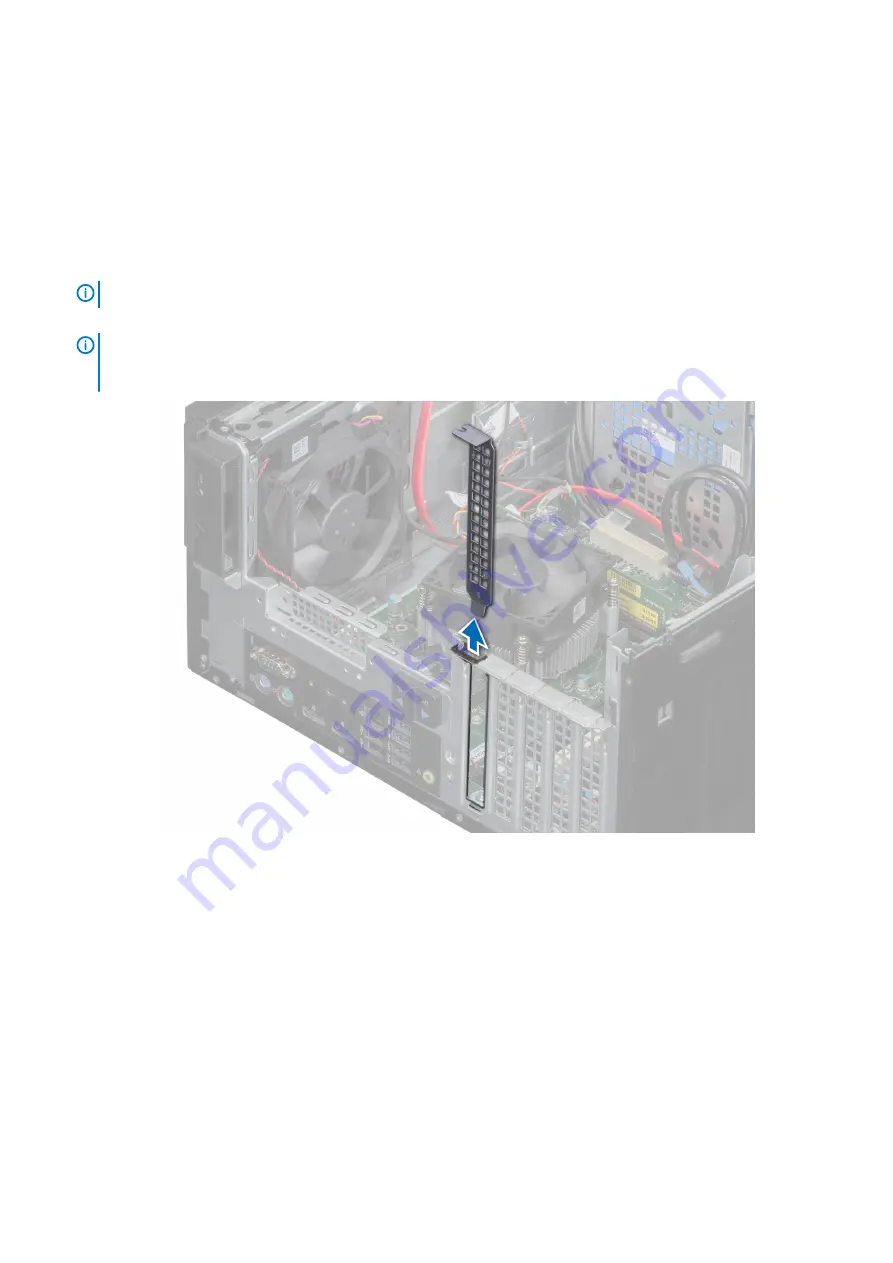
2.
or filler bracket from the expansion card holder.
NOTE:
Store this bracket for future use. Filler brackets must be installed in empty expansion-card slots to maintain
FCC certification of the system. The brackets also keep dust and dirt out of the system and aid in proper cooling and
airflow inside the system.
Figure 24. Removing the filler bracket
3. Push the ejector on the expansion card slot to allow the expansion card to be inserted into the socket.
4. Holding the card by its edges, position the card so that the card aligns with the expansion card connector.
5. Insert the card firmly into the expansion card connector until the card is fully seated.
Figure 25. Installing the expansion card
Installing and removing system components
47
Содержание PowerEdge T40
Страница 11: ...System Information Label Figure 4 Service Information PowerEdge T40 system overview 11 ...
Страница 12: ...Figure 5 Memory information Figure 6 Jumper Settings 12 PowerEdge T40 system overview ...
Страница 13: ...Figure 7 System task PowerEdge T40 system overview 13 ...
Страница 14: ...Figure 8 Quick resource locator 14 PowerEdge T40 system overview ...
Страница 26: ...3 The Bios flash menu will open then click the browse button 26 Pre operating system management applications ...
Страница 28: ...6 Click the Begin Flash Update button 28 Pre operating system management applications ...


