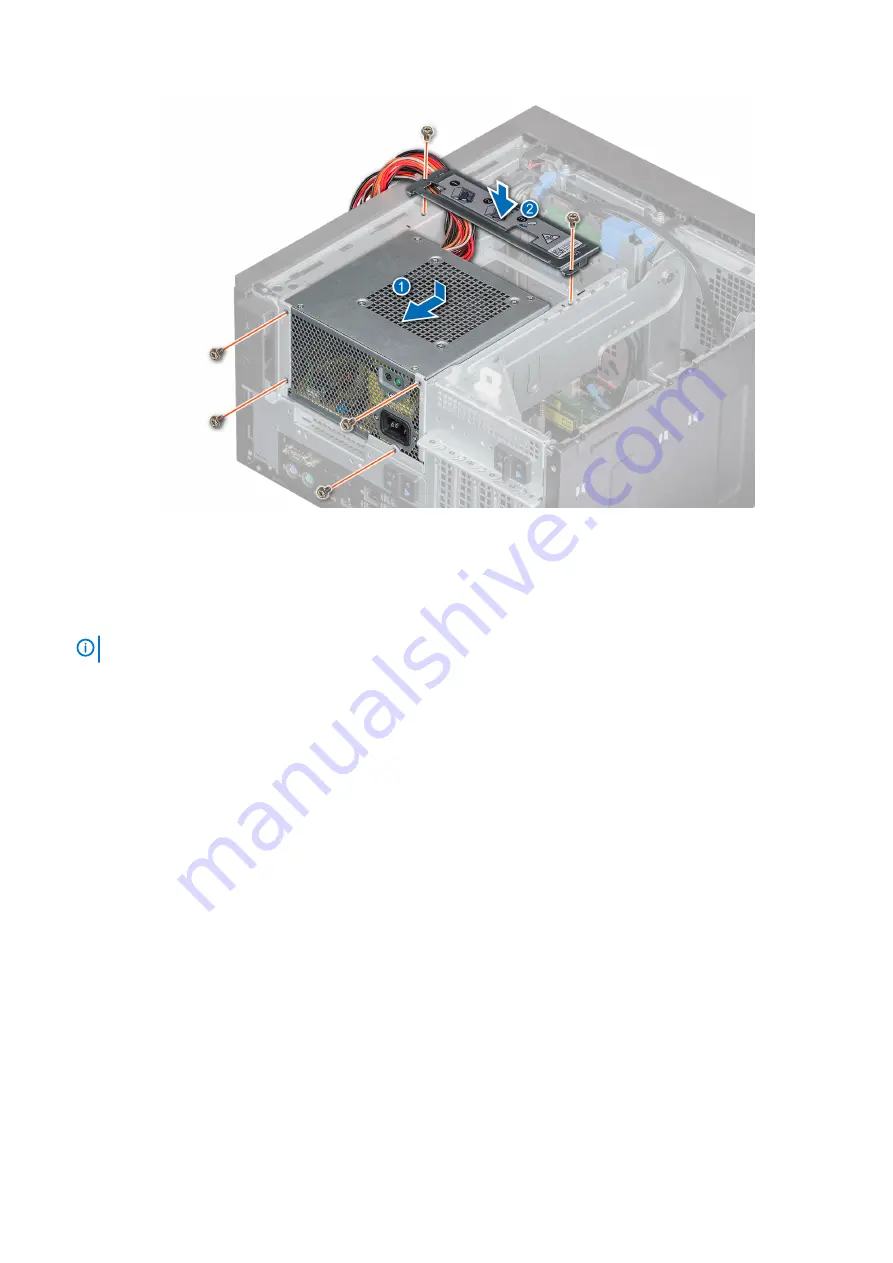
Figure 21. Installing power supply unit
Next steps
1. Connect the PSU cable to the drive.
2.
3. Connect the PSU cables to the optical drive and the system board.
NOTE:
Route the cable properly when you replace it to prevent the cable from being pinched or crimped.
4.
.
5. Follow the procedure listed in
After working inside your system
Expansion cards
Removing the Expansion card
Prerequisites
1. Follow the safety guidelines listed in
.
2. Follow the procedure listed in
Before working inside your system
3.
4. If applicable, disconnect the cables connected to the expansion card.
Steps
1. Push the ejector on the expansion card slot to release the expansion card.
2. Holding the card by its edge, pull the card to disengage it from the connector on the system board.
3. Remove the expansion card from the system.
Figure 22. Removing the expansion card
Installing and removing system components
45
Содержание PowerEdge T40
Страница 11: ...System Information Label Figure 4 Service Information PowerEdge T40 system overview 11 ...
Страница 12: ...Figure 5 Memory information Figure 6 Jumper Settings 12 PowerEdge T40 system overview ...
Страница 13: ...Figure 7 System task PowerEdge T40 system overview 13 ...
Страница 14: ...Figure 8 Quick resource locator 14 PowerEdge T40 system overview ...
Страница 26: ...3 The Bios flash menu will open then click the browse button 26 Pre operating system management applications ...
Страница 28: ...6 Click the Begin Flash Update button 28 Pre operating system management applications ...


