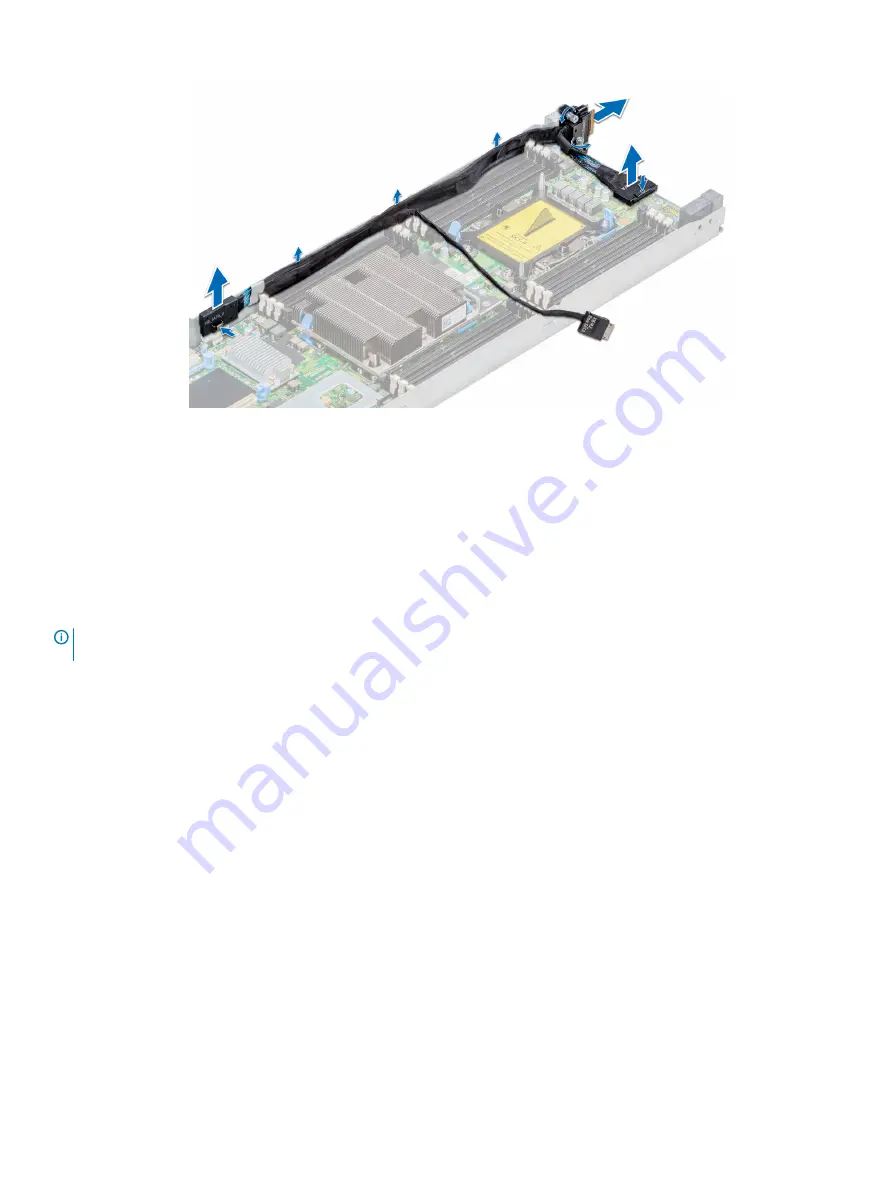
Figure 28. Removing the linking board and SATA cable
Next step
1
Install the linking board and PCIe cables
Installing the linking board and PCIe cables
Prerequisite
NOTE:
Observe the routing of the cable as you remove it from the sled. Route the cable properly when you replace it to prevent
the cable from being pinched or crimped.
1
Follow the safety guidelines listed in
Steps
1
Insert the PCIe_A connector into the connector on the system board, press the connector until it locks into place.
2
Insert and press the PCIe_B connector into the connector on the system board, press the connector until it locks into place.
3
If disconnected, reconnect the SATA cable to the x16 M.2 riser.
4
Using the Phillips #1 screwdriver, tighten the captive screws on the linking board to secure the board to the sled.
Installing and removing enclosure components
81
Содержание PowerEdge C6420
Страница 8: ...Figure 1 Supported configurations for PowerEdge C6420 8 Dell EMC PowerEdge C6420 overview ...
Страница 16: ...Mechanical overview Figure 10 Mechanical overview 16 Dell EMC PowerEdge C6420 overview ...
Страница 17: ...Memory information Figure 11 Memory information Dell EMC PowerEdge C6420 overview 17 ...
Страница 18: ...Jumper settings Figure 12 Jumper settings 18 Dell EMC PowerEdge C6420 overview ...
Страница 68: ...Figure 17 Installing a sled 68 Installing and removing enclosure components ...
Страница 101: ...Figure 48 Removing an expansion card Installing and removing enclosure components 101 ...
Страница 103: ...Figure 50 Removing the expansion card filler bracket Installing and removing enclosure components 103 ...


