Installing the expansion card risers
Prerequisites
1. Follow the safety guidelines listed in the
.
2. Follow the procedure listed in the
Before working inside your system
3. If removed, install the expansion cards into the expansion card risers.
Steps
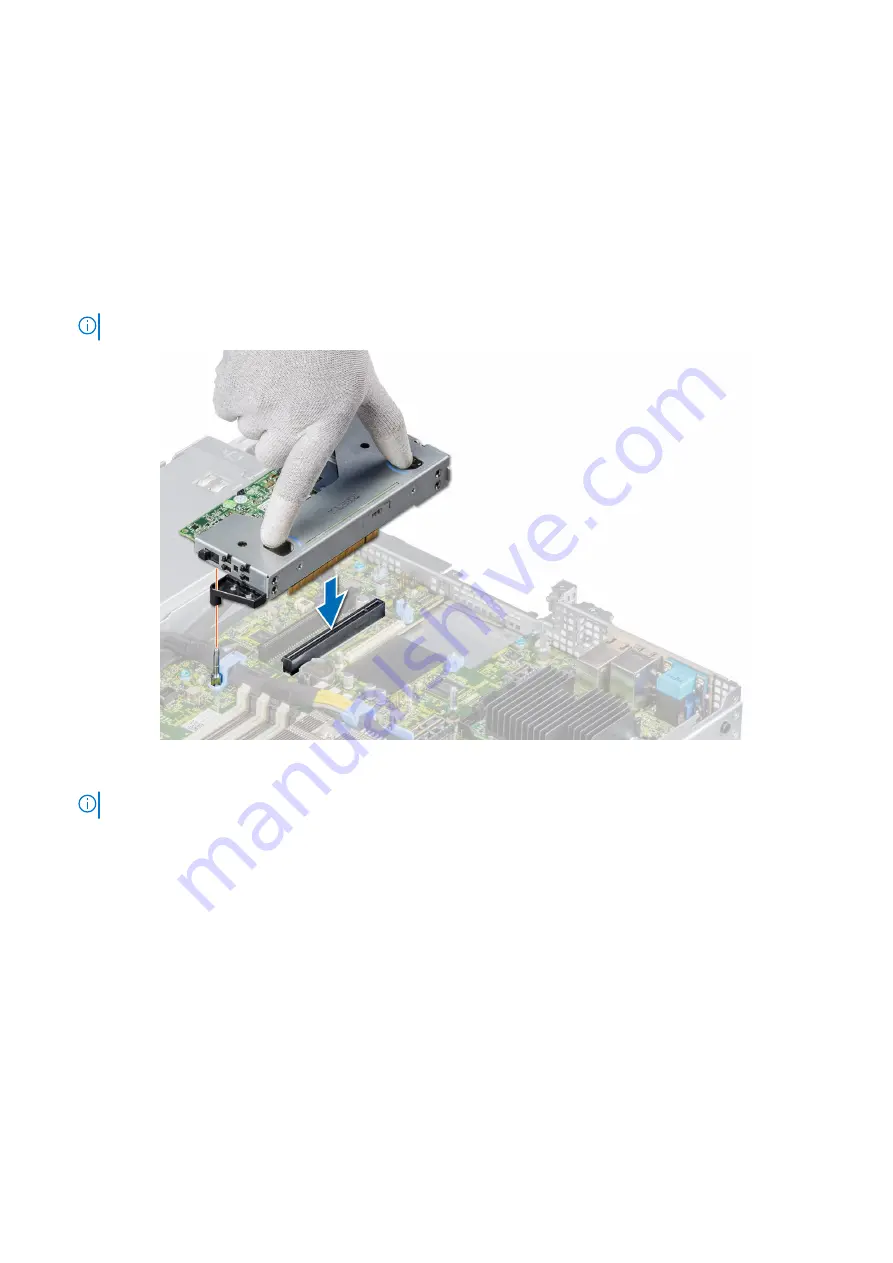
1. Holding the touch points, align the expansion card riser with the connector and the riser guide pin on the system board.
2. Lower the expansion card riser into place until the expansion card riser connector is fully seated in the connector.
NOTE:
The numbers on the image do not depict the exact steps. The numbers are for representation of sequence.
Figure 56. Installing the low profile left riser
NOTE:
For low profile riser right, tighten the captive screw to secure the riser to the system board.
Installing and removing system components
65
Содержание E45S
Страница 6: ...Receiving automated support with SupportAssist 117 Chapter 8 Documentation resources 118 6 Contents ...
Страница 16: ...Figure 10 Service information 16 PowerEdge R6515 system overview ...
Страница 17: ...Figure 11 Memory information PowerEdge R6515 system overview 17 ...
Страница 18: ...Figure 12 System tasks Figure 13 Icon Legend 18 PowerEdge R6515 system overview ...


