11
HOMEDEPOT.COM
Please contact 1-866-308-3976 for further assistance.
Operation (continued)
11
Setting the sensor for testing
NOTE:
The light fixture will operate during the day or
night during testing. The light will stay on for 5 seconds
after all motion is stopped.
NOTE:
The light requires a 60-second boot-up period
before the camera will be fully operational.
Tap
> Feature Settings > Camera > Motion
Detection to select the motion detection settings.
The light fixture will automatically enter “Test” mode
whenever the “Motion Detection” option is selected.
The light fixture will remain in “Test” until one of the
following actions occurs:
Ƒ
The “Save” or “Cancel” option is selected.
Ƒ
No movement during the testing process for 30
seconds.
Ƒ
Three minutes have passed without changing
one of the on-screen settings.
12
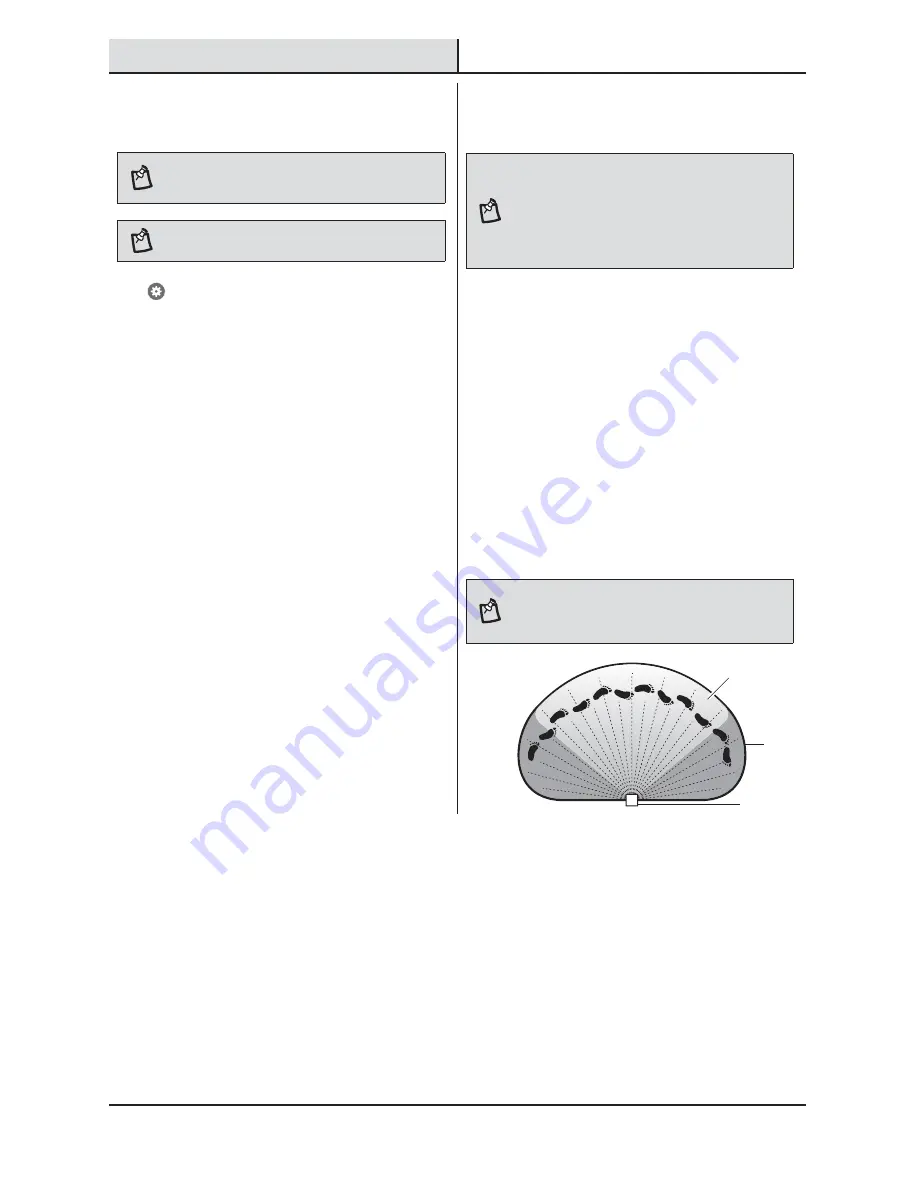
Adjusting the motion sensor
detection zone
NOTE:
The camera’s (E) detection zone is inside of the
light’s detection zone. When the motion sensor (C) for the
light is adjusted, the camera’s (E) motion sensor will also
be adjusted.
If motion is detected outside the camera’s detection zone,
the light may turn on but the camera will not record an
event.
Ƒ
Perform a “walk test”: walk in an arc across
the front of the motion sensor (C).
Ƒ
Watch the light. The light will come on and the
red LED will flash indicating motion has been
detected.
Ƒ
Stop, wait for the light to turn off, and then
begin walking again.
Ƒ
Continue this process until the detection zone
has been established.
Ƒ
If needed, gently grasp the motion sensor (C)
and move it from side to side or up and down
to adjust the detection zone.
Ƒ
Adjust the “Motion Detection” sensitivity to
High, Medium, or Low as needed.
NOTE:
The motion sensor (C) is more sensitive to motion
moving across the front of the sensor. The motion sensor
(C) is less sensitive to motion moving directly toward the
front of the sensor.
C and E
C
E


