background image

2-13

Paper Handling

Loading a Sheet of Paper

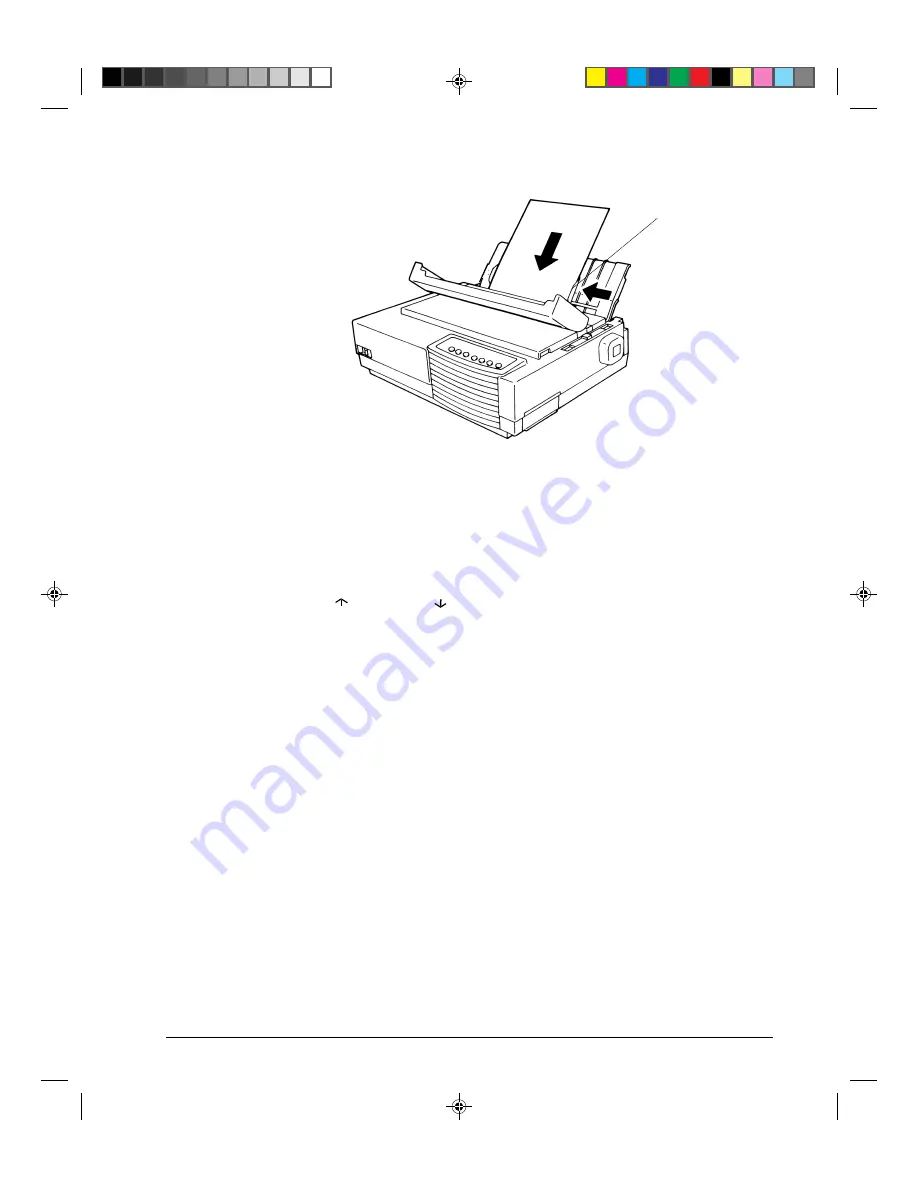
6. If you want to slightly adjust the Top-of-Form position, the first line on which printing

can start, adjust the Top-of-Form position of the paper using control panel buttons.  Press
the 

Set-Up/Quit

 and the 

Top

 buttons at the same time.  The 

M1

 and 

M2

 indicators flash

alternately with the 

DEC

 and 

PPX24

 indicators, indicating Top-of-Form Adjustment

mode.  Press the

button or the

button.  The paper will move forward or backward

in 1/60-inch increments.  Press the 

Set-Up/Quit

 button after adjusting the position.  Note

that this adjustment is temporarily saved.  It will not be active at next power-up of the
printer.  For permanent adjustment, see the section “Feeding and Positioning Paper” later
in this chapter.

7. Place the printer in the Ready state.  Print a sample page and check the page margins.

Make the following adjustments, as necessary:

Horizontal alignment.  Readjust the paper guides if required.

Top-of-form setting.  Use the printer Set-Up mode (see Chapter 4 “Using Set-Up
Mode”) or the TOF Adjustment mode (see the section “Feeding and Positioning
Paper” later in this chapter).

Margin settings.  Use your software or the printer Set-Up mode (see Chapter 4
“Using Set-Up Mode”).

Ejecting Single Sheets

If you print using software, each sheet is ejected automatically upon the completion of the
page printing.  To manually eject sheets of paper:

Press the 

FF/Load

 button to execute a forward form feed.

Turn the platen knob.

e

#02 Chapter 2

23/05/96, 14:16

13

Содержание LA30N

Страница 1: ...Order Number EK LA30E UG 001 User Guide TM LA30N LA30W Companion Printer 1 Cover 1 UG 28 05 96 13 58 1...

Страница 2: ...1 Cover 1 UG 28 05 96 13 58 2...

Страница 3: ...LA30N LA30W Companion Printer User Guide Digital Equipment Corporation Maynard Massachusetts 00_0 Title Page 2 23 05 96 14 09 1...

Страница 4: ...00_0 Title Page 2 23 05 96 14 09 2...

Страница 5: ...ing Single Sheets 2 13 Using Continuous Forms 2 14 Positioning the Paper Stack 2 15 Loading Continuous Forms Push Tractor and Rear Feed 2 16 Loading Continuous Forms Pull Tractor and Bottom Feed 2 19...

Страница 6: ...uous Forms 3 10 4 Using Set Up Mode 4 1 What is Set Up Mode for 4 1 How Set Up Works 4 2 Entering the Set Up Mode 4 2 Overview of the Set Up Mode 4 5 Set Up Mode Functions 4 5 Points to Remember 4 11...

Страница 7: ...ical Alignment 6 7 A Supplies and Options A 1 Supplies A 1 Options A 1 Documentation A 1 Installing Options A 2 Installing the Color Kit A 2 B Printer and Paper Specifications B 1 Physical Specificati...

Страница 8: ...ter X24E and XL24E Protocol and Epson ESC P2 Protocol E 18 Default Sets E 18 IBM Proprinter X24E and XL24E Protocol E 24 IBM Set 1 2 E 24 Epson ESC P2 Protocol E 25 National Character Sets E 25 F Resi...

Страница 9: ...t time users Experienced users can skip some of the details using the table of contents and chapter introductions to locate specific information This part has several appendixes a glossary and an inde...

Страница 10: ...rs mechanism The only visible difference concerns the accurate location of the notch scale of the paper thickness lever Specification differences are clearly identified further in this User Guide Orga...

Страница 11: ...pendices a glossary and an index Appendix A gives order numbers for printer supplies and options explaining how to install them Other appendices provide additional technical information about the prin...

Страница 12: ...00_3 Preface 23 05 96 13 55 10...

Страница 13: ...t two sections Software compatibility This printer which operates with the DEC PPL2 protocol the IBM Proprinter X24E LA30N or IBM Proprinter XL24E LA30W protocol and the Epson ESC P2 protocol for Epso...

Страница 14: ...to be fed through the slot at the bottom of the printer Automatic tear off advancing With factory settings of the Set Up mode continuous forms perforations are automatically advanced up to the tear ba...

Страница 15: ...s forms push tractor feed and pull tractor feed Feeding and positioning paper Switching paper types Tips for paper handling are given at the end of this chapter Check that section if you are using mul...

Страница 16: ...2 2 Paper Handling Parts of the Printer Front and Rear Views w e r t y u q i o 0 1 7 6 5 3 2 8 4 02 Chapter 2 23 05 96 14 16 2...

Страница 17: ...d paper select print features or change the printer s optional settings 8 Power switch to switch the printer on off 9 Paper select lever to switch the paper source 10 Print head to apply ink to the pa...

Страница 18: ...cond table lists Normal mode operations and required user response Operations are listed by functions Basic States of the Printer Indicator Status Printer Status Ready On The printer is ready for prin...

Страница 19: ...ing Off Press Pause if the TEAR option is switched from AUTO to MANUAL in Set Up mode Return paper to previous position Not printing Off Press Pause if the TEAR option is switched from AUTO to MANUAL...

Страница 20: ...e cursor to select Off Not printing Off Press or button a Set Up Function or Value Move cursor to select Off Not printing Off Press or button a Set Up Option Select a Set Up Function Off Not printing...

Страница 21: ...rt forms Continuous forms include labels and multipart forms fed into the printer using the forms tractors For best results use paper that meets the specifications listed in the following table See Ap...

Страница 22: ...Courier 10 Bold PS Draft Prestige 12 Time PS HSDraft Comp 17 Nimb PS HiDraft Soft Ctrl Font Macro M1 M2 Fault DEC Protocol Park LF FF Load PPX24 Set Up Quit Top Exit Save Ready Pause EP2 M2 M1 Paper s...

Страница 23: ...ently store the TOF position adjusted by the button and the button in TOF Adjustment mode Pause Press Pause to advance the forms perforation to the tear bar Tear off the forms then press Pause again t...

Страница 24: ...ickness lever located at the top right corner of the printer allows you to adjust for different paper thicknesses Be sure to adjust the paper thickness lever whenever you change the number of copies b...

Страница 25: ...s section describes how to load paper in the cut sheet stand The cut sheet stand allows paper to be loaded manually one sheet at a time Loading a Single Sheet of Paper To load a sheet of paper into th...

Страница 26: ...elect Lever and Left Paper Guide 5 Adjust the right paper guide e to the width of paper Insert the paper into the cut sheet stand Make sure that the bottom edge of the paper engages snugly with the pl...

Страница 27: ...the printer For permanent adjustment see the section Feeding and Positioning Paper later in this chapter 7 Place the printer in the Ready state Print a sample page and check the page margins Make the...

Страница 28: ...rear of the printer it pushes paper from the rear to the platen This is called push tractor feeding If the forms tractor unit is mounted at the top of the printer it pulls paper from the bottom or rea...

Страница 29: ...pull bottom feed Caution When using paper stapled multipart forms in push feed raise the cut sheet stand e After the paper is installed in the printer the paper path should look like this Good placeme...

Страница 30: ...ms paper 1 Make sure that the printer is turned on Remove any single sheet paper from the printer 2 If necessary readjust the paper thickness lever for continuous forms See the section Adjusting for P...

Страница 31: ...own to secure the tractor Center the middle forms support Note The tractor guide u can be found below the right forms tractor as seen from the back This tractor guide is a short inch based ruler gradu...

Страница 32: ...taut Push the left locking lever down to secure the tractor in place Unlock the back cover from the cut sheet stand to close it 10 When using paper stapled multipart forms leave the cut sheet stand e...

Страница 33: ...parts of the tractor unit This subsection explains how to use continuous forms when the forms tractor unit is installed at the top of the printer The forms tractor unit pulls continuous forms This is...

Страница 34: ...f the tractor unit to detach the catches q of the tractor unit from the support studs w Then pull the tractor unit Removing the Tractor Unit 3 Set the cut sheet stand and the back cover to the down po...

Страница 35: ...Feed 6 Turn the platen knob to make sure that the tractor gear fully engages the platen shaft gear Lean the top cover and the acoustic cover against the tractor unit The following are the procedures t...

Страница 36: ...he platen Passing Continuous Forms Paper From Under the Printer 6 Close the front cover q and open the top cover 7 Open the two holders of the left and right tractors Each tractor has a larger main ho...

Страница 37: ...12 Press the Pause button to place the printer in the Ready state Print a sample page and check the first line and the page margins Make the following adjustments as necessary Horizontal alignment Mo...

Страница 38: ...operation was unsuccessful paper not actually parked and Fault indicator blinking Press the Pause button The printer switches to the Ready state and the paper moves according to the setting of the TEA...

Страница 39: ...position the paper perforation in front of the tear bar Note If the printing job does not include a form feed command after pressing the Pause button the paper is only automatically fed so that you ca...

Страница 40: ...a form feed occurs Top line q This is the line where the printing actually starts To define a top margin select the number of this line within Set Up mode TOP MRGN option Example In the following pict...

Страница 41: ...2 27 Paper Handling 1 1 2 3 4 5 6 2 3 4 5 6 7 8 1 2 3 4 5 6 48 49 50 ABCDEFGHIJ ABCDEFGHIJ TOF L ABCDEFGHIJ 51 52 TOF Print Area Definition w q t e r 02 Chapter 2 23 05 96 14 18 27...

Страница 42: ...tractor The adjustment is reflected to the Top of Form setting of Macro 1 or Macro 2 currently selected from the control panel Note This adjustment is not available for continuous forms fed by the pul...

Страница 43: ...e Exit Save button The printer returns to Normal mode To temporarily save the value press the Set Up Quit button The printer returns to Normal mode The new value is lost at next power off Note The use...

Страница 44: ...his chapter Put a sheet of paper on the cut sheet stand with its bottom edge aligned with the platen The paper automatically advance to the top of form position if the option S SHEET LD Single Sheet L...

Страница 45: ...paper To Reinstall the Tractor Unit for Push Tractor Feed 1 Open the acoustic cover and the top cover 2 Pull up both ends of the tractor unit to detach the catches of the tractor unit from the support...

Страница 46: ...se the envelopes may jam in the printer Labels Be careful to check operating conditions when using labels Labels are sensitive to temperature and humidity Only use labels mounted on continuous forms b...

Страница 47: ...er interprets commands from the computer and how your printed pages will look For example print features include the following Protocol Font Pitch characters per horizontal inch Line spacing lines per...

Страница 48: ...col buttons as follows Macro to select one of the two sets of print features Macro 1 M1 and Macro 2 M2 Font to select one of nine resident fonts You can access three other fonts in Set Up mode Protoco...

Страница 49: ...ndicator is lit and the Ready indicator is lit the Fault indicator will be lit if no paper is loaded That is all of the print features assigned to Macro 1 are enabled fonts used depend on font command...

Страница 50: ...is set to Draft and Macro 2 to Courier You switch the Font selection of Macro 1 from Draft to Prestige using the Font button When you switch the Macro selection from Macro 1 to Macro 2 Prestige will...

Страница 51: ...AGM No No Epson mode Epson national character set USA USA 1 When you change the Macro selection and that the new Top of Form value is different from the former paper is automatically fed to the next p...

Страница 52: ...e switch time 2 seconds Baud rate 9600 bps Bits and parity 8 bits and none Buffer control XON XOFF Disconnected on fault No Adjustments Settings Print Feature Factory Settings Fanfold adjust continuou...

Страница 53: ...ve Ready Pause EP2 M2 M1 Control Panel Draft Draft font at any pitch last active pitch or software pitch HSDraft High speed draft font at any pitch last active pitch or software pitch HiDraft High imp...

Страница 54: ...ssigns different protocols for parallel and serial interfaces To change the protocol 1 Make sure the printer is in the Ready state no data to be printed 2 Repeatedly press the Protocol button q The DE...

Страница 55: ...eed mode but not valid for continuous forms in pull tractor feed mode Resuming Printing To resume printing press the Pause button again If the paper is advanced for viewing it is backed to the previou...

Страница 56: ...when removing printed continuous forms paper the printer has the tear off function Depending on the TEAR option value of the Set Up the printer automatically feeds the paper so that the perforation fa...

Страница 57: ...g environments for your application software Printer operating environments include the protocol font horizontal and vertical pitches page length and margins line mode and printing direction They also...

Страница 58: ...Selecting a new value for an option Saving your new printer configuration permanently or temporarily For information on using the printing test and hex dump functions see the section Using the Diagnos...

Страница 59: ...Turn the printer back on while pressing the Set Up Quit button until the printer beeps 4 Remove the acoustic cover in order to see the printed text Entering the Set Up Mode OFF ON Set Up Quit 04 Chap...

Страница 60: ...IONS menu w The header tells you that the printer is in the Set Up mode The help menu provides a quick summary of how to use buttons in the Set Up mode The FUNCTIONS menu w lists all of the functions...

Страница 61: ...the printing test and hex dumps RCALL FACT Resets factory settings in MACRO 1 MACRO 2 INSTALL and ADJUST MENU ACCES Restricts access to Set Up functions from the control panel SAVE EXIT Exits the Set...

Страница 62: ...MACRO 1 MACRO 2 PRINT INSTALL ADJUST TESTS RCALL FACT MENU ACCESS SAVE EXIT PROTOCOL PORT DEPND PRTCL SERL DEC PPL2 PRTCL PARL EPSON ESCP FONT DRAFT HORZ PITCH 10 CPI VERT PITCH 6 LPI VERT PITCH 2 LPI...

Страница 63: ...of the vertical pitch option Since you do not want to change other than the vertical pitch press the button to select the current protocol Bolded PORT DEPND is underlined and the next option PRTCL SE...

Страница 64: ...s printed at the right of the current value 3 If this new value is not satisfying repeat step 1 until the next new value is satisfying Range Management for a Wide Range of Values The permitted range o...

Страница 65: ...d beneath SAVE EXIT 6 Exit the Set Up mode saving or not saving the new left margin Press the button or the button to save 20 columns as the new power on defaults in Macro 2 and exit Macro 2 The print...

Страница 66: ...DEFAULTS TESTS PRINT TEST and HEXDUMP Printer saves changes and exits Set Up mode Press Exit Save Press Set Up Quit Press or Printer exits Set Up mode without saving changes Select values Press or to...

Страница 67: ...e currently selected values see the next section for details To exit the Set Up mode and permanently save your changes select the SAVE EXIT function For details see the section Exiting and Saving late...

Страница 68: ...4 12 Using Set Up Mode Printout of Factory Settings Using the PRINT Function 04 Chapter 4 24 05 96 10 30 12...

Страница 69: ...rotocol when you set up the printer you do not need to change the PROTOCOL option unless you want to change to a different protocol For MACRO 1 the factory setting is PORT DEPND Port Dependent This me...

Страница 70: ...rn the printer on The Macro selection changed is permanently retained in the printer Select the same protocol on the printer as is selected in your software If the protocols are not the same the print...

Страница 71: ...Mode 4 18 Paper Source 4 19 Print Direction 4 19 DEC Defaults 4 20 DEC Printer ID 4 20 Auto Wrap 4 20 End of Transmission Disconnect 4 20 Initialization Report 4 20 Automatic ANSWERBACK 4 20 ANSWERBA...

Страница 72: ...ocol This is useful when you use various applications in a DOS or network environment and so you cannot determine the protocol The efficiency of this function relies on the recognition of control sequ...

Страница 73: ...T Draft font lower resolution than letter quality 3 times letter quality speed HSDRAFT High speed draft font lower resolution than draft quality 3 3 times letter quality speed HI IMPACT High impact dr...

Страница 74: ...the physical right margin 8 IN 8 inch page width 13 2 IN 13 2 inch page width 13 6 IN 13 6 inch page width TOP OF FRM Specify the top of form in 1 60 inches See Print Area Definition in Chapter 2 Pape...

Страница 75: ...UAL Single sheets selected RSVD 1 Reserved RSVD 2 Reserved RSVD 1 2 Reserved PRINT DIR UNIDIR Unidirectional printing Unidirectional printing is used for the printing that needs the precise vertical a...

Страница 76: ...gnored DISCONNECT DTR signal turns low for five seconds when the EOT character is detected INIT REPRT Specify whether the status is sent to the computer when the printer is turned on DEC 423 serial in...

Страница 77: ...Roman D NORW DAN DEC Norwegian Danish I SPANISH ISO Spanish D SWEDISH DEC Swedish NORW DAN Norwegian Danish D DUTCH DEC Dutch D SWISS DEC Swiss D PORTGU DEC Portuguese LEGAL Legal D SUPPL DEC Suppleme...

Страница 78: ...Graphics D TECH DEC Technical D 7 HEBREW DEC 7 bit Hebrew D HEBREW S DEC Hebrew Supplement D GREEK S DEC Greek Supplement D 7 TURKI DEC 7 bit Turkish D TURKI S DEC Turkish Supplement J KATAKANA JIS Ka...

Страница 79: ...50 CP 851 CodePage 851 CP 852 CodePage 852 CP 857 CodePage 857 CP 860 CodePage 860 CP 862 CodePage 862 CP 863 CodePage 863 CP 865 CodePage 865 CP 866 CodePage 866 CP DHN CodePage DHN TURKEY Turkish EC...

Страница 80: ...rnate Graphics Mode AGM is used that is the printer is compatible with the IBM Graphics printers NO The base of line spacing is 1 72 inch or 1 216 inch YES The base of line spacing is 1 60 inch or 1 1...

Страница 81: ...using the DEC 423 serial interface you must set the serial interface options properly for the printer to function correctly with your system hardware The following table describes the INSTALL options...

Страница 82: ...Pause button is pressed NO TEAR Tear off feeding is inhibited under any conditions Specify this setting for labels that tend to peel off during backward feeding S SHEET LD Specify the auto start timi...

Страница 83: ...data The interface is active until the input buffer becomes empty AUTO SW Specify the timing of regarding the selected protocol or interface as being inactive when AUTO is specified in the PROTOCOL or...

Страница 84: ...D 7 Odd 7 SPACE 7 Space 7 MARK 7 Mark 8 EVEN 8 Even 8 ODD 8 Odd 8 NONE 8 None The mark is logical 1 The space is logical 0 BUFFER CTL Setting of data transmission buffer control for DEC 423 DTR The Da...

Страница 85: ...ADJUST Options and Values Overprinted values are the factory settings ADJUST Options Values Description FNFOLD ADJ Adjust the Top of Form origin for continuous forms in increments of 1 60 inch 0 42 m...

Страница 86: ...abled even in Normal mode Set Up mode is also inaccessible Note You can return to the All Functions Accessible mode by turning the printer on while pressing the Park LF and FF Load buttons at the same...

Страница 87: ...SCII character set For color printers having a color ribbon printing occurs in four colors To start the printing test make sure that continuous forms paper is loaded into the printer Enter the Set Up...

Страница 88: ...he button to position the red cursor under HEX DUMP and then press the button or the button The printer selects underlines HEX DUMP goes ready and prints a header at the top of the page Note You canno...

Страница 89: ...4 33 Using Set Up Mode Sample Hex Dump 04 Chapter 4 24 05 96 10 31 33...

Страница 90: ...6 LINES DEC PRT ID PPL2 LA50 ID LA120 ID LA210 ID AUTO WRAP TRUNCATE WRAP EOT DISCON NO DISCON DISCONNECT INIT REPRT NO YES AUTO ANSBK NO YES BOTTOM MRG 1 LINES 2 LINES 3 LINES 256 LINES ANSWER ENQ NO...

Страница 91: ...OLAND MAZOWIA KAMENIC CYRILLIC ELOT927 ELOT928 LTN POLISH LITHUANY 1 LITHUANY 2 MIK MACEDONIAN I SET 1 2 IBM SET 1 IBM SET 2 I DBL HIGT NO YES IBM AGM NO YES E CHR SET USA FRANCE GERMANY UK DENMARK 1...

Страница 92: ...04 Chapter 4 24 05 96 10 31 36...

Страница 93: ...the printer when the front cover and the cut sheet stand and back cover are removed Cleaning and Vacuuming the Printer If the print head carriage does not move smoothly back and forth or paper particl...

Страница 94: ...d surrounding areas 7 Raise the cut sheet stand together with the back cover Vacuum the forms tractors and surrounding areas Cleaning the Platen and Paper Bail Rollers Clean the platen and paper bail...

Страница 95: ...olves removing the old ribbon cartridge and unpacking the purchased ribbon cartridge from the carton The installation of the ribbon cartridge is detailed in the section Installing the Ribbon Cartridge...

Страница 96: ...idge press the ribbon release levers q located on the sides of the cartridge and carefully lift the cartridge out of the printer Removing the Ribbon Cartridge 5 Remove the new ribbon cartridge from it...

Страница 97: ...ht end of the head lock wire q forward to release it from the hook at the right of the print head carriage Then release the wire from the center hook 4 Lift the print head to remove it from the connec...

Страница 98: ...05 Chapter 5 23 05 96 14 43 6...

Страница 99: ...igital Service Center Solving problems The tables in this section describe common printer problems and their solutions The following types of problems are considered Print quality problems Paper handl...

Страница 100: ...sure that the interface cable is securely connected to both the printer and computer Make sure that the printer protocol selected in your software is the same as the protocol selected on the printer...

Страница 101: ...he section Changing Macro1 and Macro2 Options in Chapter 4 pages 4 18 and 4 19 Change the LINE MODE setting in the printer Set Up mode to CR LF CR See the section Changing Macro1 and Macro2 Options in...

Страница 102: ...for rear feeding open the front cover and make sure that the second stud from the left on the printer bottom frame projects outward Paper jams while loading Turn off the printer and remove the jammed...

Страница 103: ...Make sure that the interface cable is securely connected to both the printer and the computer See step 6 Connecting the Printer to Your Host System of Setting Up Your Printer page 17 If the Fault ind...

Страница 104: ...x dump Print test tells you whether the printer hardware is functioning correctly It prints the print test pattern If the printer hardware is functional any problems you are having are probably caused...

Страница 105: ...s paper or single sheet paper is loaded in the printer If possible use forms at least 216 mm 8 5 inches wide for LA30N or 356 mm 14 inches wide for LA30W to avoid printing on the platen Then proceed a...

Страница 106: ...ertical Alignment 4 Exit the vertical alignment function Press the Exit Save button to save the new vertical alignment settings and exit the vertical alignment function Note To exit the vertical align...

Страница 107: ...cartridges Black ribbon LA30R KA Color ribbon LA30R KC Print head LA30X PH Options Option Order Number Description Color kit LA30X CK Color ribbon included Parallel interface cable BC19M 10 10 ft shi...

Страница 108: ...in front of the print head Color Kit Ribbon Shift Unit and Color Ribbon Cartridge To install the ribbon shift unit on your printer turn the printer off and remove the cover from the print head carriag...

Страница 109: ...g 16 5 lb 8 5 kg 18 7 lb AC power requirements LA30N A2 LA30W A2 LA30N A3 LA30W A3 100 to 120 VAC 10 220 to 240 VAC 10 6 50 60 Hz 50 60 Hz Power consumption Average 120 VA Maximum 240 VA Heat generati...

Страница 110: ...r bar automatically or by Pause button Continuous forms are parked while cut sheets are used Paper type 1 to 5 part side glued or paper stapled fanfolded continuous forms or label sheets with sprocket...

Страница 111: ...210 220 437 850 851 852 857 860 862 863 865 866 CP DHN Turkish ECMA 94 ISO Latin 1 ISO Latin 2 Hungarian Slovenian Polish Mazovian Kamenicky Cyrillic ELOT 928 ELOT 927 Latin Polish Lithuanian 1 Lithu...

Страница 112: ...cps 360 cps High speed draft 333 cps 400 cps cpi characters per inch cps characters per second Line feed speed 60 ms per line at 6 lines per inch Form feed speed 5 6 inches per second Ribbon service...

Страница 113: ...8 5 mm 1 3 inch However line spacing may be uneven Print area may be off the paper depending on paper setting or width 25 4 mm 1 inch 25 4 mm 1 inch Print area 5 08 mm or more 0 2 inch or more H H H H...

Страница 114: ...epending on paper setting or width Print area Wc Lc Approx 80 mm 3 2 inches for push tractor feed Approx 35 mm 1 4 inches for pull tractor feed May be decreased to 4 23 mm 1 6 inch However line spacin...

Страница 115: ...Single 47 81 g m2 40 70 kg or 12 22 lb Carbonless Top 40 64 g m2 34 55 kg or 11 17 lb Bottom 40 81 g m2 34 70 kg or 11 22 lb Top 40 64 g m2 34 55 kg or 11 17 lb Middle 40 64 g m2 34 55 kg or 11 17 lb...

Страница 116: ...11 14 lb Middle 40 52 g m2 34 45 kg or 11 14 lb Middle 40 52 g m2 34 45 kg or 11 14 lb Middle 40 52 g m2 34 45 kg or 11 14 lb Bottom 40 64 g m2 34 55 kg or 11 17 lb Carbon interleaved Avoid using sin...

Страница 117: ...owing three resident command sets protocols DEC PPL2 DIGITAL ANSI Printer Protocol Level 2 IBM Proprinter X24E LA30N and IBM Proprinter XL24E LA30W Epson ESC P2 Select the same protocol on the printer...

Страница 118: ...ging implicit cursor motion Font management and attribute selection Tabs Selecting character sets Reports Miscellaneous Barcode printing Graphics This section is intended for use in conjunction with t...

Страница 119: ...uence ESC 1 11 5 12 Pn Numeric parameter or number of units that specify a distance or quantity pertaining to the escape sequence control function or control string Ps Selective parameter or one which...

Страница 120: ...C1 Control Code 7 bit environment ESC E PLD Partial Line Down 8 11 C1 Control Code 7 bit environment ESC K Advance paper 1 12 in PLU Partial Line Up 8 12 C1 Control Code 7 bit environment ESC L Rever...

Страница 121: ...marks DECSLPP Set Lines per CSI Pn t Pn number of lines per pages Physical Page DECVPLA Set Vertical CSI Pn1 Pn2 u Pn1 position of the origin from Page Length top of form in 1 720 in Alignment Pn2 Pap...

Страница 122: ...RP Set Horizontal CSI Ps w Ps 0 Determined Pitch by current font Ps 8 8 25 CPI Ps 1 10 CPI Ps 9 15 CPI Ps 2 12 CPI Ps 11 17 1 CPI Ps 3 13 2 CPI Ps 12 8 55 CPI Ps 4 16 5 CPI Ps 13 18 CPI Ps 5 5 CPI Ps...

Страница 123: ...nt off Ps 24 Any underline off Ps 29 Strike through on Ps 30 Print Text in back Ps 31 Print Text in red Ps 32 Print Text in green Ps 33 Print Text in yellow Ps 34 Print Text in blue Ps 35 Print Text i...

Страница 124: ...Horizontal Tab ESC 1 deprecated command Set DECSHTS Set Horizontal CSI Pn Pn u Pn tab stop Tab Stops DECSVTS Set Vertical Tab CSI Pn Pn v Pn tab stop Stops DECVTS Vertical Tab Set ESC 3 deprecated com...

Страница 125: ...C1 Control Take the next character from G3 Code 7 bit environment ESC O LS0 Locking Shift 0 SI Invoke G0 into GL or Shift In LS1 Locking Shift 1 SO Invoke G1 into GL or Shift Out LS2 Locking Shift 2...

Страница 126: ...DEC 7 Bit Hebrew 2 5 3 13 ISO Italian Y 5 9 Legal 4 2 5 3 4 JIS Katakana I 4 9 JIS Roman J 4 10 DEC Norwegian Danish 6 3 6 ISO Spanish Z 5 10 DEC Swedish 7 3 7 DEC Swiss 3 13 Norwegian Danish 6 0 DEC...

Страница 127: ...ks DA Device CSI c Request Device Attributes Report Attributes DAR Device ESC ps1 Ps2 Ps1 72 Attributes Psn c Ps2 Psn describe extensions See Report printer to host the Programming Supplement DA2 Seco...

Страница 128: ...New password Default password 0 Password range 0 9999 ENQ Send 0 5 C0 Control Code ANSWERBACK Message DSR Device Status CSI Ps n Ps 0 or 5 Request extended DSR Request Ps 2 Enable brief unsolicited r...

Страница 129: ...Epson Protocol CRM Control Representation CSI 3 h Print hex representation for all Mode CSI 3 l characters Reset DECASFC Automatic Sheet CSI Ps v Ps 0 No change Feeder Control Ps n Tray n reserved Ps...

Страница 130: ...n 9 Codabar c 10 Codabar d e 11 UPC A 13 Postnet 14 Industrial 2 of 5 18 Matrix 2 of 5 Pn2 Width of narrow bars Supported values 10 default in Decipoints 15 20 25 30 Not applicable to UPC EAN and Post...

Страница 131: ...odes Code 39 one above the other DECSBCA CSI 0 q DECBAR start data DECBAR stop VPA Pn DECBAR start data DECBAR stop Sixel Graphics Device Control String Envelope Command Function Remarks DCS String In...

Страница 132: ...less modified by Pn3 or DECGRA Sixel Graphics Grid Size defined by Pn3 HGS VGS dpi by Aspect Ratio defined by Ps1 Pn3 Value 1 1 2 1 2 5 1 5 1 0 or none No change to HGS and VGS defined by Ps1 1 2 360...

Страница 133: ...phics line DECGCI Graphics Color 2 3 Assigns a color to a color number or Introducer selects a predefined color number Followed by parameters Pc Pu Px Py Pz Pc Color number 0 255 Pu Universal coordina...

Страница 134: ...C 18 Command Sets Function Command Standard 8 bit Code Table Left Half Standard 8 bit Code Table Left Half C Appendix C 23 05 96 15 07 18...

Страница 135: ...C 19 Command Sets Function Command Standard 8 bit Code Table Right Half Standard 8 bit Code Table Right Half C Appendix C 23 05 96 15 07 19...

Страница 136: ...cter Sets Power up configuration is as follows GL G0 GR G2 G0 Value for DEC G0 CST Set Up option G1 ASCII G2 User Preference G3 User Preference User Preference Value for USER PREF Set Up option Design...

Страница 137: ...h Finnish French Canada German Italian Roman 2 3 4 0 5 11 5 12 5 13 5 14 6 0 7 11 7 12 7 13 7 14 National Replacement Character Sets Loca tion DEC US Norwegian ISO DEC Norwegian DEC DEC DEC ASCII Dani...

Страница 138: ...F Single line double width characters on SO or ESC SO Single line double width characters off DC4 Double width characters on off ESC W n on n 1 off n 0 Double height double width characters ESC n1 n2...

Страница 139: ...ine spacing to n 72 inch ESC A n 1 n 255 Preset line spacing to n 60 inch in AG mode ESC A n 1 n 255 Set line spacing to 1 6 inch or to the value ESC 2 preset by line spacing command ESC A n Change gr...

Страница 140: ...ration skip by n lines ESC N n 1 n 255 Perforation skip off ESC O Set page length to n lines 1 n 255 ESC C n Set page length to n inches 1 n 22 ESC C NUL n Set top of form ESC 4 Color Selection Select...

Страница 141: ...m2 data Bit Image Graphics Single density graphics ESC K n1 n2 data Double density graphics ESC L n1 n2 data High speed double density graphics ESC Y n1 n2 data Quadruple density graphics ESC Z n1 n2...

Страница 142: ...ESC 5 Select character style ESC q n n 0 Normal 1 Outlined 2 Shaded 3 Outlined and shadowed One line double width characters on SO or ESC SO One line double width characters off DC4 Double width char...

Страница 143: ...ESC M Set pica pitch ESC P Set 15 CPI ESC g Proportionally spaced characters on off ESC p n on n 1 off n 0 Set inter character space to n 120 inch for draft ESC SP n or n 180 inch for letter and prop...

Страница 144: ...r draft 1 ESC n1 n2 or n 180 inch for letter 1 right from left margin n n1 n2 256 Move print position n 120 1 inch for draft ESC n1 n2 or n 180 1 inch for letter left or right from the current positio...

Страница 145: ...th to n lines 1 n 127 ESC C n Set page length to n inches 1 n 22 ESC C NUL n Set page length to d1 d2 256 360 1 inch ESC C n1 n2 d1 d2 n1 2 n2 0 0 d1 255 0 d2 127 Color Selection Select print color ES...

Страница 146: ...acter set number 0 1 Active character set number 1 2 Active character set number 2 3 Active character set number 3 d2 0 Italic 1 PC 437 USA 3 PC 850 Multilingual 7 PC 860 Portugal 8 PC 863 Canada Fren...

Страница 147: ...ier Scalable font n 0 Timeless 1 Nimbus Sans 2 Courier 3 Timeless 4 Timeless 5 Timeless 7 Timeless 8 Timeless 9 Timeless Set scalable font mode ESC X m n1 n2 m sets character pitch m 0 Keep previous p...

Страница 148: ...graphics ESC G n1 n2 d n1 1 n2 0 d 1 Raster image graphics mode Print raster image graphics ESC c v h m n1 n2 data Cut Sheet Feeder Control Feed a sheet from bin 1 ESC EM 1 Feed a sheet from bin 2 ES...

Страница 149: ...ystem in Setting Up Your Printer Parallel Interface This printer can communicate with the host in two different modes Unidirectional In this mode the printer operates an industry standard 8 bit Centro...

Страница 150: ...BUSY high indicates the printer can not receive data buffer full BUSY high occurs when paper is out an INIT is received the printer is offline or an error condition exists 12 From printer PE H PAPER...

Страница 151: ...ogical 1 6 To printer DATA BIT 5 7 To printer DATA BIT 6 8 To printer DATA BIT 7 9 To printer DATA BIT 8 10 From printer PtrClk Set to low to qualify data on reverse channel 11 From printer PtrBusy Re...

Страница 152: ...n the table Input denotes a signal from the computer to the printer Output denotes a signal from the printer to the computer The signal level for mark state logical 1 is 5 V to 6 V for space state log...

Страница 153: ...Data Ready In Host Printer Pin 1 Pin 2 Pin 3 Pin 4 Pin 5 Pin 6 indicates grounding Pin 6 Pin 5 Pin 4 Pin 3 Pin 2 Pin 1 Ready In Receive Data Receive Data Transmit Data Transmit Data Ready Out Cable Bu...

Страница 154: ...63 characters of receiving the XOFF code or information may be lost If the paper runs out the printer sends an NAK code hex 15 DTR DTR is a hardware buffer control that is the Ready Out signal on inte...

Страница 155: ...cter sets even if they have the same character set name may not have certain characters or symbols depending on the resident fonts selected For details see the table at the end of this appendix For ch...

Страница 156: ...acter Set Greek Character Sets DEC 8 Bit Greek Supplemental Character Set ISO Latin Greek Supplemental Character Set Turkish Character Sets DEC 7 Bit Turkish Character Set DEC 8 Bit Turkish Supplement...

Страница 157: ...E 3 Character Sets E Appendix E 24 05 96 10 43 3...

Страница 158: ...E 4 Character Sets E Appendix E 24 05 96 10 43 4...

Страница 159: ...E 5 Character Sets E Appendix E 24 05 96 10 43 5...

Страница 160: ...E 6 Character Sets E Appendix E 24 05 96 10 43 6...

Страница 161: ...E 7 Character Sets E Appendix E 24 05 96 10 43 7...

Страница 162: ...E 8 Character Sets E Appendix E 24 05 96 10 43 8...

Страница 163: ...E 9 Character Sets E Appendix E 24 05 96 10 43 9...

Страница 164: ...E 10 Character Sets E Appendix E 24 05 96 10 43 10...

Страница 165: ...E 11 Character Sets E Appendix E 24 05 96 10 43 11...

Страница 166: ...E 12 Character Sets E Appendix E 24 05 96 10 43 12...

Страница 167: ...E 13 Character Sets E Appendix E 24 05 96 10 43 13...

Страница 168: ...E 14 Character Sets E Appendix E 24 05 96 10 43 14...

Страница 169: ...E 15 Character Sets E Appendix E 24 05 96 10 43 15...

Страница 170: ...E 16 Character Sets E Appendix E 24 05 96 10 43 16...

Страница 171: ...E 17 Character Sets E Appendix E 24 05 96 10 43 17...

Страница 172: ...are available Code pages 210 220 437 850 851 852 857 860 862 863 865 and 866 CP DHN Turkish ECMA 94 ISO Latin 1 ISO Latin 2 Hungarian Slovenian Polish Mazovian Kamenicky Cyrillic ELOT 927 ELOT 928 La...

Страница 173: ...E 19 Character Sets Code Page 852 Code Page 857 Code Page 860 Code Page 862 Code Page 863 Code Page 851 E Appendix E 24 05 96 10 44 19...

Страница 174: ...E 20 Character Sets Code Page 865 Code Page 866 Code Page DHN Turkish ECMA 94 ISO Latin 1 E Appendix E 24 05 96 10 44 20...

Страница 175: ...E 21 Character Sets ISO Latin 2 Hungarian Slovenian Polish Mazowian Kamenicky E Appendix E 24 05 96 10 44 21...

Страница 176: ...E 22 Character Sets Cyrillic ELOT 927 Lithuanian 1 Lithuanian 2 Latin Polish ELOT 928 E Appendix E 24 05 96 10 44 22...

Страница 177: ...E 23 Character Sets MIK Macedonian E Appendix E 24 05 96 10 44 23...

Страница 178: ...E 24 Character Sets IBM Proprinter X24E and XL24E Protocol IBM Set 1 2 IBM character set 1 and IBM character set 2 IBM Set 1 IBM Set 2 E Appendix E 24 05 96 10 45 24...

Страница 179: ...available USA France Germany UK Denmark 1 Sweden Italy Spain 1 Japan Norway Denmark 2 Spain 2 Latin America Korea and Legal Common Characters The following table shows characters common to the fifteen...

Страница 180: ...E 26 Character Sets National Characters The following table shows national characters that differ with languages Character codes correspond to NRs in the preceding table E Appendix E 24 05 96 10 45 26...

Страница 181: ...sident Fonts This appendix provides print samples of the printer s twelve resident fonts Draft High Speed Draft High Impact Draft Pica 10 Courier 10 Prestige Elite 12 Compressed 17 Boldface PS F Appen...

Страница 182: ...F 2 Resident Fonts Timeless outline Nimbus Sans outline OCR A OCR B F Appendix F 23 05 96 15 27 2...

Страница 183: ...d right to left Bidirectional printing is faster than unidirectional printing because there are no carriage returns Bit The smallest unit of information in computer memory A bit is a single digit eith...

Страница 184: ...rower than regular characters Using condensed print increases the number of characters per line Continuous Forms Connected fan folded sheets of paper that are fed into the printer using forms tractors...

Страница 185: ...printer control panel Graphics Printing Controlling the print head wires dots individually to produce a picture or an image on the page Hexadecimal A base 16 numbering system also commonly referred t...

Страница 186: ...s such as loading and unloading paper feeding paper and selecting print features See also Set Up mode Offline When the printer is offline it receives commands from the printer control panel rather tha...

Страница 187: ...printer The forms tractor unit must be installed at the rear of the printer The forms tractor unit pushes paper into the printer Resident Fonts Fonts present resident in the printer s permanent memory...

Страница 188: ...ration Top Margin The total space at the top of the printed page The top margin is the sum of the top of form setting the software specified top margin and the printer s TOP MRGN setting in Set Up mod...

Страница 189: ...ding Pull Tractor Mode 2 19 Loading Push Tractor Mode 2 16 Placement of Paper Stack 2 15 Recovering from an Unexpected Unloading Operation 2 24 Switching from Continuous Forms to Single Sheets 2 30 Te...

Страница 190: ...rinter Commands C 22 Switching to 3 8 4 16 I DBL HIGT 4 24 I F TYPE 4 27 Indicators 2 4 3 2 3 3 3 7 3 8 INIT REPRT 4 20 Input Buffer 4 27 Install Function Description 4 5 4 14 Changing Options 4 25 I...

Страница 191: ...n 2 11 Cleaning 5 2 PPX24 Indicator 3 8 Print Area B 5 Definition 2 26 PRINT DIR 4 19 Print Features Selecting 3 1 Print Function 4 11 Print Head Cleaning 5 3 Replacing 5 5 Printed Pages Removing 3 10...

Страница 192: ...gin 4 29 Install Installation Conditions 4 25 Macro User Environments 4 14 Menu Access Restriction 4 30 Print the printer configuration 4 11 Recall Factory Defaults 4 31 Save and Exit 4 30 Tests Print...

Страница 193: ...ed device is prohibited The length of the parallel interface cable must be 3 meters 10 feet or less The length of the serial interface cable must be 600 meters 1970 feet or less 2 The length of the po...

Отзывы: