74
M-Class
Advanced Entry Calibration (continued)
Step
Operator Action
Displayed Message
Comment
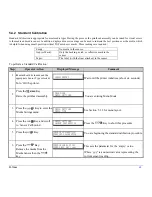
11
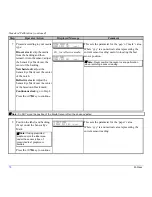
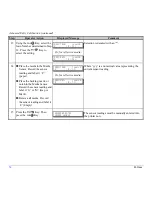
Proceed according to your media
type:
Die-cut stock:
strip the media
from the backing and then
reinsert it into the sensor; adjust
the Sensor Eye Mark over the
center of the backing.
Notched stock:
adjust the
Sensor Eye Mark over the center
of the notch.
Reflective stock:
Adjust the
Sensor Eye Mark over the center
of the facedown black mark.
Press the
Key to select
the setting and then record the
sensor reading in a table similar
to the one shown after Step 12,
as a
TOF Value.
Next, press the
FWD
Key to
increment the Gain Number.
Repeat for each of the Gain
Numbers (00-32).
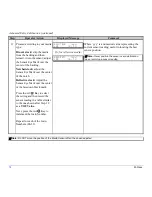
!
HBJO!USBO!!!!!=zzz?!
+11!!!!!!!!)1!.!42*!
!
Or, for reflective media:
HBJO!SFGM!!!!!=zzz?!
+11!!!!!!!!)1!.!42*!
Where ‘yyy’ is a numerical value representing the
current sensor reading: useful in locating the best
sensor position.
Note:
Never position the sensor over a perforation
when recording a sensor reading.
Note:
Do NOT move the position of the Media Sensor after it has been adjusted.
Содержание M-Class
Страница 1: ...M Class Operator s Manual ...
Страница 24: ...16 M Class ...
Страница 46: ...38 M Class ...
Страница 86: ...78 M Class ...
Страница 96: ...88 M Class ...
Страница 108: ...100 M Class ...
Страница 122: ...114 M Class ...
Страница 128: ...120 M Class Network Status ...
Страница 129: ...M Class 121 TCP IP Configuration ...
Страница 131: ...M Class 123 System Settings Media Settings and Print Control continued Printer Options Communications and Diagnostics ...
Страница 132: ...124 M Class Printer Options Communications and Diagnostics continued ...
Страница 133: ...M Class 125 Network Print Options Reset Network Parameters ...
Страница 134: ...126 M Class Change Password ...
Страница 154: ...146 M Class ...
Страница 160: ...152 M Class ...
Страница 166: ...158 M Class ...

