PG4UW
89
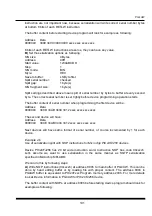
can not be specified inside the range <From address> to
<To address>. Address is always defined as Byte address.
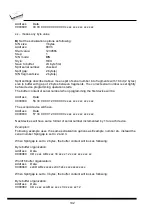
Size
Size of chosen checksum result, which will be written into
the buffer. A size of inserted checksum may be Byte (8-bit),
Word (16-bit) or DWORD (32-bit). If size is smaller then
selected checksum size, only lower byte(s) of checksum
value will be written into the buffer.
Note:
If Word size was selected, a low byte of checksum
value will be written on address specified in box Insert
address and a high byte will be written on address
incremented by one. Similarly it is for DWORD.
Calculate button
- click on the button Calculate starts calculating checksums for
selected block in buffer. No writes into the buffer are executed.
Calculate & insert button
- click on the button Calculate & insert starts calculating
checksums for selected block in the buffer and writes the chosen checksum into the
buffer on address specified by Insert address. This function is available for Byte,
Word, CRC-CCITT and CRC-XMODEM checksums.
Close button
- closes dialog Checksum.
(*1) These values aren't saved into project; they are initialized to defaults with each new
device selection.
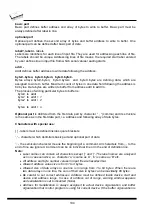
Tab Main checksum options allow you to set mode of Automatic checksum calculator.
(*2)
group
Custom address range for main checksum
Enabled
- user defined addresses are used to calculate checksum of buffer data,
otherwise, if
Disabled
, global Buffer start and Buffer end address is used for
calculation of checksum of buffer data
Fields
From address
and
To address
are used to enter address range for main
checksum calculation. Addresses are used only when checkbox
Enabled
is
checked.
Selection group
Checksum type
allows selecting wished kind of checksum to be
used for main checksum. More information about Checksum types can be found at
the bellow.
Field
Checksum
contains actual value of recently calculated checksum.
Group
Exclude buffer block(s) from checksum calculation
- same as for Tab
Checksum calculator
Button
Apply
is used to confirm checksum settings from
Main checksum options
.
Please note, that once the button is pressed, previous checksum settings are lost.
Button
Close
is used to close the Checksum dialog. If you made some changes in
settings, they won't take effect until you press
Apply
.
(*2) These values are stored into configuration file and project file. Setting from project file
has higher precedence.
Checksum types
Byte sum (x8)
Buffer data are summed byte-by-byte irrespective of current buffer view mode (x8/x16/x1)
organization. Any carry bits exceeding 32-bits are neglected. This checksum mode is
indicated by string (x8) displayed after checksum value in main program window.
Word sum Little Endian (x16)
Buffer data are summed word-by-word irrespective of current buffer view mode organization.
Any carry bits exceeding 32-bits are neglected. This checksum mode is indicated by string
Содержание Dataman-40Pro
Страница 7: ...Quick Start 7 Introduction ...
Страница 12: ...12 Quick Start ...
Страница 14: ...14 4 check if the device is blank click on 5 program device click on 6 additional verify of device click on ...
Страница 15: ...Detailed description 15 Detailed description ...
Страница 16: ...16 DATAMAN 448PRO2 ...
Страница 30: ...30 DATAMAN 48PRO2 DATAMAN 48PRO2C ...
Страница 45: ...DATAMAN 40PRO 45 DATAMAN 40PRO ...
Страница 54: ...54 DATAMAN MEMPRO ...
Страница 61: ...Setup 61 Setup ...
Страница 65: ...Setup 65 Step 6 Check your setting and then click on Install button Step 7 Installation process will start ...
Страница 70: ...70 Step 6 Click on Continue Anyway button For Windows Vista Click Install this driver software anyway ...
Страница 72: ...72 PG4UW ...
Страница 141: ...PG4UWMC 141 PG4UWMC ...
Страница 154: ...154 Installation procedure customized ...
Страница 159: ...Common notes 159 Common notes ...
Страница 171: ...Troubleshooting and warranty 171 Troubleshooting and warranty ...

