31
Advanced Sharpening Tips
Geometry
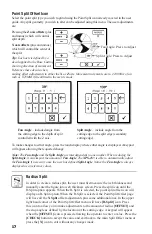
• Start out simple and add more features as the drill point is developed. The point and lip relief
angles can be treated as absolute values. Split parameters are more relative and require some
judgment and “sneaking” towards.
• To produce a small chamfer on the very outer edge of a drill, sharpen the drill at desired point
angle. Then create a second program, setting the included point angle to 90°, at minimum
MTO and grind 1 rotation only (watch for 1 full rotation, then press the
[PAUSE]
button twice
to return to
[HOME]
).
• Secondary cutting edges which appear to be too perpendicular to the Fan Angle tend to make
the best radius style splits, as the launch of the radius tends to consume most of the initial
angularity.
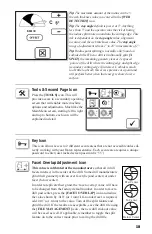
• Another way to decide how severe the Split Angle needs to be without using a microscope
(useful for on-site grinding), is to watch to see how much of the primary cutting edge is
removed by the split angle and adjust to get the best match.
• If there is an unwanted straight edge remaining between the end of the split and the cutting
edge, it can be rounded off by going to the R-Split screen and subtracting some of 5° of the
“C” compensation.
• When splitting the point, the closer the Fan Angle is to its maximum value, the more obvious
the Split corner. This means that the drill rotation is minimized to produce a given Split Angle.
Drill Files
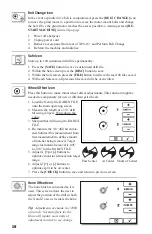
• Name and start saving a Drill File early on in the sharpening process
• When developing a new drill point, err on the material safe side when splitting.
•
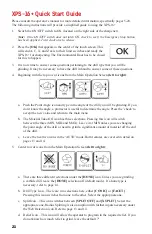
Learn to use Single Point and Manual Alignment when needed, especially for chisel edge
placement. A thick web drill requires less advance (ADV= 4 - 8º) than a standard web
(ADV=14 - 18º).
• To achieve desired radius in R-Split, slowly reduce Web Thickness. In some cases it can be
reduced by 65% of actual. If the web thickness is entered as too small, the drill will over-
rotate the cutting edge into the wheel grinding negative Rake.
• Never turn your back on the Alignment process. Be sure the drill is going to the grind wheel
in the proper orientation.
Wheels and Hone
• Hone times vary depending on drill size. Use 3, 6 & 9 seconds for small, medium and large
drills, respectively. When using SiC Hone, multiply by a factor of 2 or more.
• Use clean and sharp Grind Wheels to maximize speed of re-sharpening drills.
•
A 320 DIA (diamond) Grind Wheel can be used on a limited basis to grind/split small
(<3/16”) HSS drills to improve surface finish.
Carbide and Facet
• On 4-Facet drills, the Split Angle needs to increase with larger point angles to avoid
remnants of the secondary facet along the split edge.
• When sharpening 4-Facet drills using ADV (Single Point) alignment, a widening facet
towards the OD requires a more positive ADV degree angle.
• To create more primary facet overlap on 4-Facet drills, reduce the Stickout in increments of
0.010” until the desired amount of overlap is achieved.
• When setting-up a carbide drill that has unusual features, use a comparable HSS drill and
CBN grind wheel to help develop the more difficult geometries.
Содержание XPS-16+
Страница 1: ...Operating Instructions XPS 16 CNC Drill Grinder and Sharpener ...
Страница 2: ......
Страница 40: ...37 Notes ...
Страница 41: ...38 ...

