


to RESUME profile scheduling on groups of devices.
- To create a Group press the
Configure
icon (diagram 25).
- New screen appears ‘CONFIGURE’ (see diagram 26).
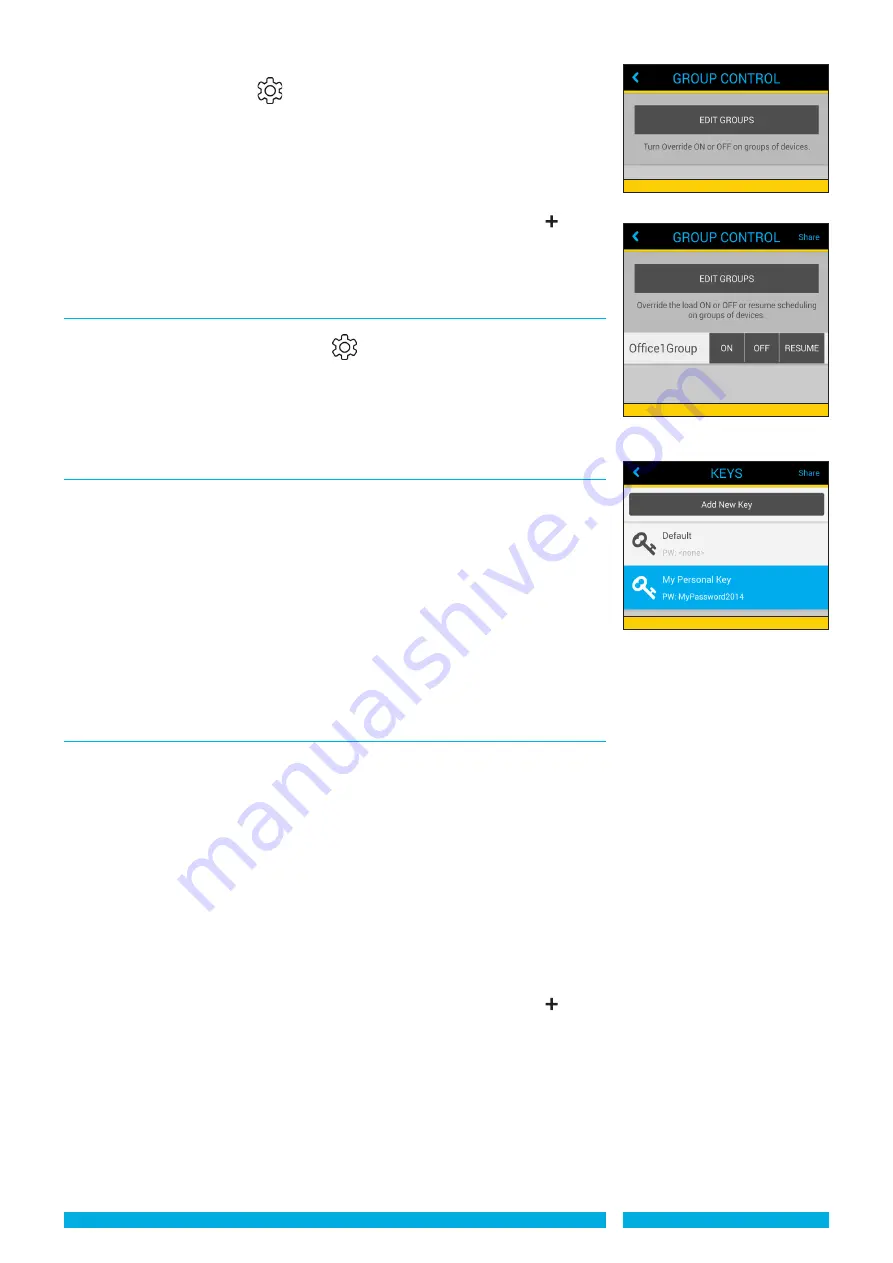
- Press ‘Group Control’. New screen appears edit groups’ (see diagram 38).
- To create a GROUP, press ‘EDIT GROUPS’ button. Prompt appears ‘Tap NEW to create
a group’ (top right of screen). New screen appears ‘Enter name’ for the group, type
name and Press ‘OK’.
- To add devices to the group press ADD (top right) and any devices within range will
appear in the list. Add the devices you wish to act as a group by pressing the button
next to the appropriate device.
- New screen ‘READY’ - with a prompt ’look for the flashing LED and output’. Press ‘Use
this device to confirm it is correct. Press DONE when complete.
Group Control
- Once you have created Group(s) you will have a new display when opening
the Group Control option by pressing the
Configure
icon.
- New screen appears ‘CONFIGURE’. Press ‘Group Control’. Your saved Group(s) will
now appear with a set of options, select the appropriate Group and then its option:
ON - Switches the load permanently ON.
OFF - Switches the load permanently OFF.
RESUME - Returns the control to its selected PROFILE.
Manage keys
- Once you have created a Key or Keys you will be able to manage the Key passwords
and Key names by pressing the
Configure
icon then pressing ‘Manage Keys’.
- This feature allows one or more security passwords to be created ensuring other
ControlZAPP users cannot tamper with settings.
- These personised settings are only visible to the user of that phone (see diagram 40).
- Keys can be shared with other users by selecting the ‘Share’ button (top right). A
warning prompt appears select ‘I agree’ or ‘Cancel’. Various ‘programs to share’
options for transferring the Keys file will appear - select as approprate.
- When a recipient opens and saves the file it will then have to be opened from the
downloads folder on your mobile / tablet. ControlZAPP app will be launched if installed
with a prompt ‘Import Keys’ select Merge Keys, the Keys will be merged into the
recipients Manage Keys folder. To view press the
Configure
icon then press ‘Manage
Keys’.
ControlZAPP GC App
In addition to the ControlZAPP app (blue icon) if you have downloaded ControlZAPP from
the DANLERS website you will receive a second APP -
ControlZAPP GC
(red icon). This
application / widget fast tracks you to the group control ON, OFF and RESUME options of
a pre-saved group.
- Click on the ControlZAPP GC icon. New screen appears ‘EDIT GROUPS’
- Press ‘EDIT GROUPS’. Prompt appears ‘Tap NEW to create a group’ (top right of
screen). New screen appears ‘Enter name’ for the group, type name and Press ‘OK’.
- To create a Group select the ControlZAPP GC icon. New screen appears ‘EDIT
GROUPS’. New screen appears ‘CONFIGURE’ (see diagram 26).
- Press ‘Group Control’. New screen appears edit groups’ (see diagram 38).
- To create a GROUP, press ‘EDIT GROUPS’ button. Prompt appears ‘Tap NEW to create
a group’ (top right of screen). New screen appears ‘Enter name’ for the group, type
name and Press ‘OK’.
- To add devices to the group press ADD (top right) and any devices within range will
appear in the list. Add the devices you wish to act as a group by pressing the button
next to the appropriate device.
- New screen ‘READY’ - with a prompt ’look for the flashing LED and output’. Press ‘Use
this device to confirm it is correct. Press DONE when complete.
- Once you have created Group(s) when you reopen the ControlZAPP GC app you will
have a new display
- Your saved Group(s) will now appear with a set of options, select the appropriate Group
and then its option:
ON - Switches the load permanently ON.
OFF - Switches the load permanently OFF.
RESUME - Returns the control to its selected PROFILE.
PAGE 10
CZUG 23.12.14
Diagram 39
Diagram 38
Diagram 40


