DH-SMT/FI
VI.KA.C4.3C
© Danfoss 09/2009
2
4
4
3
3
2
2
1
1
A
EnGlISh
Safety notes
To avoid injury of persons and damages
to the device, it is absolutely necessary
to carefully read and observe these
instructions.
Necessary assembly, start-up and
maintenance work must only be
performed by qualified and authorized
personnel.
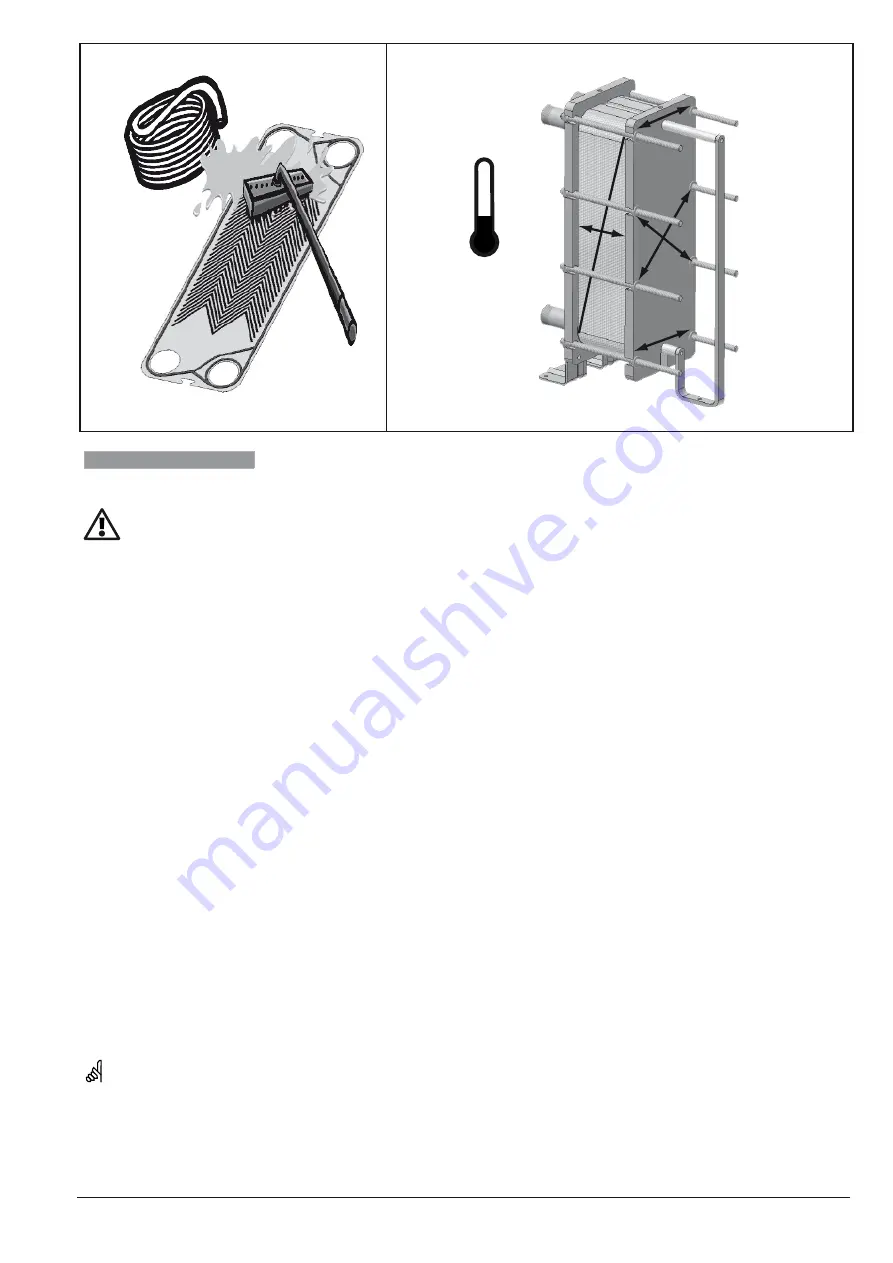
Cleaning the heat exchange plates
Backwash
The backwash removes fouling that has
accumulated on the surface of the plate.
Clean water is flushed with high speed
into the primary and / or secondary side in
the opposite direction from the one used
during normal operation.
The heat exchanger can also be washed
with a cleaning compound, approved
by Danfoss (e.g. Kaloxi® or Radiner FI
liquid cleaner concentrate), which is
environmentally friendly and can be
disposed of through a normal sewer.
After using a cleaning compound,
the heat exchanger must be flushed
thoroughly with fresh water.
Cleaning the heat exchange plates by
hand
You cannot open the brazed heat
exchanger.
Do not damage the heat exchange plates
gasket during cleaning.
Detach the heat exchange plates from the
heat exchanger for cleaning. Clean the
plates with a soft brush and running water.
If the dirt does not come off the plates
easily, you can use a cleaning compound.
After use of the cleaning compound, the
heat exchange plates must be rinsed
completely with clean running water.
Opening the gasket heat exchanger
Wait for the heat exchanger’s temperature
to fall below +40 °C before opening the
heat exchanger.
1. Drain the heat exchanger.
2. Mark the order of the exchange plates
by drawing a diagonal line to the
exchanger.
3. Measure and note the heat exchanger’s
measurement (tightening measurement
A).
4. Loosen and detach the exchanger’s
tightening bolts.
5. Open the plate pack by moving the end
plate. Detach the heat exchange plates
carefully from each other.
replacement of gaskets XG 10 gaskets
1. Remove the old gasket.
2. Place the new gasket into the groove.
The plate is ready for mounting to the
heat exchanger.
Clip-on gaskets
For XG 14, XG 18, XG 20, XG 31, XG 40,
XG 50.
1. Remove the old gasket.
2. Place the new clip-on gasket into the
groove and fasten it with the aid of the
clip. The plate is ready for mounting to
the heat exchanger.
< +40˚C
Glued gaskets
For XG heat exchangers except for XG-10
and ones equipped with clip-on gaskets
(see sections above).
1. Remove the old gasket.
2. Clean the gasket groove carefully (note
the safety aspects when using e.g.
thriclorethylene).
3. Apply the glue into the gasket groove
and let it dry for about 10 minutes.
4. Place the gasket into the groove an let
it dry for about 1 hour. After drying,
the plate can be mounted to the heat
exchanger.
reassembling the heat exchanger
Before reassembly, check that the sealing
surfaces are clean and the gaskets are
securely attached to the heat exchange
plates.
1. Mount the plates in the opposite order
from that used in dismantling, with the
gasket side of the plate towards the
front end plate.
2. Check that adjacent plate profiles are
in opposite directions (see the plate
diagram).
3. Press the plates against each other and
start the tensioning of the plate back
by tightening the bolts evenly (start
tightening from center to outwards, see
the numbering). Ensure that the end
plates are parallel at all times.
4. Continue tightening until the heat
exchanger’s measurement A (tightening
measurement) is achieved.
5. The tightening measure is correct
when the crests of the plates are in
metal contact with each other. Excess
tightening can cause changes in the
plate profiles.
Содержание XG 14
Страница 16: ...DH SMT FI VI KA C4 3C Danfoss 09 2009 16...


