55
Move cursor with
and
on the front panel and select item with
and
.
¾
Channel number:
Select one channel for setting.
¾
Cover Channel:
whether to display current channel or not
¾
Activate Shielding
:
Provide you to mask the
sensitive area. Move cursor to “Area Set” and set the area.
In the shelter area setup interface, there are four small panes. You can press “
”, “
”, “
” and
“
” or number “1-4” keys to move the cursor. When you choose one pane, use direction keys to move
the pane to your hope position; And press “ENTER” key to fix the pane; Then use direction keys again to
extend the pane. This pane is the shelter area.
After you finish setup, press “ESC” key to exit.
¾
In the color mode menu
,
is brightness
,
is color
,
is constrast
,
is saturation.
Section 13
PTZ Setup
Through DVR_WEB could control PTZ. About the DVR_WEB setting please refer “Chapter
Ⅴ
”.
Enter “Main Menu
-
Advanced
-
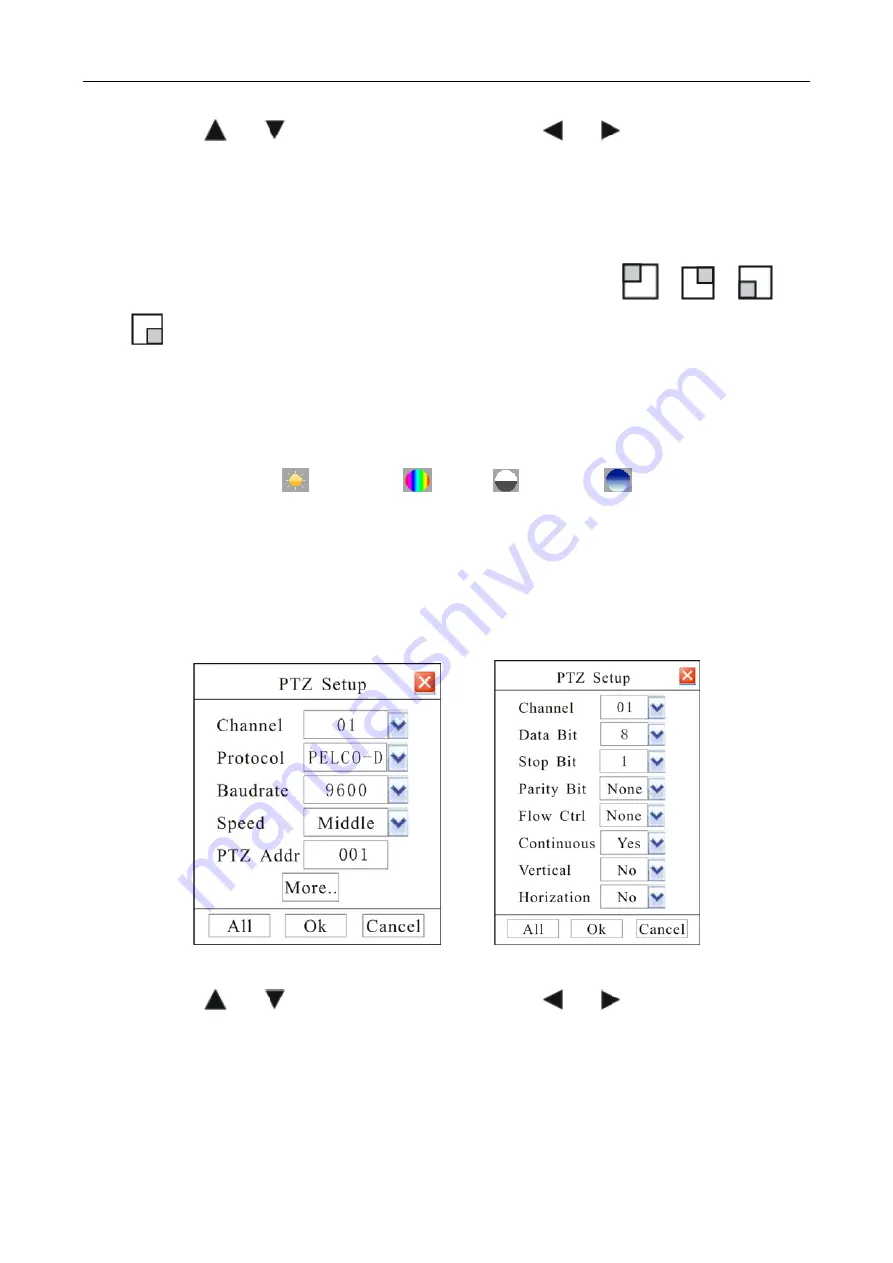
PTZ ” as shown in Fig.51.
Fig. 51 Fig. 52
Move cursor with
and
on the front panel and select item with
and
.
¾
Channel number:
connect channel number of decipherer
¾
Protocol:
DVR had the following PTZ protocol: PELCO-D
、
PELCO-P2
、
PELCO-P1
、
W110
、
P3
、
PLD
、
ENKEL
、
YAAN
、
SONY
、
JC4116
、
PD-NW
、
PD-CONST
、
PIH-1016
、
KRE301
、
PELCO9760
、
LILIN
、
T3609HD
、
HD600
、
KTD
、
SAMSUNG
、
ELEC
、
PANASONIC
、
FASTRAX
、
DL-0001.


