


– 42 –
Select individual modules or groups of modules for adjustment by highlighting them with
the cursor. Select non-adjacent modules using the cursor and
Ctrl
key.
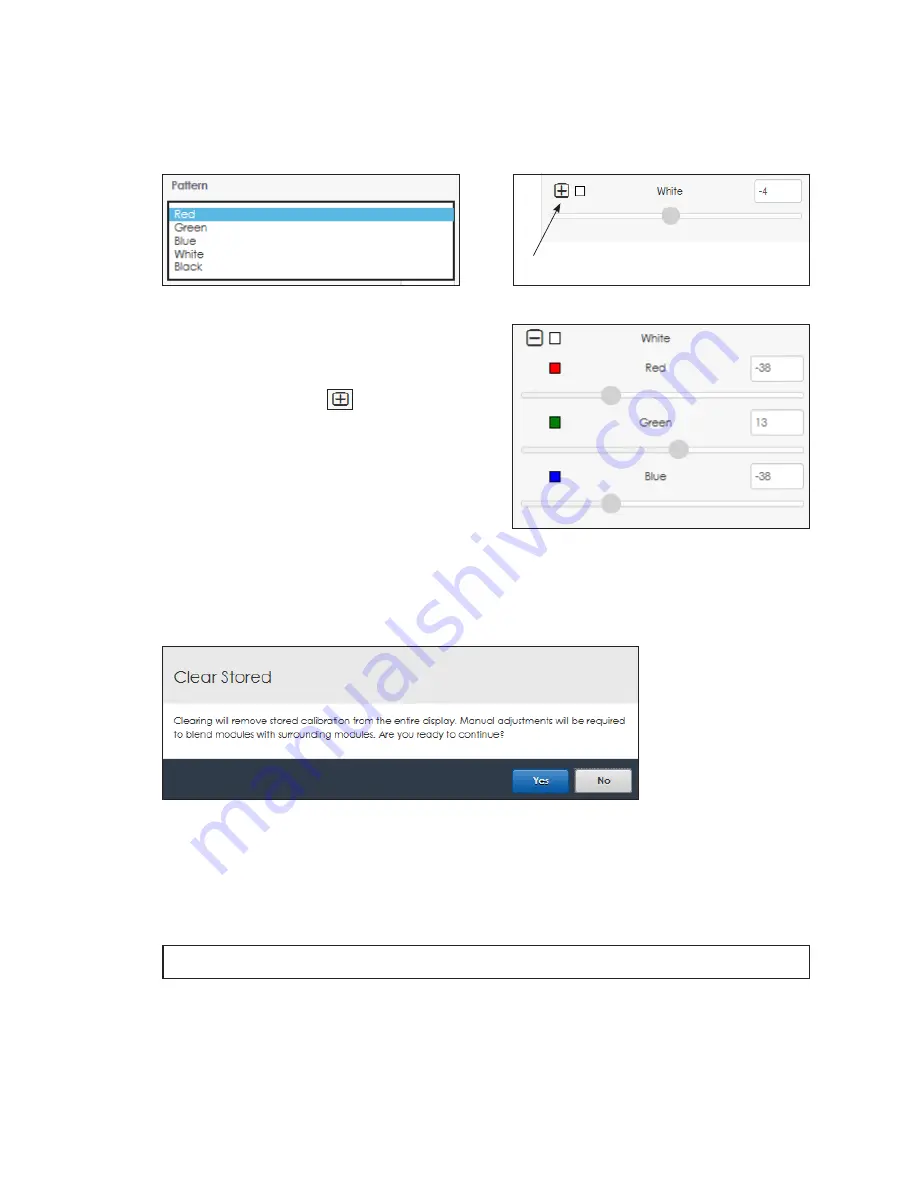
Choose the desired display output color to check from the
Pattern
drop-down menu.
.
Figure 92:
Module Adjust Pattern
Adjust the selected module(s) using the
White
slider bar. This action uniformly adjust the red,
green and blue values. Refer to
.
Click the expand icon
as shown in
to open the red, green, and blue
slider bars. Adjust the values for any of these
colors with the slider bars. Refer to
Click
Preview
to see how the adjusted
modules look on the display. Click
Store
to
keep the changed calibration values. Click
Clear Preview
to clear the changes.
Click the red
Clear Stored
button to delete the
module calibration. A prompt opens to confirm this action since this removes the stored
calibration from the entire display and loads the factory calibration settings . Press
Yes
to
reset the calibration to factory settings or
No
Figure 95:
Clear Stored Calibration Settings
Camera
Camera calibration adjusts the intensity level of each pixel in a Daktronics LED video
display as needed to improve the uniform intensity of the entire display. A prompt opens
to confirm this action since this interrupts the active content on the display.
Note:
Camera calibration should only be performed by Daktronics technicians.
Expand for specific color adjustment
Figure 93:
White Adjustment
Figure 94:
Color Adjustment


