20
Display Maintenance
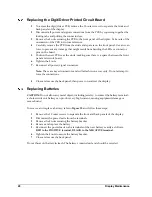
Replacing the Digit/Driver Printed Circuit Board
1.
To access the digit/driver PCB, remove the 10 outer screws to separate the front and
back panels of the display.
2.
Disconnect all power and signal connections from the PCB by squeezing together the
locking tabs and pulling the connector free.
3.
Remove the 8 nuts securing the PCB to the front panel of the display. Take note of the
orientation of the PCB for future reference.
4.
Carefully remove the PCB from the studs and spacers on the front panel. Use an even
force to prevent any damage that might result from bending the LEDs or connector
pins on the board.
5.
Position the new PCB over the studs, making sure there is a spacer between the front
panel and circuit board.
6.
Tighten the 8 nuts.
7.
Reconnect all power/signal connectors.
Note:
These are keyed connectors and will attach in one way only. Do not attempt to
force the connections.
8.
Close and secure the back panel, then power on and test the display.
Replacing Batteries
CAUTION:
Do not allow any metal object, including jewelry, to contact the battery terminal –
a short-circuit on a battery can produce very high current, causing equipment damage or
severe burns!
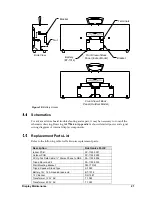
To remove and replace a battery, refer to
Figure 10
and follow these steps:
1.
Remove the 10 outer screws to separate the front and back panels of the display.
2.
Disconnect the power leads from the terminals.
3.
Remove the 4 nuts securing the battery bracket.
4.
Remove and replace the battery.
5.
Reconnect the power leads to the terminals of the new battery exactly as follows:
RED to the POSITIVE terminal, BLACK to the NEGATIVE terminal
.
6.
Tighten the 4 nuts to secure the battery bracket.
7.
Close and secure the back panel.
Do not throw old battery in trash. The battery contains lead and should be recycled.
Содержание PC-2001
Страница 2: ......
Страница 4: ......
Страница 6: ......
Страница 10: ......
Страница 24: ......
Страница 30: ......
Страница 32: ......
Страница 33: ......
Страница 34: ...JC 100 SWIM STOP REST LL 2584 REV 01 CIRCUIT PACE CLOCK...
Страница 35: ......
Страница 36: ......
Страница 37: ...Daktronics Warranty and Limitation of Liability 27...
Страница 38: ......


