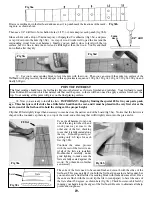
Mark and trim these
braces to the pencil
line, as shown in
fig 15c and 15d.
(or cut them a little
longer if you plan to
cut pockets for them
in the kerfing)
Fig 15c
Fig 15d
_____16. Before gluing the X braces in place, test your clamp-
ing system without glue to make sure you have sufficient pressure
everywhere. You want even pressure across the full length of the
braces. Make sure that the ends will be pressed fully against the
soundboard. You don’t want these braces to come loose!
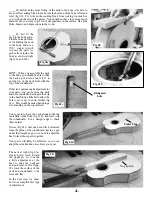
When all is ready, glue and clamp them in place to the sound-
board, pressing them against your flat clamping board. NOTE:
be sure to put glue in the notch where the two braces intersect.
Use the spacer block (or other long scrap) across the soundboard
to press the intersection firmly (fig 16).
Wipe off excess glue and leave the clamps in place for 3-4 hours
until dry.
Fig 16
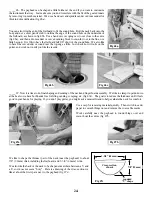
_____17. When the braces are dry, use a chisel to clip a 1/4” end of the
thin flat back bracing material to use for a patch across the intersection of
the X braces, as shown below (fig 17a).
Glue and clamp this patch across the intersection forming a “bridge” to tie
the bracing together firmly (fig 17b).
Fig 17a
Fig 17b
9.
Содержание PARLOR
Страница 36: ......


