20.
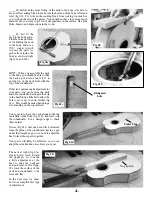
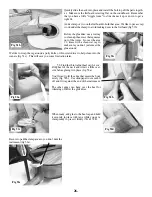
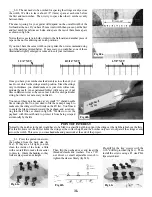
Chamfer the edges of the slot in the heel of the body for the tenon to make sure
the sharp corners don’t interfere with the tenon fitting all the way into the slot. A
chisel or file works well for this task (fig 39e).
Test-fit the neck to the body. If the tenon is too tight for an easy fit, you can file it on
one or both sides, as necessary, but try to avoid making it too loose and sloppy in the
slot (fig 39f). Check for glue residue in the slot that might interfere with a good fit.
CAUTION:
Be careful not to damage or remove the thin edges at the heel of the
neck. You can reduce their width to match your fingerboard, but leave them full
height to make it easier to fit the neck to the body.
In these directions, we will refer to the four corners of the heel as A, B, C, & D, as
shown in fig 39d, to help you plan your adjustments.
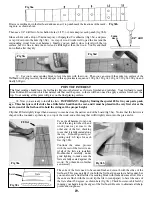
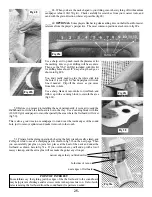
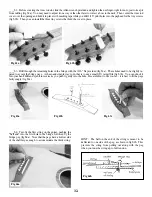
_____39. Temporarily clamp the fretboard to the neck, carefully centering it and
leaving enough flat space at the narrow end to allow for the ebony nut. Use a
pencil to outline the fretboard as shown in fig 39a. These lines will be helpful
reference points as you do more shaping on the neck to fit your grip.
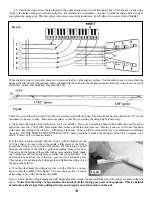
Remove the temporary clamps and set the fretboard aside while you work on the
neck. We like to clamp the neck upside-down and hanging over the edge of our
work table, as shown in fig 39b. This allows you free use of both hands for doing
some shaping at the heel with a rasp and/or coarse sandpaper.
When the shape looks rounded enough for you, switch to medium (100-grit) sand-
paper to smooth out the surface (fig 39c). This area will be difficult to sand when
the guitar is assembled, so take the time to do it now.
PREPARING THE NECK
Fig 39a
Fig 39b
Fig 39c
A
C
B
D
Fig 39d
HEEL
Fig 39e
TENON
SLOT
TENON
Fig 39f
Содержание PARLOR
Страница 36: ......


