Page 54 of 62
SK2014
‐
SON
‐
002
‐
TechMnl
‐
FMCD
‐
003
D.2.2.
Wall
Pad
Operation
Guidelines
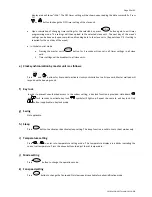
a)
Clock
display
and
setting
System
has
an
accurate
internal
real
time
clock
used
for
time
indication
and
timer
ON/OFF
function.
Clock
display
area
indicates
internal
time
clock
which
can
be
set
by
the
TIME
or
TIME
button.
b)
Day
display
and
setting
The
wall
pad
has
a
day
display
function
which
is
used
for
day
indication
and
timer
ON/OFF
function.
Day
display
icon
indicates
current
day.
Press
DAY
button
to
set
day.
c)
Timer
ON/OFF
setting
If
the
master
unit
is
in
global
control
mode
and
the
ON/OFF
timer
setting
is
selected,
the
master
unit
will
command
the
whole
network
to
be
on
or
off.
Otherwise
the
ON/OFF
timer
affects
the
local
unit
only.
The
system
supports
individual
ON/OFF
timer
settings
for
each
day
of
the
week.
Press
TIMER
button
once,
and
ON
symbol
blinking
indicates
ON
timer
programming
mode.
The
day
display
area
indicates
which
day
the
timer
is
being
set
for.
If
there
is
no
preset
ON
timer,
the
timer
display
area
shows
,
otherwise
the
previous
setting
will
be
shown.
Press
TIME
or
TIME
button
to
change
the
ON
timer
setting.
Press
CANCEL
key
to
cancel
the
current
ON
timer
setting
and
the
timer
display
area
will
show
.
Press
DAY
button
to
change
the
day
the
ON
timer
is
to
be
programmed
for.
Press
TIMER
button
again,
and
OFF
symbol
blinking
indicates
OFF
timer
programming
mode.
The
setting
method
is
the
same
as
the
ON
timer
setting
above.
Press
TIMER
button
again,
to
exit
the
ON/OFF
timer
setting
function.
Should
there
be
any
ON
or
OFF
timer
settings
programmed,
will
light
up.
Should
there
be
any
unexecuted
ON
or
OFF
timer
settings
for
the
current
day,
its
corresponding
ON
or
OFF
icon
will
light
up.
Hold
down
CANCEL
button
for
3
seconds
to
cancel
all
timer
settings.
d)
Timer
set
by
master
unit
is
as
follows:
Press
NET
button
to
enter
into
networking
control
mode.
Unit
area
blinking
indicates
the
slave
unit
under
control.
Press
TIME
or
TIME
to
select
the
desired
slave
unit.
Units
that
are
off
will
be
skipped
automatically.
Press
TIMER
button
once
to
enter
into
ON
timer
programming
mode.
Press
DAY
button
to
select
the
required
day
of
the
week.
Master
unit
will
then
retrieve
the
setting
from
the
selected
slave
unit
and
the
timer
display
area
will
show
“rEAd”.
The
ON
timer
setting
will
be
shown
upon
reading
the
data
successfully.
Press
TIME
or
TIME
button
to
change
the
ON
timer
setting
of
the
slave
unit.
Press
TIMER
button
again
to
enter
into
OFF
timer
programming
mode.
Press
DAY
button
to
select
the
required
day
of
the
week.
Master
unit
will
then
retrieve
the
setting
from
the
selected
slave
unit
and
timer
the
Содержание FMCD*ECM series
Страница 11: ...Page 11 of 62 Dimensional drawing for FMCD 20 24 ECM All dimensionsshown in mm ...
Страница 21: ...Page 21 of 62 SK2014 SON 002 TechMnl FMCD 003 C 1 3 Wiring Diagram SK NCFMCD 001 ...
Страница 45: ...Page 45 of 62 SK2014 SON 002 TechMnl FMCD 003 C 4 2 Wiring Diagram SK NCFMCD 002 ...
Страница 62: ...Page 62 of 62 SK2014 SON 002 TechMnl FMCD 003 ...

