98
(1) • For a technical detector:
“Technical detector X”
• For a fire detector:
“Fire detector X”
With these 2 applications, there are no steps 3, 4 and 5.
IMPORTANT: during programming, the
LED indicator lamp lights up to show
which loop is being programmed:
• red LED indicator lamp lit: loop n° 1,
• green LED indicator lamp lit: loop n° 2.
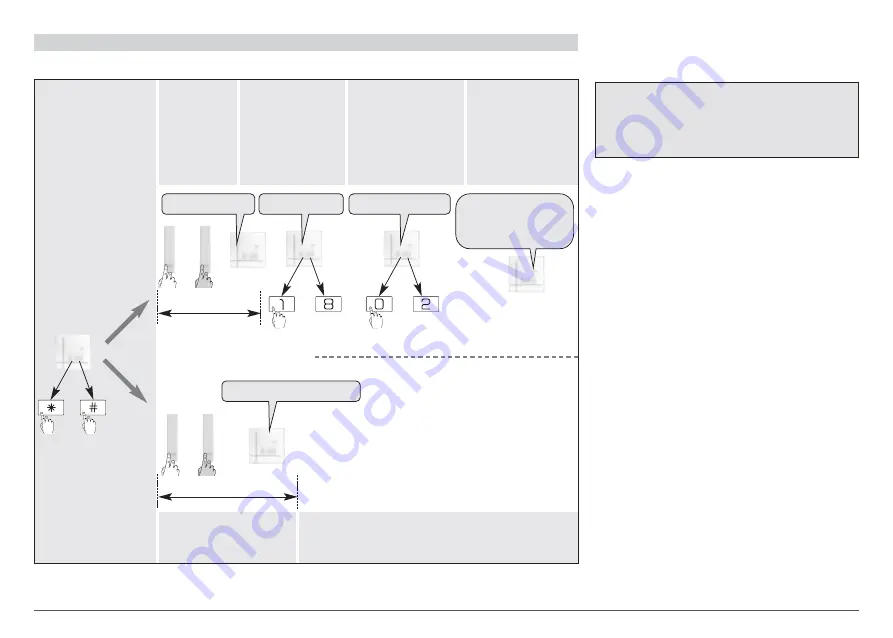
Carry out the programming sequence described below:
4.2 Loop n° 2 programming
10 sec. max.
2.
Press once
(quickly) and
then press
& hold the
“Test”
button until
the control
panel
responds (1)
3.
The control panel
waits for a
group
to be chosen
from
1 to 8
*. Press the
corresponding
digits on the
control panel
keypad to choose
the group
2.
Press once (quickly) and
then press & hold the
“Test”
button until the
control panel responds
3.
The control panel
confirms programming
by issuing a voice
message
4.
The control panel
waits for the time
delay to be chosen:
0: immediate
1: delayed,
2: combined.
Press
“0” or “1” on the
control panel keypad
to choose the group
5.
The control panel
confirms
programming by
issuing a voice
message
)
)
)
10 sec. max.
or
(depending on configuration)
de
tec
to
r
con
tro
l un
it
1.
Press
*
then
#
on
the control panel
keypad to move to
programming mode
then
then
then
to
*
* according
to the model of
the control panel
“beep, detector X,
group Y, immediate
(or delayed
or combined)”
“detector X”
to
“time delay?”
“group?”
)
)
)
“beep, remote control X”
Содержание 221-21 Series
Страница 111: ...111 ...
Страница 112: ...803427 J Daitem 02 20 www daitem com ...


