


7 Configuration
Installer and user reference guide
33
SERHQ020~0 SEHVX20~64BAW
Split packaged air-cooled water chiller
4P508020-1B – 2018.04
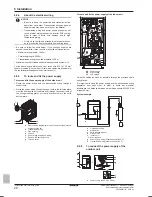
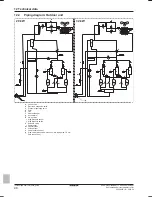
7.2.4
To access mode 1 or 2
After the unit is turned ON, the display goes to its default situation.
From there, you can access mode 1 and mode 2.
Initialisation: default situation
NOTICE
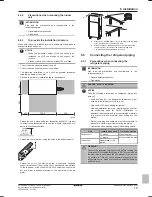
Be sure to turn on the power 6 hours before operation in
order to have power running to the crankcase heater and
to protect the compressor.
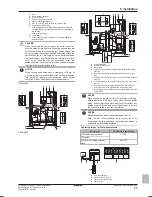
Turn on the power supply of the outdoor unit and the indoor unit.
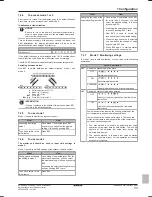
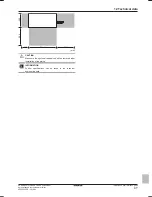
After initialisation, the display indication state will be as below
(default situation when shipped from factory).
Outdoor unit
If the default situation is not displayed after 10~12 minutes, check
the malfunction code. Solve the malfunction code accordingly.
The HAP LED flashes to indicate normal microcomputer operation.
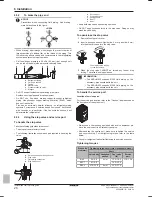
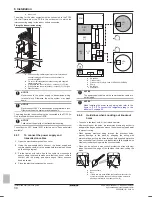
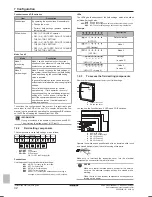
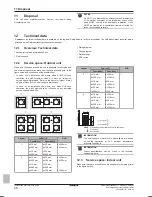
Switching between modes
Use BS1 to switch between the default situation, mode 1 and
mode 2.
BS1 [5 s]
BS1
BS1
BS1
a
c
b
a
Default situation (H1P OFF)
b
Mode 1 (H1P flashing)
c
Mode 2 (H1P ON)
BS1
Press BS1.
BS1 [5 s]
Press BS1 for at least 5 s.
INFORMATION
If you get confused in the middle of the process, press BS1
to return to the default situation.
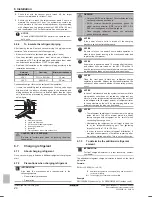
7.2.5
To use mode 1
Mode 1 is used to monitor the status of the unit.
What
How
Accessing monitoring
mode 1
Once mode 1 is selected (push BS1
one time), you can select the wanted
setting. It is done by pushing BS2.
To quit and return to the
initial status
Press BS1.
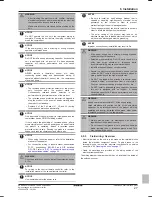
7.2.6
To use mode 2
The master unit should be used to input field settings in
mode 2.
Mode 2 is used to set field settings of the outdoor unit and system.
What
How
Changing and accessing
the setting in mode 2
Once mode 2 is selected (push BS1 for
more than 5 seconds), you can select
the wanted setting. It is done by pushing
BS2.
Accessing the selected setting's value is
done by pushing BS3 1 time.
To quit and return to the
initial status
Press BS1.
What
How
Changing the value of the
selected setting in mode 2
▪ Once mode 2 is selected (push BS1
for more than 5 seconds) you can
select the wanted setting. It is done
by pushing BS2.
▪ Accessing the selected setting's value
is done by pushing BS3 1 time.
▪ Now BS2 is used to select the
required value of the selected setting.
▪ When the required value is selected,
you can define the change of value
by pushing BS3 1 time.
▪ Press BS3 again to start operation
according to the chosen value.
7.2.7
Mode 1: Monitoring settings
In mode 1 (and in default situation) you can read out the following
information:
Value / Description
H2P
Shows the present operation state.
OFF
Normal operation state.
ON
Abnormal operation state.
FLASHING
Under preparation or under test preparation
H6P
Shows the status of low noise operation.
OFF
Unit is currently not operating under low noise
restrictions.
ON
Unit is currently operating under low noise
restrictions.
Low noise operation reduces the sound generated by the
unit compared to nominal operating conditions.
Low noise operation can be set in mode 2. There are two
methods to activate low noise operation of the compressor
unit and heat exchanger unit.
▪ The first method is to enable an automatic low noise
operation during night time by field setting. The unit will
operate at the selected low noise level during the
selected time frames.
▪ The second method is to enable low noise operation
based on an external input. For this operation an optional
accessory is required.
Содержание SERHQ020BAW1
Страница 68: ......
Страница 69: ......
Страница 70: ......
Страница 71: ......
Страница 72: ...4P508020 1B 2018 04 Copyright 2018 Daikin...


