277
Note
If it is to change several devices IP addresses at the same time, please input
incremental value. Device can add the fourth address of the IP address one
by one to automatically allocate the IP addresses.
If there is IP conflict when changing static IP address, device pops up IP
conflict dialogue box. If batch change IP address, device automatically skips
the conflicted IP and begin the allocation according to the incremental value
Step 8 Click Next button.
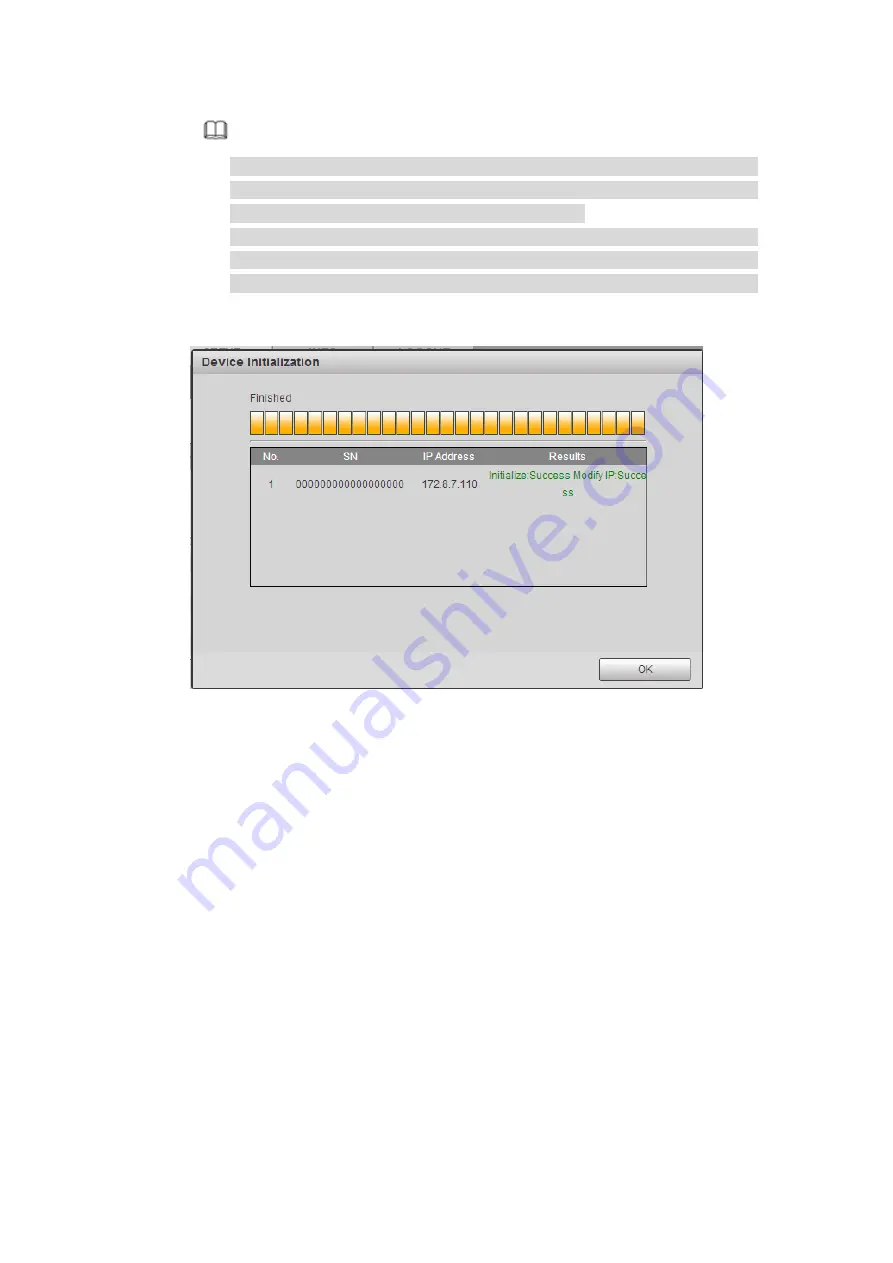
Device begins initializing camera. See Figure 5-29.
Figure 5-29
Step 9 Click OK to complete the initialization.
5.7.1.1.2 Auto Add
Step 1 From main interface->Setting->Camera->Registration
Step 2 Click IP Search, device displays searched results.
Step 3 Double click an IP address or select an IP address and then click Add button, it is
to register the device to the DVR. Device supports batch add.
5.7.1.1.3 Manual Add
Step 1 Click Manual add to register the camera manually. There are three modes:
TCP/UDP/Auto. The default setup is TCP. See Figure 5-30.
Содержание HCVR8204A-S3
Страница 1: ...Dahua HDCVI Standalone DVR User s Manual Dahua HDCVI Standalone DVR User s Manual V1 3 1 ...
Страница 30: ...20 Name Parameters XVR8808S XVR8816S Installation Mode Desktop rack installation ...
Страница 54: ...44 Figure 3 3 3 10Other Interfaces There are still other interfaces on the DVR such as USB port 485 Port ...
Страница 77: ...67 Figure 4 24 Figure 4 25 ...
Страница 171: ...161 Figure 4 133 Step 2 Click Add user button in Figure 4 133 The interface is shown as in Figure 4 134 Figure 4 134 ...
Страница 184: ...174 Figure 4 147 Figure 4 148 ...
Страница 185: ...175 Figure 4 149 Figure 4 150 ...
Страница 194: ...184 Figure 4 159 Step 2 Draw tripwire 1 Click Draw button to draw the tripwire See Figure 4 160 Figure 4 160 ...
Страница 198: ...188 Figure 4 163 Step 2 Draw the zone 1 Click draw button to draw the zone See Figure 4 164 Figure 4 164 ...
Страница 200: ...190 Figure 4 165 Step 2 Draw the zone 1 Click draw button to draw the zone See Figure 4 166 Figure 4 166 ...
Страница 202: ...192 Figure 4 167 Step 2 Draw the zone 1 Click Draw button to draw a zone See Figure 4 168 Figure 4 168 ...
Страница 213: ...203 Figure 4 177 Figure 4 178 ...
Страница 220: ...210 Figure 4 186 Figure 4 187 ...
Страница 221: ...211 Figure 4 188 Figure 4 189 ...
Страница 227: ...217 Figure 4 194 Figure 4 195 ...
Страница 240: ...230 Figure 4 208 Figure 4 209 4 16 2 Channel Name ...
Страница 246: ...236 Figure 4 215 Figure 4 216 ...
Страница 324: ...314 Figure 5 73 Figure 5 74 ...
Страница 387: ...377 Figure 5 155 Note For admin you can change the email information See Figure 5 156 ...
Страница 424: ...414 448K 196M 512K 225M 640K 281M 768K 337M 896K 393M 1024K 450M 1280K 562M 1536K 675M 1792K 787M 2048K 900M ...
Страница 440: ...430 ...
Страница 446: ...436 Email overseas dahuatech com Website www dahuasecurity com ...


