ESS3016X User’s Manual
72
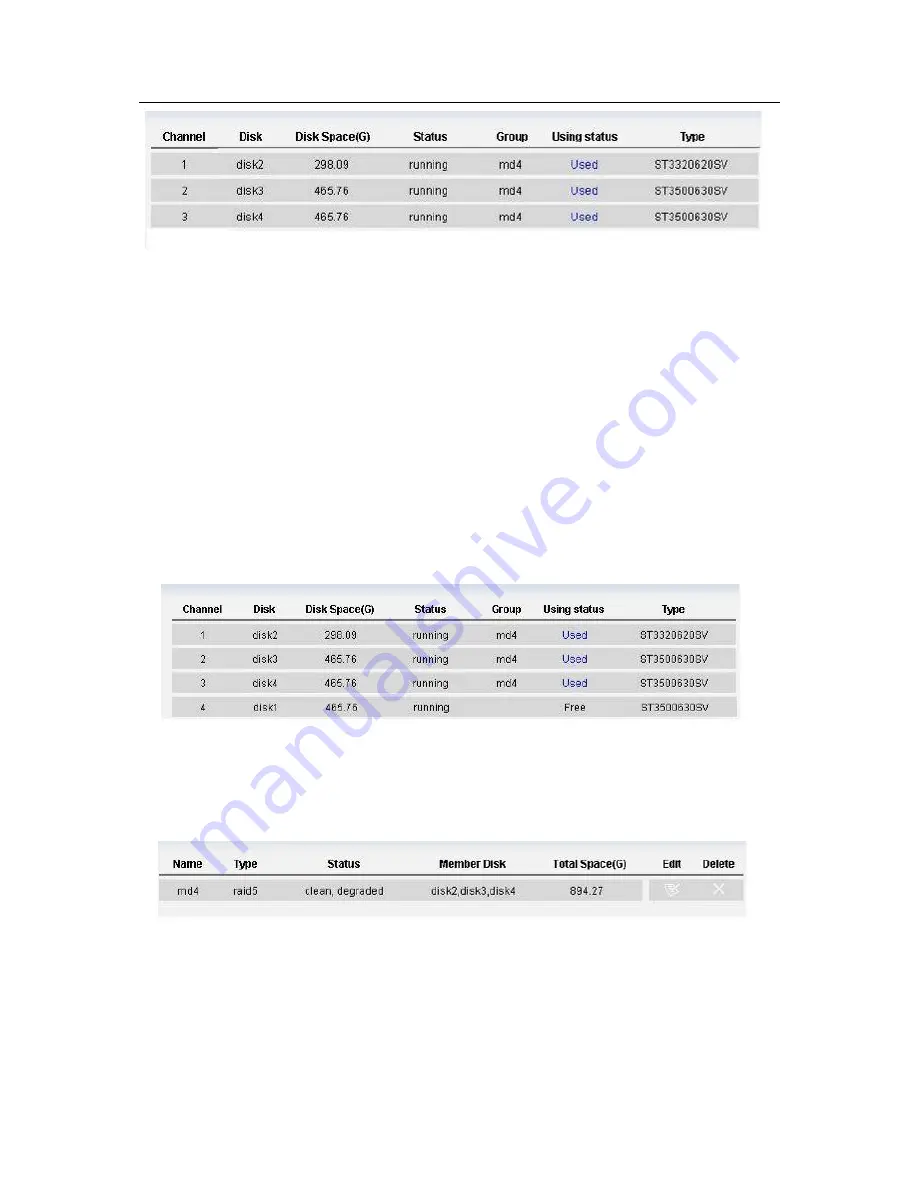
Figure 8-8
2). Insert the disk directly to the idle disk channel of 3016X internet intelligent storage and
memorize the disk channel name (such as disk1). In this example, we are going to insert the
disk1 that just was removed.
From disk management to disk information, you can review disk information before hot swap.
And then check disk information again after hot swap.
Compare the information before and after hot swap. You can see before hot swap, there are
three disks: dksk2, disk3, disk4. After hot swap, you can see the there are four disks: disk2, disk3,
disk4, disk1. Now you can see the newly inserted disk name is disk1.
3). In web configuration interface, from disk configuration to disk information, you can see the
disk information. See Figure 8-9.
Figure 8-9
4). In web configuration interface, from disk configuration to RAID configuration, you can see the
following RAID device status. See Figure 8-10.
Since current disk group md4 is in degraded status, you can add disk now.
Figure 8-10
5). Insert hot swap disk.
In Figure 8-10, click edit button, you can see an interface is shown as in Figure 8-11.
Now please check the add button and then click save
Please note, hot swap operation only applies to degrade RAID1/RAID5
RAID begins synchronization again after hot swap.
Содержание ESS3016X
Страница 1: ...ESS3016X Internet Intelligent Storage User s Manual...
Страница 65: ...ESS3016X User s Manual 65 Figure 6 7...


