113
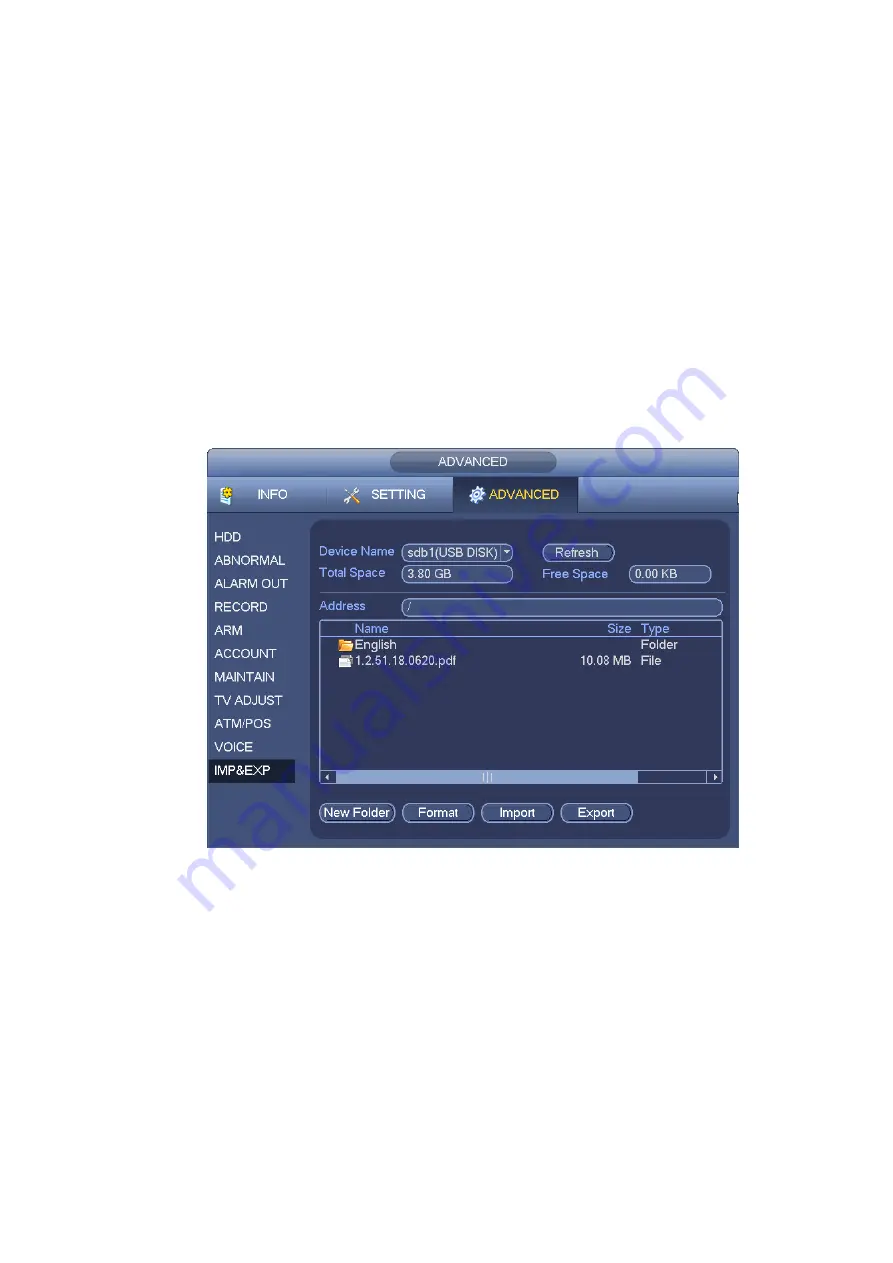
Export: Please connect the peripheral device first and then go to the following interface. Click
Export button, you can see there is a corresponding
“Config_Time” folder. Double click the folder,
you can view some backup files.
Import: Here you can import the configuration files from the peripheral device to current device. You
need to select a folder first. You can see a dialogue box asking you to select a folder if you are
selecting a file. System pops up a dialogue box if there is no configuration file under current folder.
After successfully import, system needs to reboot to activate new setup.
Format: Click Format button, system pops up a dialogue box for you to confirm current operation.
System begins format process after you click the OK button.
Note:
System can not open config backup interface again if there is backup operation in the process.
System refreshes device when you go to the config backup every time and set current directory as
the root directory of the peripheral device.
If you go to the configuration backup interface first and then insert the peripheral device, please
click Refresh button to see the newly added device.
Figure 5-77
5.6
Backup
Please refer to chapter 4.13 for detaled information.
5.7
Shutdown
Double click shutdown button, system pops up a dialogue box for you to select. See Figure 5-78
When you are shutting down the device, you can see the corresponding shut down process bar. System
is going to shut down in 3 seconds and there is no cancel button to terminate current process.
Logout menu user: log out menu. You need to input password when you login the next time.
Shutdown: system shuts down and turns off power.
Restart system: system begins rebooting.
Содержание DVR0X04AH-VD-E
Страница 1: ...ATM DVR Series User s Manual Version 1 1 0 ...
Страница 24: ...15 Drag mouse Select motion detection zone Select privacy mask zone ...
Страница 60: ...51 Figure 4 44 Figure 4 45 Figure 4 46 ...
Страница 61: ...52 Figure 4 47 Figure 4 48 Figure 4 49 ...
Страница 79: ...70 Figure 5 13 Figure 5 14 Figure 5 15 ...
Страница 101: ...92 Figure 5 44 Figure 5 45 ...
Страница 103: ...94 Figure 5 47 Figure 5 48 ...
Страница 123: ...114 Switch user you can use another account to log in Figure 5 78 ...
Страница 149: ...140 Figure 6 39 Figure 6 40 Figure 6 41 Please refer to the following sheet for detailed information ...
Страница 156: ...147 Figure 6 51 Figure 6 52 Figure 6 53 Figure 6 54 ...
Страница 175: ...166 Figure 6 85 Figure 6 86 ...
Страница 176: ...167 Figure 6 87 Figure 6 88 Figure 6 89 Please refer to the following sheet for log parameter information ...
Страница 200: ...191 Maxtor DiamondMax 20 STM3250820AS 250G SATA ...


