19
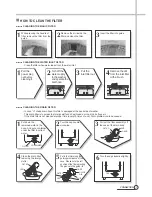
THE REPAIR
1
separate the back cover from
washing machine
2
remove two screws
3
remove three screws
4
turn the case filter ass’y and
separate it from the drain motor
5
separate the drain hose i from
the case filter ass’y
6
separate the cavitation hose from
the case filter ass’y
7
assemble the case filter ass’y
that purchased
8
tie up three screws
9
tie up two screws
0
assemble the hose drain I to the
case filter with bond & clamp
q
assemble the cavitation hose to
the case filter with bond & clamp
w
assemble the back cover to the
washing machine
Replace the Case Filter Ass’y
Replacing 1
Содержание DWF-H361ASA
Страница 27: ...APPENDIX 26 PCB ASS Y Wiring Diagram...
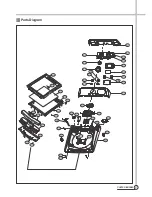
Страница 29: ...28 PARTS DIAGRAM...
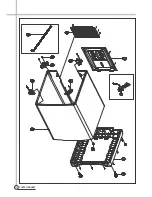
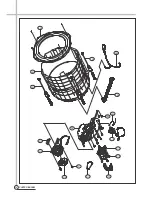
Страница 30: ...29 PARTS DIAGRAM C01 C04 C02 C03 C05 C06 C08 C07 C10 C11 C12 C12 C09 C13 C14 C15 C16 C17 C18...
Страница 31: ...30 PARTS DIAGRAM D01 D02 D03 D04 D05 D06 D07 D08 D09 D10 D11 D12 D13 D14 D15 D16 D17 D18...

