20
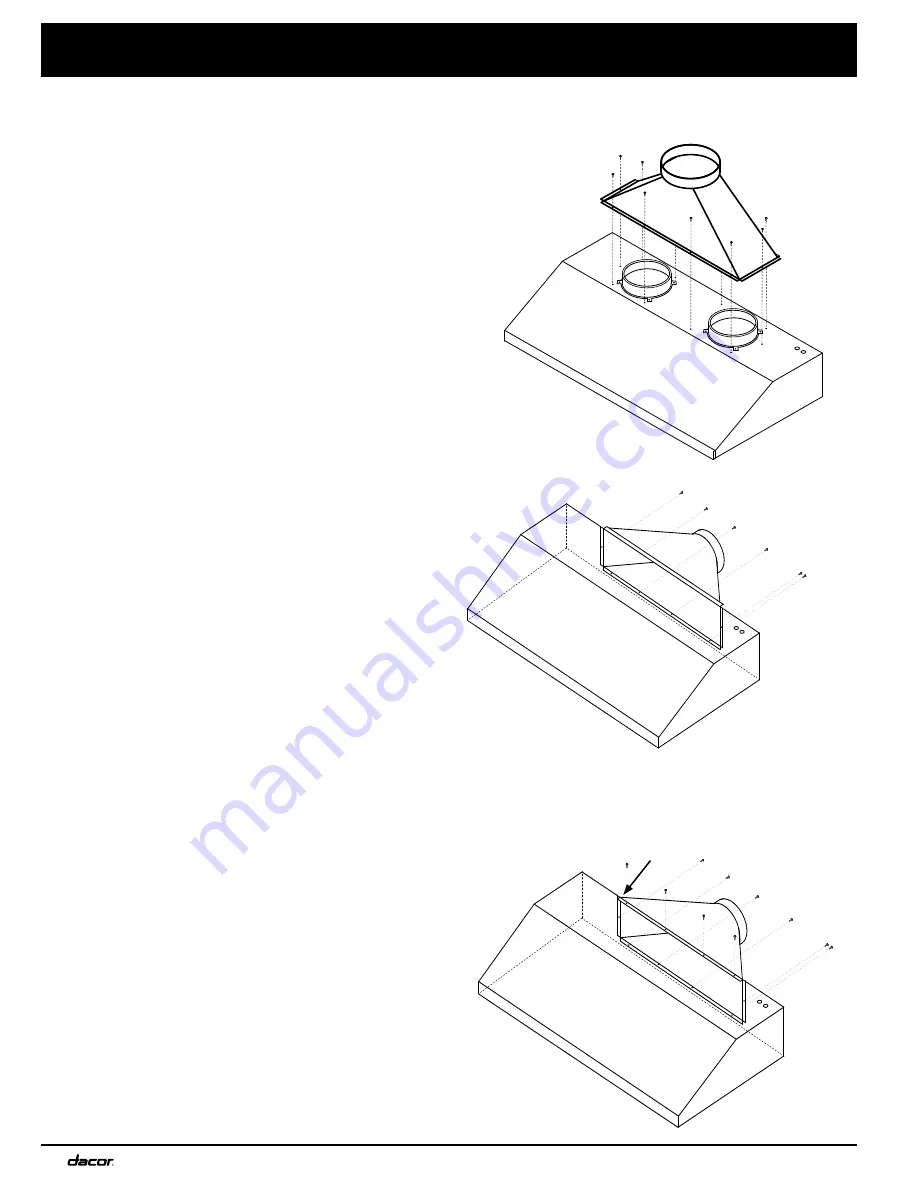
Long edge on top of kit is straight and
unbent. It overlaps the top of the hood
and works like a bracket.
Installing the AHT10
Top Vent:
3012, 3612, 4812
1. Drill holes on the flanges for metal screws. Make sure
the holes pierce the top of the hood (see right).
2. Center the transition kit over the duct collars.
3. Fasten the kit into place using sheet metal screws (not
included).
4. Seal the base of the transition kit with foil tape or duct
tape.
Top Vent:
3012, 3612, 4812
3018, 3618, 4818
Rear Vent:
3012, 3612, 4812
(12-inch height requirement)
Rear Vent:
3018, 3618, 4818
(18-inch height requirement)
1. Drill holes for screws in the flanges. Make sure the
holes pierce the rear of the hood (see right).
2. Center the AHT10 transition kit over the duct collars.
3. Fasten the AHT10 into place using sheet metal screws
(not included).
4. Seal the base of the AHT10 with foil or duct tape.
Installation Instructions
3018, 3618, 4818
1. Drill holes for screws in the flanges. Make sure the
holes pierce the top of the hood (see right).
2. Center the AHT10 transition kit over the duct collars.
3. Lay the long edge of the AHT10 over the top of the
hood.
4. Fasten the AHT10 into place using sheet metal screws
(not included).
5. Seal the base of the AHT10 with foil or duct tape.
Rear Vent:
3018, 3618, 4818
Rear Vent:
3012, 3612, 4812
Содержание RNHP36 Renaissance
Страница 31: ...29 Notes...
Страница 32: ......
Страница 33: ...Dacor 14425 Clark Avenue City of Industry CA 91745 Phone 800 793 0093 Fax 626 403 3130 www dacor com...


